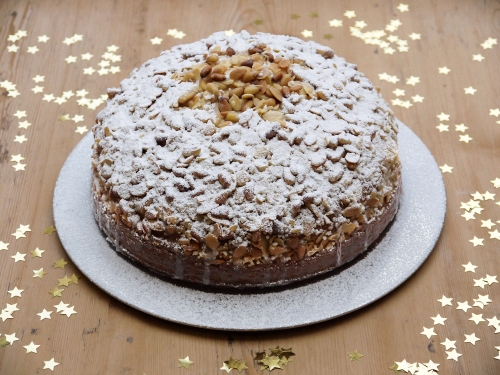
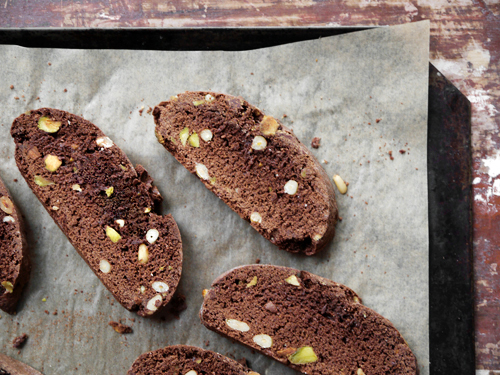
Tag Archives: pine nuts

{12} Pignoli

We’ve made it to the end of another instalment of the 12 Days of Baking! This cycle has gone on a little longer than I planned and well into the New Year, but I’d rather that than pile on the stress of trying to do everything by Christmas Eve. Also, spreading things out gives friends and family a sporting chance of being able to enjoy what I bake, rather than turning it into an endurance event whereby cookies need to be eaten as fast as they are made…

To bring things to a conclusion, we’re finishing with a classic Italian cookie: pignoli.

These morsels are delicious almond cookies, crisp and lightly golden on the outside and with a soft and chewy centre. They are generously coated in pine nuts which toast lightly in the oven. They are simultaneously simple and luxurious. I love their festive appearance which will look good on any cookie tray, but they are equally at home any time of the year with a cup of good coffee for a quiet moment of reflection.
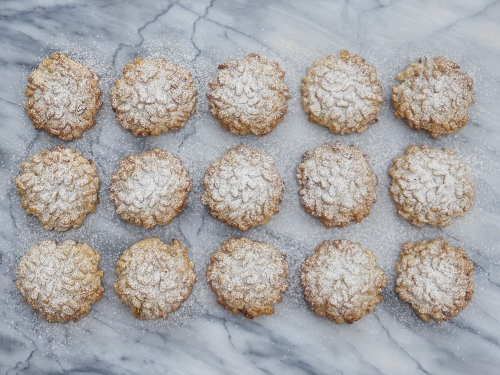

Pignoli originate from the island of Sicily in Southern Italy, where both almonds and pine nuts feature in local cookies. They’ve also made their way to the US, where there are also a favourite in Italian-American families at Christmas.

While my festive baking this year has included some complex bakes, pignoli are (comparatively) easy. One bowl, no resting, no chilling, just roll, coat in nuts and bake. And this is a delightful recipe as it gives you a lot of deliciousness for minimal effort.

When it comes to pignoli recipes, many are based on almond paste, which is mixed with sugar and egg whites. Almond paste is a 50/50 mixture of almonds and sugar, and not the same thing as marzipan here in Britain (marzipan here is typically 25/75 almonds to sugar). However, almond paste is not an ingredient that is easily available in stores here, so I’ve come up with an easy recipe that just uses ground almonds and sugar. It gets us to the same place, and I think it is easier – there is no need to break down a lump of almond paste into a smooth mixture.  Essentially I’m offering a route that involves less work, getting you more quickly to delicious pignoli.


However, even if there is less work involved, we need to be honest. These are clearly luxury cookies. A good amount of almonds, and then lots and lots of pine nuts. This is not a cheap recipe, but hey, they are called pignoli and so pine nuts should be used generously. And you want them to taste of something. I tipped two large bags of pine nuts into a bowl for coating the cookies and assumed I had over-calculated. The rest could be toasted and sprinkled into a salad perhaps? But no. I think I ended up with about a dozen pine nuts left in the bowl at the end. So just a word of warning – get those nuts in, and don’t think you’ll be able to wing it with that half-used bag lurking in the baking cupboard.

If you want to play around with the flavours you can add lemon or orange zest, and they would still be pignoli. Or you could skip the pine nuts and use other nuts to coat the cookies – flaked almonds, or chopped hazelnuts, pistachios or cashews would all work – except that you’re then not making pignoli. They’ll still taste great, but they will be something else. This is, of course, a good way to make a batch of visually different cookies using one basic recipe (or if you ignored my warning and ran short of pine nuts…).

One final point worth knowing – there is no flour, butter or milk in pignoli so these little guys just happen to be naturally gluten and lactose-free. This makes them a great choice if you want to impress and you know someone who needs to avoid either in their diet.

To make Pignoli (makes around 20):

For the dough

• 2 large egg whites
• 175g ground almonds
• 100g icing sugar
• 100g granulated sugar
• 1/2 teaspoon almond extract

To decorate

• 200g pine nuts
• icing sugar

1. Preheat the oven to 175°C (345°F) and line a baking sheet with greaseproof paper.

2. In a large bowl, briefly whisk the egg whites until foamy. Add the rest of the dough ingredients and mix to a smooth dough. It should be sticky but you should be able to form it into balls. If too dry, add a little water. If too sticky, add a teaspoon each of ground almonds, granulated sugar and icing sugar and mix well.

3. Take a teaspoon of the dough (around 25g) and form into a ball. Roll in the pine nuts. Transfer to the baking sheet. Leave around 5cm between each cookie, and keep going until all the dough is used up.

4. Lightly press each cookie to flatten slightly, then bake for 15 minutes (turn the tray around half-way to get an even colour). When baked, remove from the oven, allow to cool on the tray. Lightly dust with icing sugar before serving.

3 Comments

Filed under Christmas, Recipe, Sweet Things

{12} Nadalin de Verona

And here we are! The final installment of 2016’s edition of the Twelve Bakes of Christmas!

Today I’ve turned my hand to a very traditional Italian cake, the Nadalin de Verona. This is a rich dough raised with yeast, which should hint that it has a long history, pre-dating our modern raising agents. It is flavoured with butter, vanilla and lemon zest, and topped with pine nuts, chopped almonds and sugar.

nadalin2

It is fair to say that the big name of the Italian festive cake world is the panettone, closely followed by the pandoro. I make panettone fairly often, as it is easy with a bread machine and it always proves popular. However, I’ve never had a go at pandoro. The name means “golden bread” and it gets this colour from many, many, many egg yolks in the dough. I’m sometimes a very lazy baker and don’t like ending up with lots of spare egg whites. I guess I’ll get round to making a pandoro the next time I have to make a pavlova…

nadalin1

But back to the star of today. The nadalin (also called the “natalino”) dates back as far as the 13th century, and is suggested as the ancestor of the modern pandoro. It is said to have been created to mark the investiture of the Della Scala family as the Lords of Verona. It is often linked to the most famous tragic romance of all time – the nadalin appears first in 1303, the same time that the events of Romeo and Juliet as said to have taken place. I’m not clear quite what the link is, but this cake may have featured on a medieval banquet table where either of the star-crossed lovers were present.

nadalin3

Now, in the interests of Christmas, I’ve actually made the nadalin not just once, but twice!

I looked at a few recipes before making the nadalin, and settled on the “authentic” version on the website of the City of Verona tourist office. However I am sorry to say it didn’t quite work for me. It is made from eggs, a lot of butter and quite a bit of sugar. My baking instincts said this would be a very rich dough and the yeast might struggle to get a good rise, and it turned out to be so. It was of course perfectly tasty, but it didn’t have the lightness I prefer from sweet breads. This is all personal preference, but what to do?

Well I mentioned that I make panettone quite often, so I looked at my own recipe and adjusted to reflect the flavours of the nadalin – out with the dried fruit, and in with the vanilla and lemon zest. I also added a small handful of crushed sugar cubes to add some additional sweetness to the dough. Entirely optional, but this seemed like a sensible way to get a bit more sugar in the dough without making it too rich to rise well. I’m pleased to say this all worked very well, and the result is a light, sweet and fragrant festive bread.

To finish the nadalin, it is brushed with melted butter and topped with pine nuts and chopped almonds. They were a delicious addition, as they toast during baking to provide some crunch and flavour contrast.

Traditionally the nadalin is baked in a star shape. However I’ve bought so many pieces of baking equipment recently that I had to make do with the round cake tin I already had.  To make up for my cake being the “wrong shape” I made a simple star template and placed it on top of that nadalin before dusting with icing.

The nadalin is traditionally enjoyed with cocoa or a special wine after Christmas Eve mass. I would also quite happily much on a piece of this on a chilly winter evening too!

And with that, my 12 Days of Christmas Baking is over for 2016. I hope you’ve enjoyed it – I’ve enjoyed finding new inspiration, trying new baking techniques and eating the results! See you for the 2017 edition – if you have any suggestions of local specialities that I should try, leave a comment below.

To make a Nadalin de Verona (nom-traditional)

For the dough:

• 2 eggs
• 150ml milk, boiled and cooled
• 75g butter
• 50g sugar
• Zest of 1 lemon
• 1 teaspoon vanilla extract
• 1 1/2 teaspoons dried yeast

• 400g strong white flour
• small handful of sugar cubes, crushed

To decorate:

• melted butter, to brush
• 50g pine nuts
• 50g chopped almonds
• 20g pearl sugar

To finish:

• 100g icing sugar
• water
• icing sugar, to dust

1. Make the dough – I used a bread machine for all the hard work. Put everything apart from the sugar cubes into the bread machine. Run the dough cycle.

2. Crush the sugar cubes. Work into the finished dough.

3. Line a cake tin (or wide saucepan) with greaseproof paper. Take the dough out of the machine, form into a ball, and press into the tin. Leave in a warm place, loosely covered with clingfilm, until the dough has doubled in size. Traditionally this is for 3 hours, but as my recipe is lighter, this could happen more quickly.

4. Just before you’re ready to bake, preheat the oven at 180°C (350°F).

5. Now prepare the topping. Melt some butter, and mix the pine nuts, flaked almonds and pearl sugar in a bowl.

6. Brush the nadalin generously with the melted butter. Sprinkle over the nut mixture and press down very gently.

7. Bake the nadalin for around 45 minutes to an hour until risen and golden, and it sounds hollow when tapped. If the nuts are browning too quickly, cover loosely with tin foil.

8. When baked, remove the nadalin from the oven. Make a simple icing with 100g icing sugar and 3 tablespoons of boiling water, and drizzle on top of the nadalin – this will form a glaze, and help keep the nuts in place.

9. Leave to cool completely, then dust with icing sugar before serving. I used a star template as a nod to the traditional shape.

6 Comments

Filed under Christmas, Recipe, Sweet Things

Ajo Blanco

Do you remember the first time? By which I mean the first time you tried certain foods. There are a lot of things (Cake! Chips! Pasta!) that have just always been there, but then there are foods that I very firmly do remember trying for the first time. I can point to a family holiday to Port de Pollença on the north side of Mallorca as the first time I tried gazpacho. Sachertorte was at the Hotel Sacher in Vienna. Kanelbullar firs experienced in Stockholm’s Old Town. These are all pleasant memories as I liked the thing I was trying. You can probably guess where I am going with this…

Anyway, my first experience of ajo blanco was all rather different. It’s a cold Spanish soup, made with almonds and garlic, served with green grapes and olive oil. Sounds nice and refreshing, yes? Perfect in hot weather perhaps?

ajoblanco2

Well, the first time I tried ajo blanco is still seared into my memory in vivid detail. I was at a Spanish restaurant somewhere on the fringes of Shoreditch, the distinctly non-latin sounding Eyre Brothers. Looked great, friendly service, and then we came to order. Bread, olive oil, olives all consumed with glee, and then it came to choosing what to eat. While Spanish food has a reputation as being very meaty (and thus not very veggie-friendly), I don’t find this to be the case. There is usually enough in terms of vegetables, bread and cheese to keep me happy.

Anyway, on this occasion, they were serving ajo blanco which I remember being described as an almond soup with garlic. As I’d never seen it before, I thought I should take the plunge. I mean – it’s cold soup, how bad could it ever be?

Well, I expected some garlic, but this stuff took your breath away, almost literally. Pleasantly creamy to begin with, it broke down in the mouth within seconds into pure, pungent garlic, complete with an unpleasant burning sensation on the tongue and throat. Now, I like garlic, but lots of the raw stuff can be just horrible, which tends to lead to garlic oil seeping from every pore. I made it half-way through before giving up, but by this point, the meal was spoiled. The garlic had overpowered everything else. For the rest of the meal, all I could taste was garlic. Patatas bravas? No, garlic. Green salad? No, garlic. Frozen turrón dessert? Nope, still the all-pervading taste of garlic. Yes, I did mention to the staff that the soup was too strong, and one of the serving ladies was very sympathetic, but this little episode did put me off ajo blanco for years.

That is, until yesterday. I thought I would try making it myself as part of my attempts to make refreshing summer meals.

ajoblanco1

So I got my little mixer ready, and had a little think. Would I use garlic this time? Or more…dare I use garlic?

Well, I reasoned that the use of garlic was traditional, so it just had to go in there, somehow. Then I remembered a Pho soup I had made where garlic was added to the stock, and at the end of cooking, it was soft, mild and not pungent at all. This seemed like the perfect solution to my garlic issue, and so I blanched some cloves for a few minutes. Job done – garlic flavour, not garlic nightmare. However, you might find this approach to be a little mild. It you’re still after a little more “zing” you might want to rub the bowl with a cut clove of raw garlic before adding the other ingredients. That should still ensure your guests take notice, without gasping throughout dinner.

ajoblanco4

The rest was a complete breeze – throw stale white bread, water, almonds, seasoning, garlic and olive oil into a blender and liquidise until everything is smooth and white. One little tweak that I did make was to add a handful of pine nuts. They give a little extra flavour, but also help to emulsify the soup and get a great texture.

Once made, all that remains to be done is to make sure the soup is completely chilled, then serve. The traditional way is with a drizzle of olive oil and some sliced green grapes. This might sound strange, but the combination of fresh, juicy grapes and the chilled, creamy ajo blanco is fantastic. It’s also not that common, so makes a nice change from gazpacho when you’re looking for a chilled soup as a starter when it’s pushing 33°C outside (yes, that’s how hot it got today in London!).

And with that – my fear of ajo blanco has been overcome!

ajoblanco3

To make Ajo Blanco (serves 4):

For the soup:

• 3 cloves garlic
• 150g whole almonds
• Handful of pine nuts
• 80g stale white rustic bread (crusts removed)
• 4 tablespoons olive oil
• 1 tablespoon salt
• 1 teaspoon white wine vinegar
• 200ml water

To serve:

• olive oil
• 12 green grapes

1. Put the bread and water in a bowl. Leave to soak for 15 minutes.

2. Peel the garlic, slice in half and remove any green bits. Blanch for 3 minutes in a small pot of boiling water. Drain and leave to cool.

3. Skin the almonds – bring another pan of water to the boil, add the almonds and simmer for two minutes. Drain, and squeeze the almonds out of the skins (you can discard them – we only need the nuts!).

4. Put the garlic, bread, almonds, pine nuts, olive oil, salt and vinegar into a blender and blitz until very smooth. You may need to add more water to get the right consistency (think single cream). Pour into a large bowl and adjust the seasoning as needed – more oil, salt or vinegar according to taste. Cover the bowl and chill for at least two hours or overnight.

5. To serve, divide between four bowls. Slice the grapes in half and divide between the bowls, finishing with a drizzle of olive oil.

Worth making? Definitely! This is a really easy recipe to make, while the almonds and bread mean that it is light and fresh but still substantial.

22 Comments

Filed under Recipe, Savoury

Chocolate & Nut Biscotti

By now you will have noticed that I get my ideas for my posts from a wide variety of places, events and travels. It’s great to come up with my own ideas, or my take on some of the classics, but it’s also nice to get a recipe challenge to test. And so I got a request from the good people at Titan Supper Club to have a bash at Italian biscotti. The challenge was a rich chocolate and nut version, which sounded excellent and here we are!

Biscotti4

Biscotti2

First off, full disclosure. I’ve never made biscotti before. Saffron-flavoured biscotti are on my radar for (whisper it) Christmas baking, but the technique is new to me. I was vaguely aware of the need to form the dough into large sausage, part bake it, then cut into thin slices and bake further until they are dry. So were these cookies as easy as the theory would suggest?

The good news is that this is an absolute dream to make. You just mix up all the dry ingredients, add eggs, then fold in melted chocolate and nuts. Bake, cool, slice and bake again. Their slightly rustic appearance also makes them ideal for smaller kitchen hands who have lots of enthusiasm but who might lack a steady hand to make neat edges.

The original recipe suggested making these biscotti with hazelnuts, and I think this would be delicious (it’s the combination that makes Nutella great). However, I fancied trying something a little different, and went with a mixture of pistachios and pine nuts, to add different colours and flavours. The result looks great, with flashes of green and creamy white against the rich chocolate biscuit.

This is also a great recipe for chocolate lovers. The dough already contains cocoa, and is enriched with melted dark chocolate. This is rounded out with a dash of vanilla and some fresh orange zest. The aroma from these little treats during baking was sensational, and the flavour is fantastic.

Biscotti3

Biscotti1

So what do you think? I’m thrilled with how they turned out. Perfect with a cup of tea or strong coffee on a warm day in the shade, with dreams of la bella Italia!

To make Chocolate & Nut Biscotti (makes around 25-30 cookies):

• 140g nuts
• 100g dark chocolate
• 300g plain flour
• 75g cocoa powder
• 1/2 teaspoon baking powder
• 1/2 teaspoon bicarbonate of soda
• 1/4 teaspoon salt
• 200g caster sugar
• 1 teaspoon vanilla essence
• zest of 1 orange
• 3 large eggs

1. Preheat the oven to 180°C (350°F). Line two baking trays with greaseproof paper and grease lightly.

2. Melt the chocolate in a bowl over a pan of boiling water. Put to one side.

3. In a large bowl, mix the flour, cocoa, baking powder, bicarbonate of soda, salt and sugar.

4. In a separate bowl, whisk the eggs with the vanilla and orange zest. Add to the flour mixture and mix until the dough just comes together. Add a drop of water if needed. Add the chocolate and mix well. Fold in the nuts.

5. On a lightly-floured worktop, shape half the dough into a long rectangular sausage (aim for about 22cm long, 8cm wide). Transfer to a baking tray. Repeat with the rest of the dough.

6. Bake the dough for 25 minutes (it should be puffed up). Remove and cool for 20 minutes. In the meantime, reduce the oven temperature to 160°C (320°F).

7. Using a sharp serrated knife, cut on the diagonal into 1cm slices. Lay flat on the baking trays and bake for 20 minutes (10 minutes each side, turning over half-way). Remove from the oven and leave to cool on a wire tray.

Worth making? Definitely. If you’re a fan of chocolate and nuts, you’ll love these.

7 Comments

Filed under Recipe, Sweet Things

Recipe Challenge: White Christmas

We all love a good challenge! So here is a chance to try one! I am one of the judges in the December Challenge at Very Good Recipes where the theme is “White Christmas”.

To kick things off, all the judges have led the way, and we’ve turned our hands to creating something new – you can check out the creations in the links below, but here is my attempt – a festive take on the Mexican/Spanish drink horchata – based on almonds and with lots of traditional Christmas spices.

What led me to create this recipe? Well, I wanted to try something that was a little less obvious – I love all the cakes, biscuits, sweets, chocolates and puddings at this time of the year – but this was a chance to do something a little different. When leafing through a cookbook, I saw a recipe for horchata based on rice, and thought this could be easily adapted to suit the White Christmas theme.

The most obvious thing was the white colour. However, I thought it would be nice to make this snowy-white beverage, but round out the flavour with all manner of warming festive spices. This would – in theory – result in something quite fitting for  those drinks parties at this time of year. Personally I love a good glass of mulled wine, but sometimes it is nice to try something else, especially for guests who are not quite so keen on the strong stuff.

I moved away from using rice to using almonds, so that this version of horchata can be drunk chilled over ice, or warm with a dash of rum if you’re a fan of something a little stronger. I can assure you – warmed, with a spoonful of rum, a dash of orange zest and a dusting of cinnamon – it’s divine!

If you’re wondering what that is in the drink, it’s a gilded almond!

This recipe also plays with festive flavours in a number of levels. First of all, the base is made with almonds and pine nuts, the former being a festive classic, and the latter adding an extra creaminess to the mixture and a slight pine aroma.

The drink is also sweetened not with plain sugar, but a syrup that has been infused with a range of spices – cloves, cinnamon, cardamom, star anise and even a couple of jaunty red peppercorns! There is also some sweet vanilla and, in place of the classic lime zest, some orange zest for warmth and sweetness. But no need to stick to my list – adjust the spices according that what you like, or add other things that take your fancy (maybe a little syrup from preserved ginger, a dusting of nutmeg or a dash of mace?).

So all in all, rather a sophisticated little treat! And also useful to know that this drink, while being rich and creamy, is vegan, so also idea for those that are avoiding dairy at this time of year.

I hope that the idea and the pictures above are proving rather tempting, and that you are interested in entering the recipe challenge!

All the details can be found here, but basically the idea is to come up with something that covers the theme “White Christmas” – it can be sweet or savoury, a new dish to a new take on a traditional recipe. The colour can be snowy-white, or it can be something that just typifies the feeling of being wrapped up next to a wood fire while the snow is falling outside. Let your imagination go wild!

There are also some great prizes to be won, courtesy of the kind folks over at Savoury Spice Shop.

If you are just a little bit curious and would like to get some inspiration, have a look at the blogs of the other judges and see what each of us has done with the theme:

• Alex from Food 4 Thought
• Anne from Les Recettes du Panier
• Han Ker from Hankerie
• Kristina from Knuckle Salad
• Quay Po from Quay Po Cooks
• Rachel from Blissfully Scrumptious
• Suzy from Suzy Eats
• Vanessa from Vane Valentine

Best of luck!

To make White Christmas Horchata:

• 1 cup (150g) skinned almonds (*)
• 2 handfuls pine nuts
• 1 stick of cinnamon
or some cassia bark
• 2 cloves
• 3 cardamom pods, crushed
• 2-3 strips orange peel
• 1/3 vanilla pod
• 1/2 cup (100g) white sugar

Grind the almonds and pine nuts as finely as you can. Put them in a large bowl and add three cups (720ml) boiling water. Stir well, cover, and leave to sit for several hours – overnight is ideal.

At the same time, make the sweet spiced syrup. In a small saucepan, combine 1/2 cup sugar (100g) with 1 cup (240ml) water, the spices, vanilla and orange peel. Bring the boil and simmer for five minutes. Remove the vanilla, and leave to sit for several hours – again, overnight is ideal.

To finish the horchata, put the almond mixture in a blender and process until very smooth (it will change from slightly yellow to very white).

Strain the liquid through a cheesecloth – all those ground almonds can clog the cloth, so get in there and use your (clean) hands to squeeze out as much liquid as you can. If you like, you can take the nuts from the cheesecloth, whizz them up again in the blender with another cup of water, and strain again. You should end up with around 4 cups (1 litre) of liquid.

Next, strain the spice mixture.

Now the fun bit – mix the almond milk with the spice mixture! Adjust the amount of sugar to taste – I didn’t add any extra, but go with what you like. This horchata will keep in a sealed bottle in the fridge for two days – make sure to shake well before serving.

To serve, there are a couple of ways to let your imagination run wild:

  • Chilled – serve over ice, topped with flaked almonds, or go for glamour as I did and float a single almond that has been coated in gold leaf (decadent – but fun!).
  • Warm – heat the horchata, add orange zest and white rum to taste, and serve with a light dusting of cinnamon.

(*) If you need to remove the skin from almonds, it’s very easy – just bring a pan of water to the boil, throw in the nuts, and boil for around a minute until they start to float. Drain, allow to cook, and you should be able to squeeze the nuts out of their skins. Voila!

Worth making? Delicious, easy and very, very festive. But I would say that, wouldn’t I? Now, go forth and come up with your own take on “White Christmas”!

9 Comments

Filed under Christmas

Pine Nut Cookies

This is a recipe that I learned to make years ago, and I really mean many many years ago, such that I can’t really remember where it came from. This is basically a simple marzipan of sugar, almonds and egg whites, which are very reminiscent of Italian amaretti morbidi – soft amaretti cookies, although I always thing the “morbidi” part sounds more sinister than it is. Sort of like “morbid amaretti”. Just a little example of a false friend that you need to watch out for when learning a language.

Funny thing about this recipe is that it has an odd habit of coming out a little bit different each time you make it – sometimes to cookies flatten out and become chewy, other times they stay as they are, with more of a baked-marzipan quality to them. Whichever way these go, these little Italian-style cookies are unfailingly delicious. In keeping with the Italian theme, la donne e mobile indeed.

These cookies are also pleasingly not-too-sweet, with a little pure almond oil just to make them more aromatic. The sweet almond flavour is balanced with the toasted flavour of the pine nuts. Not only do they look quite funky, but they taste great. If you want something more like a petit four, make smaller cookies, and to fancy things up, dredge with a little icing sugar just before serving. Basta!

To make pine nut cookies (makes 18-20):

• 160g ground almonds
• 250g caster sugar
• 2 egg whites
• 5-6 drops almond extract
• 200g pine nuts or flaked almonds

Preheat the oven to 190°C. Line two baking sheets with greaseproof paper and grease lightly.

Place the pine nuts/flaked almonds in a bowl and put to one side.

Whip the egg whites until lightly frothy. Add the ground almonds, caster sugar and almond oil, and work until you have a smooth, quite sticky dough.

Use a teaspoon to form walnut-sized balls, roll smooth with your hands, then roll each ball in the pine nuts/flaked almonds. Arrange on the baking sheet, at least 5cm/2 inches apart.

Bake the cookies for 12-15 minutes until the nuts are just lightly golden – we don’t want they to get too dark. If the cookies are cooking too quickly on one side, turn the baking sheets round during baking.

Worth making? Super-simple and absolutely delicious. Really easy, and easily adaptable to whatever nuts you happen to have to hand. Perfect if you’ve got to whip up some biscuits at the last minute.

5 Comments

Filed under Recipe, Sweet Things

Ashtalieh (Lebanese Cream Pudding)

There is a piece of dinner party wisdom which says you should not cook something you have never tried before, in case it all goes wrong and your guests hate you.

Alright, perhaps a little dramatic, but you get the idea and the theory behind it (*). Well, last New Year, I threw this concept to the wind, and made Ashtalieh as a dessert. It’s a smooth, creamy pudding, covered in softened nuts and a fragrant sugar syrup. I figured that my guests were sufficiently worldly to want to try anything, I was good at reading recipes and had an idea how they would work, and finally, this just sounded very, very delicious. That, and I had a couple of other desserts to serve, just in case it did go wrong.

Well, predictably enough, the curse of the “don’t get too bold and try something without testing first” fairy did actually strike in the end. Not so much a mistake or a disaster, but something unexpected did happen. I had used mastic gum in the recipe. It’s a marvellous fragrant, fresh-smelling resin from the Greek island of Chios, and I love it, but the amount I used (which, incidentally, was less than the amount the original recipe specified) was just too much. There was a too-strong pine taste in the cream pudding. Now, by the time I added nuts and the sweet syrup, it was actually quite nice, with the mastic gum providing an aroma rather than being the dominant flavour, and it was really quite delicious. Delicious, but it was drenched in syrup, which usually makes anything taste good. As I liked the pudding in general, I made a mental note about how to improve it next time I made it (i.e. bye-bye mastic).

And today, I unveil my version. The only tweak is an extra smidgen of sugar in the pudding and a complete lack of mastic gum. Result? Creamy, just a little aromatic, rich and luxurious. Mastic gum, it’s nothing personal, but you deserve to be the star of the show, so I will leave you to sparkle in loukoumi instead (**). I promise to do a post using mastic gum at some point, just not today.

Finally possessing the best possible recipe, there are two ways you can present this to eager diners. Either you can pour into a large dish, and serve it in squares covered in nuts and drizzled with syrup. Nice and easy. Or, you can be a masochist like me, and try pouring into individual moulds. This undoubtedly looks very pretty, and it allowed me to try our the new silicone canelé mould that I bought last time I was in Brussels, but I have learned that it really is a bit impractical to try turning out individual puddings from a tray that holds 12 in one go. So what have we learned? That we need to invest in some individual moulds.

Anyway, after a bit of delicate manoeuvring and one pudding flying in the wrong direction and impaling itself on the stove, the puddings did turn out. And they are so cool! They have that very sexy wobble you get from proper jelly, but as they are not thickened with gelatine, they are veggie friendly. They also melt seductively on the tongue, and you get fabulous flavours, textures and aromas from the cream, nuts, sugar, orange blossom and rose water.

To serve 6 people:

For the cream pudding:

• 500ml milk
• 2 tablespoons white sugar
• 2 1/2 tablespoons cornflour
• 1 tablespoon plain flour
• 170g cream cheese
• 1/2 teaspoon orange blossom water

• 1/2 teaspoons rose water (***)
• 25g blanched almonds, soaked overnight in cold water
• 25 g pine nuts,
soaked overnight in cold water
• 25g unsalted pistachios, roughly chopped
• sugar syrup (see below)

Put the milk, sugar, cornflour, flour and half of the cream cheese in a saucepan. Heat gently, stirring all the time with a whisk, until the sugar dissolves.

Bring the mixture to the boil, then simmer until the mixture thickens.

Add the orange blossom water and rose water, then keep simmering for another 5 minutes, stirring all the time.

Pour the mixture into a shallow serving dish, and allow to cool. Once cold, spread with the remainder of the cream cheese. Alternatively: divide the mixture between individual silicone moulds. In this case, you don’t need the remaining cream cheese.

To serve: cover each portion with two tablespoons of sugar syrup. Sprinkle over some almonds, pine nuts and chopped pistachios.

For the sugar syrup:

In a saucepan, heat 250g white sugar with 125ml of water and a teaspoon of lemon juice. Once the sugar dissolves, bring to the boil and simmer for two minutes. Finally, add a teaspoon of orange blossom water and a teaspoon of rose water. Stir well and leave to cool.

Worth making? Absolutely. This is one of my favourite new dessert recipes from those that I have tried recently. It’s easy to make, and the ingredient are the sort of thing you have in the store cupboard, but they combine to make something that, in my view, is really quite special.

(*) Not sure that this idea really is so good after all. Taking it to its logical extreme, we would never try anything new, ever, and how much more boring would that make life? Exactly.

(**) Which in Britain we call Turkish delight. Except the Greek version is called loukoumi, and as mastic gum can only come from Greece, I’ll use loukoumi here.

(***) By “rose water” I mean the lighty scented water. DO NOT replace this with a teaspoon of the strong rose extract. You will be overpowered and feel like you are eating perfume. If you do have the strong stuff, use 1-2 drops instead.

Leave a comment

Filed under Recipe, Sweet Things