I recently made a batch of pear jelly and I’ve been amazed how popular it has been. I was also incredibly excited when I saw that it had even inspired people to make it and do their own posts, like on Things {We} Make. I love to look at blogs and use them as a source of inspiration, and it’s great to think that people may be looking at what I get up to for the same reason.
When I saw their version of pear jelly, I did get a little bold and hinted to them that I had another pear recipe in the offing. Well, finally, here it is – perada!
So first of all, a bit of context. What is perada?
If you’ve got a soft spot for Spanish food, then you’re probably familiar with membrillo, the rich red quince paste that is famously paired with manchego cheese. Perada is something similar, although less familiar (at least to me). I came across this idea a while ago and it was mentally filed away in the “to try at some point” part of my brain.
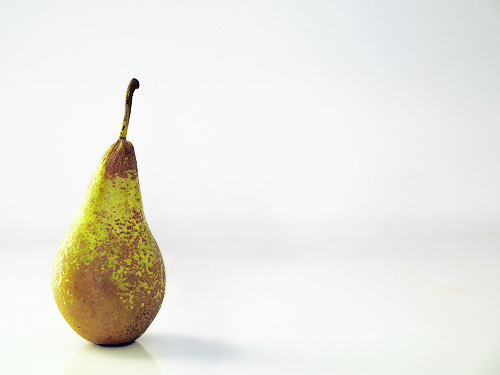
Well, since I made the pear jelly, I received yet another bag of windfall pears. A slightly different variety, which my limited garden knowledge had identified as Williams. While it would be interesting to have pear jelly made with different varieties of pear so that I can then express a preference when called upon to do so, there is also an overwhelming need to be practical. With the best will in the world, there is a limit to just how much jam and jelly a household can consume over a year, so I did two things. Firstly, I left some of the pears wrapped in newspaper to ripen for a week (a tip from Lynn at Queen of the Castle – thanks!). Second, I dug out the old recipe and use the rest to make – surprise! – a batch of perada.
The interesting thing is that there does not seem to be too much on this item on the beloved web. A couple of sources refer to it as being Iberian in origin. Beyond that, there is not much to find, so it is clearly playing second fiddle to the more famous membrillo. So let’s see if we can do a little to change that, shall we?
The method is quite easy – you boil the pears, peel them while warm, then mash them up and pass through a sieve. I have to admit, I was pretty dubious that this would work, and feared all manner of stringy bits and pips in the resulting puree, but it worked like an absolute dream. So if you’re tempted to get into all the fuss of de-coring the pears, you don’t have to.
As with my pear jelly, the colour was a bit of a surprise. The pear puree came out as a pale yellow colour, and I was expecting something similar from the resulting perada. But no. As you can see below, once the sugar was added and the whole lot allowed to boil up, it turned a rich amber colour.
Now, you may remember that on previous occasions I seemed to rant a little against the use of pectin. Well, it’s not that I’m actually against it – it is just that I tend to use high-pectin fruits, or I just add lemons, which also add a nice tang. However, with this recipe, I wanted to keep the cooking time to a minimum so as to benefit from maximum fruity pear flavour. I was also keen to have perada that would set in funky moulds I was using, and that could be sliced easily into delicate slivers to perch atop pieces of cheese.
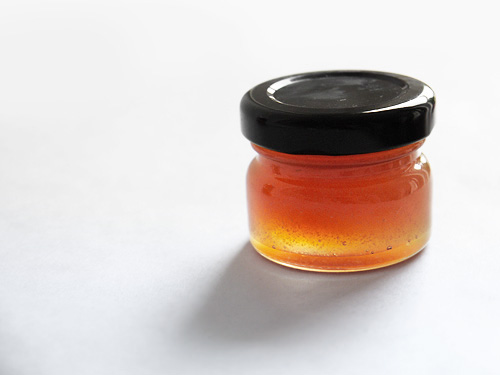
With the perada mixture made, it was time to store it. I filled one normal ramekin, four miniature moulds to adorn a cheeseboard, and I also filled three miniature jam pots to store for Christmas. To say that I was surprised at how little I got out of the process was something of an understatement! But highly predictable given that you need to let the mixture cook, and cook, and cook until it reduces down.
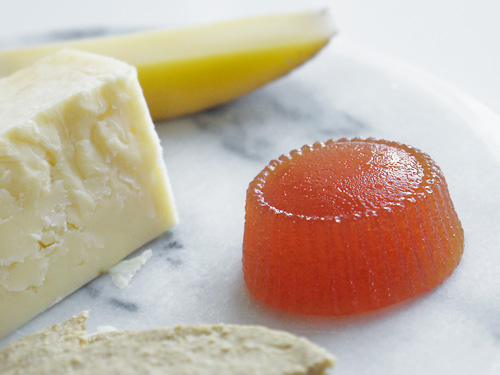
To make my miniature portions of perada, I got a little bit cunning, and as you can see from the picture below, they look like a proper old-fashioned jelly or blancmange. Well, there is a little trick to this. I used a silicone cupcake mould, then turned it inside-out. This results in a little ring of dimples at the top of the perada, which I think looks rather cute.
You can also see that once it has been sliced, the true colour is apparent – more of an amber colour than red, which I think does look rather jaunty indeed on a piece of cheese.
Lacking any manchego in the house, I paired it with a very mature Cornish cheddar, and was frankly delighted with the combination. The perada is sweet, but the cheese was very strong and tangy, and the two together was just a little piece of joy. Given that both pears and cheddar are very typically British, it is a combination that sounds odd but does work.
Once you have gone to all the effort of making perada, you might wonder what to do with it all. The natural home for it is as part of a cheeseboard, but there is of course a natural limit to just how much cheese you can eat. But perada is adaptable – cut into pieces and coat in sugar to make little pâtes de fruits, or use chunks of it in cakes or pastries.
Alternatively, be sure to do as I did, and put some perada into little jam jars – this allows you to store it and use it from time to time, enjoying the fruits of your labour over the winter months.
To make perada:
• 8 pears (leave the skin on)
• 300g white sugar
• 130ml water
• juice of 1/2 lemon
• 4 strips lemon peel, optional (*)
• 3 tablespoons liquid pectin, optional(**)
Rinse the pears, place in a saucepan and cover with cold water. Bring to the boil, then leave to simmer on a gentle heat until soft. They are ready when a sharp knife can be easily inserted (20-30 minutes).
Drain the pears. Once cool enough to handle, peel the pears and discard the skin.
Put the pears into a sieve above a bowl, and use the back of a spoon to push them through. You will end up with a bowl of pear puree and all the stringy bits and pips in the sieve.
Measure the pear puree, and add 3/4 by volume of sugar to the mixture (i.e. for every 1 cup of pear puree, add 3/4 cup sugar).
Put the pear puree, sugar, water, lemon juice and lemon peel strips into a saucepan. Bring to the boil, cook for a minute (stirring as needed) and then reduce to a simmer. Stir in the liquid pectin (if using) and then cook for around an hour until the mixture is thick and leaves little “trails” on the bottom of the pan that take a second or two to cover over. Worry less about the cooking time, and more about when the perada reaches the right thickenss. You can also test it by dropping a small amount onto a very cold plate – if it goes firm after a minutes, the perada is ready.
Remove the lemon peel. Pour the cooked perada into moulds or sterile jam jars(***).
(*) Adding the lemon peel gives the perada a slight lemon aroma. Optional, but a nice touch.
(**) You can use the perada as a paste, or add the pectin to ensure that it sets firmly and can be cut. The pectin is essential if you want to make all these fancy shapes or cut into pieces.
(***) If using moulds, use a tiny amount of neutral oil to rub the inside so that the perada slips out. And I really mean a tiny amount – it should look invisible.
Worth making? This is an interesting but very simple recipe. It takes a little time to make, but it a good idea for when you’re mooching around the house at the weekend. Well worth trying.


Looks good! Thanks for the reference. I like your ‘worth making’ idea too 🙂
You’re welcome!
And it’s always handy file things in the “worth making” brain area. Keeps you sharp in the kitchen
What a fantastic idea. I make Carne De Membrillio every year, and now want to give this a go too!
Thanks. I would be interested in what you think about it compared to the quince version.
Thanks, most interesting!. I am making quince jam as I type having just found your post on Quince jam. I have a pear tree in the garden so this is something else to try.
Thanks Tessa. Good to hear you are making the quince jam. The theory is just the same for making quince paste, so you could give them both a try! Let me know how it works out.
I love the idea of serving it with Cornish Cheddar. I think I’ll also try it with Stilton or Stichelton too, since pears and Stilton/Stichelton is a favorite combination of mine. (Not that I need more of an excuse to eat cheese, of course!)
Sounds like a great combination – in fact, I think I’ll need to nip out and get a bit of the stinky stuff to try it.
If you are feeling very creative, you could take it up a level and make some stilton truffles to eat with the pear paste – I know it sounds odd, but Paul A Young sells port and stilton truffles – his stuff is good, so I am pretty confident that this idea would work too.
It’s very beautiful and I would be happy to receive this as a Christmas gift, I will try to make a batch myself if I can find the pectin.
Looks delicous how long will it keep for . Think the moulds look fab.
Hi Deborah – I made this in autumn, and it kept in the fridge in moulds for months! I’ve got a couple of sealed jars kept in a dark cupboard, and they still look good, so I think you can keep it at least a year.
Hi, this is a wonderful recipe. I have made this a few times substituting different fruits, pear, apple and fig. Am making a batch of pear, apple and walnut today. My cheese platters have become a hit with the addition of this little gem. Thanks for sharing.
The perada is wonderful. We made some last autumn (a year ago here in South Africa) and have just eaten the last of our moulds. Kept well in sealed container in fridge. Getting ready for the next batch and some pear & date chutney!
Thanks Christine! Glad to hear you like it. I didn’t manage to get round to making any this year, and I definitely missed it with the Christmas cheeseboard. Pear and date chutney sounds fantastic too!
Help! I have a glut of pears and having made membrillo several times, I thought this sounded a brilliant alternative. I followed your recipe to the letter but it took literally hours to cook down to the required consistency, by which time it was dark brown sludge and tasted burnt – all pear flavour gone. I had added Certo liquid pectin but even this seemed unable to turn it into a proper set – this morning after a night in the fridge it is a combination of sludge and set. All going in the bin, sadly. But never mind, I have plenty of pears and am determined to get it right! Besides, I went to Hobbycraft and bought lots of little glass pâté jars so I can give it as Christmas presents. My pears were quite ripe (peeling them post-boiling was a nightmare – I wonder if they could be peeled first? What is the reason they are peeled after?) so I wonder if my purée was already very wet and I should have left out adding the water? My membrillo recipe says to strain the quince purée (and use the strained juice to make quince jelly – yum) so perhaps I should have done the same? Any tips gratefully received, otherwise I will let you know how my next batch goes!
By the way, I am not the same Tessa who commented above – we are quite thin on the ground, so it’s nice to see another!
Hi Tessa – sorry not to get back to you sooner (small child is keeping me otherwise busy these days). I think your guess about the ripeness of the pears might be right – the ones I used were windfalls and still very hard, so the cooking softened them to make it easier to turn into a puree. That probably also means the puree was less wet.
If your pears are super-soft, perhaps you could just peel and puree without boiling first? And even miss out the extra water. That would mean less water in the mixture, and so less boiling is needed to get a set.
Something else worth thinking about – use a bit more pectin, and use a food thermometer – I bought one and it is SO good for making sure jams have reached the right temperature. It turned out that my lovely brass one was 5 degrees out! That way you know when you’re reached the magic 106 degrees.
Good luck – if it doesn’t work, send me an email and I’ll have a think about what else it could be. I might even have another go at this to check that there isn’t something misleading in the recipe (I’ve made it a few times, so I think it is OK).