Category Archives: Uncategorized

{10} Struvor

When I made my Slovak ginger cookies I boasted proudly that I had not bought a special cutter to make them. This was not due to some new-found restraint on my part, but because I had already bought my novelty baking item for the year. That item was a rosette iron, which is used to make light, crisp, fried cookies in intricate patterns.
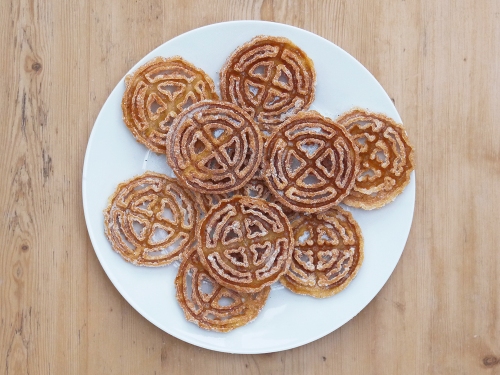

In English these are called rosette cookies and are popular in parts of the US with Scandinavian heritage. They appear with similar fancy patterns in Norway and Denmark, and as funnel cakes in Finland, but I’ve gone with the Swedish name struvor as I’ve lived in Sweden, and have used the recipe from Johanna Kindvall at Kokblog as my inspiration this year.


I must admit making fried cookies is a style of baking I’m not familiar with. I’m all for enjoying a donut or fried snacks, but making them at home tends to leave me a bit uneasy as I’ve got a bit of a fear of cooking things in a big bubbling vat of oil. But in a year that has made doing many things impossible, I felt it was right to give them a go. I also made sure I had suitable fire safety equipment in my kitchen, so I felt a bit happier with the big sizzling pan knowing that I was probably not going to set fire to the house (spoiler: the house is still fine).

While they look complex, they are actually quite easy to make if you have the equipment and enough time. But this is not a recipe to make when you have pets or small children running around!  The mixture is similar to pancake batter, so takes just a few minutes to mix up. You then heat the rosette iron in the oil, then when it is very hot, you dip it carefully into the batter. A thin layer of the batter will cook on impact, and then when you put the iron back into the oil, the cookie will release itself from the iron and fry to a golden colour.

I learned from experience that you need to let the rosette iron get very hot in the oil before you start. My first two attempts were really bad – the iron was not hot, so the dough did not stick, and they were a complete mess. It was just trial and error that helped me work out how to do it properly. Apart from that, the only advice I can offer is to make sure you have lots of kitchen paper on plates to drain excess oil from the cookies, and to make sure you’re able to open lots of doors and windows so your house does not enjoy the lingering aroma of cooking oil! Once you’ve got the knack, you’ll be able to turn out plate after plate of these little guys.


With the frying part done, I finished my struvor off in a few different ways. Some were dusted with icing sugar, and they were delicious. I dipped some others in cinnamon sugar and a few I finished off with sugar and ground cardamom. All tasted good, but my favourite (and the one recommended by Johanna) was the cardamom. It is a fresh, citrussy flavour that brings a bit of zing to these cold dark days.

So, how are they? Really, really great. They’re crisp, sweet and really feel very festive. They’re certainly not something you would eat every day, but that’s pretty much the point isn’t it? They transported me to a Christmas market where some sort of sweet, fried delight is de rigueur.

Struvor are best made fresh, but if you struggle to eat them all in one sitting (which is easy as even a small batch can easily run to 30…) you can store them if you don’t put sugar on them right away. Put them in an airtight container and pop them in the freezer, then revive them in a warm oven when you’re ready to eat them. While they’re not quite as good as when freshly made, they will regain their crispness and a sprinkling of sugar will revive their charm.

To make Struvor (makes around 30), based on the recipe on Kokblog

For the batter

• 150ml whole milk
• 1 tablespoon cream
• 1 egg
• pinch of salt
• 2 tablespoons lager
• 90g plain flour
• 300ml vegetable oil, to fry

To finish

• icing sugar, cardamom sugar or cinnamon sugar

1. Prepare your work area. Layer several sheets of kitchen roll on a couple of large baking sheets.

2. Make the batter. In a large bowl, beat the egg. Add the milk, cream, salt and lager and. Finally add the flour and salt and mix until smooth. Leave for 10 minutes to rest.

3. Get your sugar ready. Mix caster sugar with spices of your choice, and spread out on a plate. If using icing sugar, put some into a small sieve and keep close at hand.

4. Time to fry! Put the oil into a saucepan, and heat to 180°C. When up to temperature, dip the rosette iron into the oil to heat it – you want it to be good and hot, so leave for at least 30 seconds. Take the iron out, and dip just the bottom part of the iron into the batter (be careful that it does not come all the way up and cover the iron, or the cookies will not form).

5. Put the iron back into the oil, and submerge the batter in the oil. The cookie should start to peel off like magic, but you may need to give it a little helping hand with a knife.

6. Let the cookie fry for a few seconds, then turn it over and cook for another few seconds until golden. Remove the cookie from the pan, allow excess oil to drain, then transfer to the tray lined with kitchen roll. Allow to cool for a moment.

7. If using cardamom or cinnamon sugar: press one side of the still-warm cookie into the sugar, then leave to one side to cool completely. Now start with the next cookie…

8. If using icing sugar: when you’ve cookies all your cookies, dredge liberally with icing sugar.

Leave a comment

Filed under Christmas, Recipe, Sweet Things, Uncategorized

{7} Hausfreunde

It is nearly Christmas, so we really need to have something with chocolate. On today’s cookie platter we have Hausfreunde, which are little German cookies made of shortbread, filled with apricot jam and marzipan, and topped with dark chocolate and walnuts.


I also find the name to be is utterly charming. Or I did. I translated it as “friend of the house” or “family friend”, but thought it might be good to double-check in case my German is rusty. According to the website of the Langenscheidt dictionary (which I spent hours leafing through in paper form when learning German all those years ago, and hence now have no need for Google Translate) it can also mean “lover”. So I was sitting there thinking that these were adorable, and the name reflected that they are wholesome and traditional and familiar at the most magical time of the year. Certainly I found the flavour to be very traditional, if anything on the less sweet side, and that felt like a nod back to times past. But now I am left wondering if they are a nod to forbidden fruit, and a platter of these little guys is more about irresistible temptation? I may, perhaps, be over-thinking this.

They certainly look impressive, and you might think they are difficult to make. Certainly there are a number of steps, but each is individually fairly easy and the recipe lends itself to being made over a couple of days.

But, of course, I did decide to make life a little harder than it has to be. This is mainly because in London we’re kind of not really going anywhere indoors at the moment, and I’ve had my fill of multiple trips to the local funfair in the freezing cold. Yes, once again socialising means lots of standing outside in the cold, or being harassed to hold yet another online game of bingo for a bunch of 6 year olds on Zoom. You can see why pottering (hiding?) in the kitchen is so appealing.

So what did I do? It was the marzipan. I could have used the perfectly good and high-quality marzipan I already had in the baking cupboard. But no, I decided to have a go at making it myself. I’d already done it with my Goan Marzipan sweets, so when on a roll keep rolling.

For these cookies, I used this recipe from Anna Olsen, and it is pretty straightforward. You make a syrup of white sugar and acacia honey, then pour the hot mixture onto almonds and mix it well. The flavour is good, so it is nice to know that it is very easy if you want to make marzipan with other nuts: pistachio, hazelnut and walnut are all options to explore. I get the creeping feeling we’ll get a lot of time to practice things in the kitchen come the new year…


The flavour of these cookies really is excellent. The combination of shortbread, apricot, marzipan and chocolate really is a winner. They have that “central European Christmas” flavour vibe and I’m here for it. I started out wondering whether such a labour of love was worth the effort, but I was pleased to discover that it was. They are surprisingly not particularly sweet and seem all the more sophisticated for it.

Now, are there any tips I can share with avid bakers keen to embark on a grand project? Really, it is just about the chocolate. It is best if you temper the chocolate so that it looks shiny and has a pleasing crack when you bite into the cookies. The easiest way I have found is to put chocolate in a bowl, and microwave for 30 seconds. Stir. Another 30 seconds. Stir. Another 30 seconds. Now the chocolate should be starting to melt. Now microwave in 10 second bursts, stirring after each. The key is you want to just melt it but to keep the temperature as low as possible. Basically chocolate in bars has been tempered, and it will return to that state if you melt it only slightly. But if you’re keen to get more scientific, then BBC Good Food will explain all!

Speaking of chocolate, I’ve suggested melting 300g (about two bars) of dark chocolate for dipping. This seems (and is) a lot, and you won’t use anywhere near all of it. But it makes it much easier for the dipping stage. Once I’m done, I just spread it onto a sheet of greaseproof paper and let it set. Then just break it up and use it in another recipe (unless someone else in the house finds it first and eats it).

So, Liebe Leute – we’ve passed the half-way mark in the 2021 edition of the Twelve Bakes of Christmas. I hope you’re enjoying them, and that they may even have provided a little inspiration. And I promise there is more chocolate to come!

To make Hausfreunde (makes 24)

For the dough

• 225g flour
• 25g cornflour
• 75g icing sugar
• 165g butter
• zest of 1/2 lemon

• 1 1/2 teaspoons vanilla extraxt
• 1 medium egg, beaten

For the marzipan

• 125g ground almonds
• 1/2 teaspoon almond extract
• 100g caster sugar
• 45g acacia honey
• 1 tablespoon water

To assemble

• 200g apricot jam

To finish

• 300g dark chocolate
• 24 walnut halves, lightly toasted

Make the cookies

1. Put the flour, cornflour and icing sugar in a bowl. Mix well and set aside.

2. In another large bowl, beat the butter until light and fluffy. Stir in the lemon zest and vanilla. Add in the dry ingredients. Stir in the beaten egg until you have a soft dough – if it is sticky add a little more flour.

3. Wrap the dough and chill for an hour, or overnight.

4. Time to bake. Preheat the oven to 180°C (355°F) and line a baking sheet with greaseproof paper.

5. Roll the dough out to around 1/2 cm (1/4 inch) and cut out circles (5m diameter). Keep going until you have 48 discs. You will need to bake them in batches.

6. Transfer the cookies the baking sheet. Bake for around 10-12 minutes, turning half-way for an even colour. The cookies should be lightly golden when done. Leave to cool.

Make the marzipan

7. In a heatproof bowl, mix the ground almonds and almond extract.

8. Put the sugar, honey and water into a pan, and heat until the sugar dissolves. As soon as it comes to a rolling boil, pour the syrup onto the almonds and work to a paste with a silicone spatula. When smooth, wrap in greaseproof paper and leave to cool at room temperature.

Assemble the cookies.

9. Match the cookies in pairs by size (there is always some variation in size no matter how careful you are).

10. Warm the jam in a saucepan. Sieve if you want (you don’t have to), then add a teaspoon of apricot jam to each base (keep some jam back for the tops of the cookies). Gently place the partner cookie on top, and leave for a moment so the jam can set.

11. Marzipan time! Knead your marzipan (if it is very stiff, you can add a few drops of water to soften it). Sprinkle a worktop with icing sugar, and roll the marzipan out to around 4mm. Cut out marzipan circles using the same cutter as you did for the cookies (5cm diameter). Brush the top of each cookie with the remaining jam, then place a disc of marzipan on top. Press down gently.

Time to dip in chocolate!

12. Melt and temper your chocolate (BBC Good Food will explain all).

13. Dip the top of each cookie into the chocolate so that the marzipan is covered, but the sides of the cookies are left exposed. Let any excess drip off, then flip back the right way up. Immediately place a walnut half on top of the cookie. Repeat until all cookies are done. Leave to set.

1 Comment

Filed under Christmas, Recipe, Sweet Things, Uncategorized

{5} Muskazinen

Today’s festive item is a regional German cookie associated with the town of Dettelbach in northwestern Bavaria. And they come with a delightfully whimsical origin story. Back when Dettelbach was a hotspot on the pilgrim trail, a local baker called Urban Degen sought to capitalise on all that passing trade. He created a spiced sweet, and derived the name from the German word for nutmeg (Muskat). Apparently Herr Degen was rather vain, and felt himself to be the best-dressed baker in town. As a tribute to himself, he shaped his sweets into the form of a bow tie.

The cookies themselves are fairly dry and crunchy, which is often the case with traditional bakes that needed to keep for extended periods. They are heavily spiced, with a lot of nutmeg.  Various different versions do exist, with a number of bakers in the town of Dettelbach selling versions based on their own secret recipes. I have used a recipe from the excellent site of Milk and Hanni which includes spices, walnuts and candied peel. I absolutely love them – spiced, fruity, crunchy and a really interesting bake with gives you the sense of something with a bit of history to it. They also keep very well in an airtight jar, so good to have on hand for your morning coffee or tea in the afternoon.

I have to confess when I first came across these, the shape did not scream “bow tie” to me. I thought they looked more like bunches of wheat which had been bound in the middle.  I did hunt high and low for the right mould, but the only one I could find was on Etsy and had been sold some time ago. My search for an exact match was otherwise fruitless. Either this is the must-have kitchen accessory for 2021, or they are just really hard to track down.

But fear ye not – I was able to buy a wooden shell mould which did the trick just as well. If you want to have a go and are struggling, a madeleine pan may work, or you an just form shapes freehand. They will taste as good, and it can be a good creative outlet on dark evenings.


The dough is really easy to make, with the art being in making the shapes. There is no fat in the recipe, so the dough is rather sticky. I tried using flour and icing sugar in the mould, but the cookies kept getting stuck (meaning I had to clean the mould, which delayed proceedings). It turns out the easy fix was to roll a ball of dough, put it on the tray, cover in cling film, then press the mould on top. Just like that – perfect little scallop shapes! They might not be bow ties, but I still think they look adorable.

One of the features of muskaziner is that when they bake, they puff up and develop “feet” similar to macarons. After shaping, it is essential to leave the surface to dry out (in this case, overnight) so that in the oven, all the lift in the cookie is directed downwards. It is a similar approach to making highly decorated German Springerle or  Swiss Chräbeli.

To make Muskazinen (makes around 60 cookies), recipe by Milk and Hanni

• 250g plain flour
• 1 1/2 teaspoons baking powder
• 75g finely chopped walnuts
• 1 teaspoon ground nutmeg
• 1/4 teaspoon ground mace
• 1/4 teaspoon ground cloves
• 2 teaspoons mixed spice 
• 1 1/2 teaspoons cinnamon
• 40g candied citrus peel
• 2 medium eggs
• 200g white caster sugar

1. Mix the flour and baking power. Set to one side.

2. Finely chop the walnuts, and then the candied peel. Put in a bowl with the spices and mix well. Set aside.

3. Put the eggs and sugar into a large bowl. Beat for at least 5 minutes until the sugar has dissolved and the mixture is pale and fluffy.

4. Add the nut-spice mixture and stir. Fold in the flour to form a dough.

5. Pinch off portions of the mixture and shape (freehand or using a mould). Place on sheets of greaseproof paper.

6. Leave the sheets of cookies to dry at room temperature overnight.

7. To bake, pre-heat the oven to 200°C (390°F). Bake the cookies for around 8 minutes until risen and lightly browned.

1 Comment

Filed under Christmas, Recipe, Sweet Things, Uncategorized

{4} Goan Marzipan

I love a bit of marzipan. So can you imagine just how excited I got when I found that there is a tradition of making Christmas marzipan in the Indian coastal city of Goa? Than answer is very. And it is not just marzipan, but marzipan that is brightly coloured and fashioned into intricate shapes to create a truly dazzling display for all the senses.


The tradition of making marzipan came to Goa with the Portuguese. Over time it has been adapted by replacing imported almonds with the local cashew nuts which grow plentifully around Goa. If you prefer, you could use almonds. Indeed, I saw lots of people using them, but I really wanted to have a go with the cashew nuts.

The overall flavour is really pleasant – the texture was very smooth as I had blitzed the nuts to a powder using a spice grinder. The rose flavour is noticeable but still subtle, with the almond extract very much playing second fiddle. This addition of rose is apparently a hallmark of Goan Marzipan, so I think you would want to make sure that you include that, regardless of the nuts that you use. Just be sure that you’re not over-doing it. I used rose water, so a tablespoon was right. If you’re using the more concentrated rose extract, then be careful to use just a few drops as you can easily go from lightly perfumed to overpowering in a moment.


This recipe uses egg whites, and is a cooked marzipan – helpful if you’re nervous about uncooked eggs in a recipe. You essentially mix everything up, then cook it on a very, very gentle heat in a non-stick pan. The mixture starts off looking dry, and initially appears to melt as the sugar dissolves into the egg white and rose water, then as it cooks it will start to firm up. It only takes 10-15 minutes, but you really do need to watch it carefully, all the while stirring with a silicone spatula to cook it evenly and prevent any burning. This is the time to put on music or a radio play, and enjoy a mindful moment when you’re not being disturbed.

I must, however, sound a word of caution. I actually ended up making this twice. I tried one approach involving soaking the nuts, and then grinding them down to a paste. I think somehow too much water got into my mixture, because after a long cooking time the marzipan was still too moist and soft to set. I remedied that by adding a lot of extra icing sugar, and while that did work it meant the marzipan was very sweet. I noticed that lots of recipes caution not to add any extra water when making marzipan, and I think this is why. But hey, it means you can learn from my mistake. I tried this a second time with unsoaked ground cashew nuts, icing sugar, egg white and flavourings. It ended up being much easier and quicker and yielded a great result. It also meant that the mixture was 1:1 of nuts and sugar, so it is sweet but not sickly.


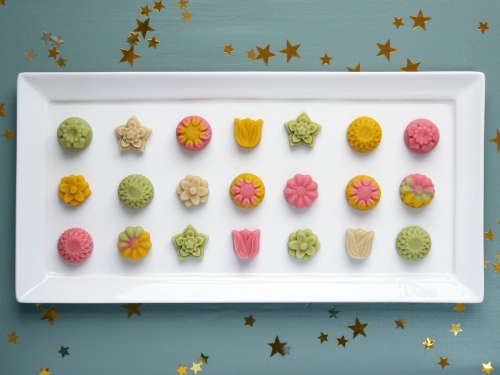
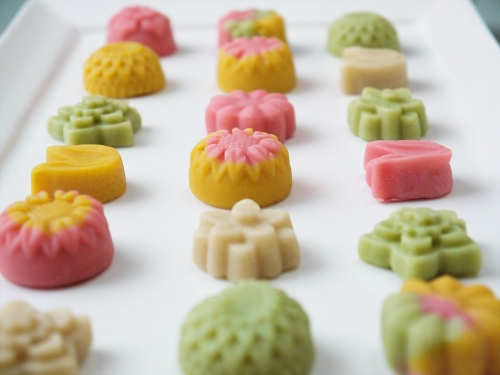
Of course, the really fun bit was shaping the marzipan. I used silicone moulds, which worked really well. I made a selection of abstract shapes and flowers in muted tones of pale green, pink and yellow. Pretty classy. It is also fun to take bits of different colours, roll them into balls, then press them into moulds to get a marbled effect. If you don’t have moulds, you can simply roll it out an cut small shapes. If you’ve got something with texture, you can also use this to emboss the top of the marzipan. Indeed, get playful – place cling film on top, and press down things like star anise or pasta shapes for some really interesting effects.

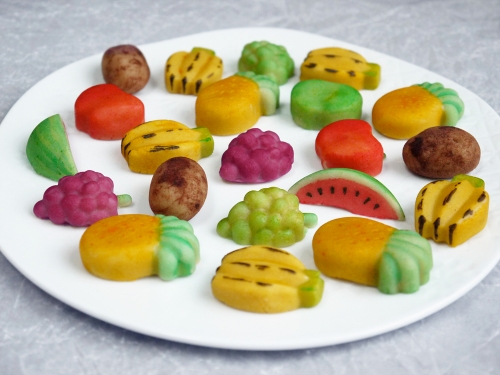
After the tasteful marzipan shapes, it was time to get fruity. Literally. This turned into a riot of bright colours and whimsy. Again, I used moulds for this. I left the marzipan uncoloured , and then decorated them freestyle with a paintbrush and food colours. Overall I’m happy with how they turned out. If you prefer to colour the marzipan first, that will work too. But again, you do not need to use moulds and can make very effective marzipan fruits by shaping them by hand and letting your creativity run riot.


Finally, in addition to various tropical fruits, I could not resist making a few little marzipan potatoes. These are really common in Germany, and have the benefit of being incredibly easy to prepare. You don’t need moulds and they look really convincing. Just form pieces of marzipan into irregular rounded oblong shapes, poke some holes to represent the eyes, then roll or dust in a little cocoa power. They really do look like miniature potatoes and are always a hit with kids!

To make Goan Marzipan (makes around 50 pieces)

• 200g cashew nuts
• 200g icing sugar
• 1 tablespoon rose water
• 1/2 teaspoon almond extract
• 1 medium egg white
• food colours, to decorate

1. Grind the cashew nuts with the icing sugar until you have a fine, smooth powder.

2. Put the egg white in a bowl and beat until frothy. Add the rose water and almond extract and mix well. Finally, fold in the cashew/icing sugar mixture and stir. It will seem very dry.

3. Transfer the mixture to a heavy-bottomed non-stick frying pan. Cook over a low heat for around 10-15 minutes until the mixture is smooth and thick, stirring and moving the mixture constantly with a silicone spatula. When you first start cooking, it will become more liquid and smooth; it will get firmer with cooking. It is ready when a small piece dropped into cold water forms a firm ball.

4. Put the cooked marzipan onto a sheet of greaseproof paper and allow to cool until it can be handled. While still warm, divide the marzipan into 3-4 balls, and use food colouring to make different colours.

5. Pinch off pieces of warm marzipan and press into moulds. Allow to set for a moment, then remove from the moulds. Place of a sheet of greaseproof paper, and allow to cool completely. Store in an airtight container.

Leave a comment

Filed under Uncategorized

{1} Gozinaki

Greetings of the season to each and every one of you! Yes, it’s that time of year again when we’re back with another edition of the Twelve Days of Festive Baking!

Did you miss me? I’ve missed you. But blogging has not felt like a priority this year. Work, home schooling, lockdowns and the like have left us all frazzled, and I was frankly a bit baked-out from last year. Even as a keen baker there is a limit to how many cakes and cookies you can or should consume when not really going far from the house.

As we head into the final weeks of 2021, we can look back on what has been one heck of a year. When we finished 2020, we reflected on a year which turned so many lives upside-down. We got used to new ways of living, we wondered what changes were here to say, and we shared the losses of so many. And I think many of us imagined that 2021 was somehow going to be a lot better; we invested emotionally in the promise of New Year’s Eve, only for those of us here in London to go right back into a lockdown and another round of trying to coax recalcitrant children to do their schoolwork. But the year did get brighter. We travelled. We reconnected. We even got to be spontaneous. But now many parts of Europe are going back into various levels of restrictions. It’s not easy, and we need to seek comfort and reassurance in whatever ways we can.

So having said that, let’s embark on our annual festive frolic with our tempting dozen delights from around the world. We can still visit lots of places via their culinary heritage, in the anticipation of actually being able to physically travel again at some point in 2022…


Our first festive treat comes from the country of Georgia. If you love honey and nuts, then this little taste from the Caucus mountains is just the thing for you.

I just happened across the recipe, and it proved to be the trigger for doing the 2021 series. I was in two minds about whether to do it this year with all that is going on, but in the end I was drawn to the comfort of tradition and familiarity. Having decided to do it, I would love to say that there are lots and lots of recipe out there that I still need to try and that I’m loving exploring them. The reality is I’m now into the 11th cycle of my Twelve Days of Festive Baking (which means 132 separate festive recipes!).

As a consequence I’ve already made lots of the more familiar recipes, so I need to look harder and harder to find inspiration. I’ve got a few criteria: things need to look interesting; they need to be somehow distinctive; and I like them to come from a specific place. Bonus points if they feature a novelty ingredient or need a special culinary tool. This means each year there is an ever-increasing need for detective work to get ideas, but it also means I get to explore food cultures I’m less familiar with. That is always a good thing. Actually I find it curious that thanks to pure happenstance one recipe is very well known, while another – which might be even more delicious – remains tucked away and known only in its home territory.

So I was frankly delighted when I was leafing through my copy of a Dorie Greenspan cookie book, and found this recipe. An interesting approach, great flavours, and from a new country for our Christmas baking list. It just had to feature.


The ingredient list for gozinaki is short – walnuts, honey, sugar – and you probably have these things in the cupboard already. Essentially this is like making praline or nut brittle, but the texture should be a little softer. They remind me very much of those little sesame brittle bars you get in health food stores, and which I remember consuming as a child on the basis they were a “healthy snack”. Were they really healthy? I’m not sure that lots of sugar counts, but they sure were tasty.

Given there are so few ingredients here, you want to make them shine. Toasting the walnuts lightly will bring out their flavour. And you also want a decent honey. Don’t use the expensive stuff that you bought on holiday (holidays – remember those?), as you’re going to boil it, but something that has a bit of flavour will serve you well. I used a decent runny honey and added a couple of teaspoons of Scottish heather honey for flavour while not overpowering the recipe.


Walnuts are traditional and feature in most Georgian recipe websites, and are also favoured by Dorie. But you can easily use other nuts if you prefer – hazelnuts, almonds or pecans would all be good, albeit less authentic. However, you can also avoid nuts completely. Sunflower and pumpkin seeds also feature in some websites, and will also develop a rich, nutty flavour when lightly toasted. One tip here is that you are best to start off with more nuts (or seeds) than you need, and chop by hand to get pieces about the size of a grain of puffed rice. Next, sieve the nuts to remove any power. This is actually just ground nuts and can be used in another recipe, but the sieving will help you avoid them mixture getting claggy when you mix in the caramel.

And so to the baking. I’ve stuck with Dorie’s version on the basis “who am I to question?” but with one small tweak. I’ve added a dash of sea salt, which was ground to a fine powder. I thought this would help provide just the slightest balance to the sweetness of the honey and sugar and makes for a more complex flavour profile. This really is about a tiny enhancement, and I was not aiming for a salty-sweet taste.


The method is fairly simple. Just make sure that you take the usual sensible precautions when you are working with very hot sugar (keep children and pets in another room), have everything ready so you can move quickly once the honey-nut mixture is up to temperature, and remember that greaseproof paper and silicone spatulas will serve you well here. You’re basically in a race against time to transfer the mixture to a tray, flatten it out, and then score it so that you’ll be able to get pretty diamond shapes rather than a tray of something that looks like shattered glass. Even if you struggle with the shapes it will still taste wonderful, but if you can get looks and flavour, then so much the better.

The big question: how do they taste? I thought they would be really sweet, but as you are using a lot of nuts in this recipe, they were surprisingly balanced. Very nutty, then sweet from the honey, so much so that they did seem to be more like a cookie than a piece of candy. And the salt was a smart addition too. But labels don’t matter, suffice to say they taste great and make a superb addition to a holiday cookie platter when arranged to form a dazzling golden star.

To make Gozinaki (makes around 30 pieces)

• 300g chopped walnuts (weight after sieving)
• 170g honey
• 100g white sugar
• 1/8 teaspoon flaky salt, finely ground
• neural oil, for greasing

1. Line a baking sheet with greaseproof paper and rub lightly with neutral oil. Get a silicone spatula and keep it to hand.

2. Toast the nuts. Put them into a clean frying pan. On the lowest heat, gently toast until lightly golden. It is important to stir them constantly and watch like a hawk – they go from toasted to burnt very fast. When done, pour onto a plate (do not leave in the pan – they will keep cooking and burn). Set the warm walnuts to one side.

3. Make the syrup. Put the honey and sugar into a medium saucepan. Heat until the sugar has dissolved, then bring to a rolling boil. You can either use the scientific method and cook it to 120°C/250°F on a candy thermometer, or drop a little of the mixture into a glass of cold water. It first it should form a stringy-looking mass, but when it starts to form clear flattened balls, you’re good.

4. Remove the pan from the heat. Immediately add the warm nuts and salt, and stir vigorously. Quickly transfer to the baking sheet. Use a silicone spatula to press and shape the mass into a large rectangle, around 1cm deep. You can use a silicone rolling pin to get it smooth, or you can use a normal rolling pin and place a sheet of oiled greaseproof paper on top before rolling.

5. While still warm and pliable, cut the gozinaki. Get a very sharp knife, and rub lightly with oil. Cut the rectangle into whatever shapes you like. You may need to clean and re-oil the knife several times. Diamond shapes are traditional, but you can also cut squares or triangles.

6. Leave to cool completely. Store in an airtight container (if it is not airtight, the gozinaki will go soft and sticky).

7 Comments

Filed under Christmas, Recipe, Sweet Things, Uncategorized

Twelfth Night Approacheth…

When did you put the decorations up in 2020? A lot of our neighbours started early. I think I saw the first lights going up in late October, and there were definitely a few trees that stood proudly in bay windows, drowning in ornaments, from the first few weeks of November.

We actually decided to wait, and our decorations only went up around mid-December. This was also a very deliberate choice. 2020’s “Lockdown Christmas” needed all the help it could get to feel special, and I reasoned that if we waited as long as we could, we would have the thrill of anticipation, and it would all still feel quite special when Christmas Day rolled around. And I think it worked.

Then of course there is the question about when to take everything down again. Traditionally decorations are kept up until Twelfth Night, which can be either 5 or 6 January depending on whether you count the Twelve Days of Christmas as starting on Christmas Eve or Christmas Day. In our house we side-step any bickering by taking them down on New Year’s Day. Maybe it is a sign of getting older that we are now up and about, with clear heads, early on 1 January. But it does also mean we start the New Year with a clean slate, the tree comes down, and suddenly the sitting room feels much bigger. I reckon that this year we also timed it just right – the tree still looked good, but another day or so and the needles would have been dropping all over the place.

In the midst of the lockdowns and social distancing (and the fact we in London are now going into our third lockdown in ten months…), I also overlooked the fact that this is the tenth instalment of my Twelve Days of Festive Baking. Number 10! That means that I’ve made a grand total of 120 recipes from various corners of the world. Goodness knows how much that must be in kilos of butter and sugar, or how many eggs were involved. And by now I’ve made a lot of the more well-known recipes, so each year gets more challenging and obscure. But then, that is a big part of the fun – trying new things and not really knowing how they will turn out or what they will (or should) taste like. It’s also fun hunting down some obscure ingredients. I know you can get a lot of them online, but I’m still analogue and like to find them in shops.

So a toast to my 2020 edition – a year we’re not madly keen on,  but at least if gave me the time to be at home and tackle some complex baking. I think we came up with a pretty wild and eclectic selection.


Finally, as I have done in previous years, I’ve matched the bakes to the original lyrics to the Twelve Days of Christmas to see if there is any sort of random correlation. So how did I compare to the carol?

On the twelfth day of Christmas, my true love sent to me:

…twelve Drummers Drumming (Greek Vasilopita)…
…eleven Pipers Piping (American Italian Rainbow Cookies)…
…ten Lords-a-Leaping (Norwegian Brune Pinner)…
…nine Ladies Dancing (Slovakian Oriešky)…
…eight Maids-a-Milking (Queen’s Cinnamon Stars)…
…seven Swans-a-Swimming (French Calissons)…
…six Geese-a-Laying (German Pulsnitzer Pfefferkuchen)…
…five Gold Rings (German Gebrannte Mandeln)…
…four Colly Birds (Norwegian Kakemenn)…
…three French Hens (Philippine Paciencias)…
…two Turtle Doves (Argentinean Alfajores)…
…and a Partridge in a Pear Tree (Italian Spongata di Natale)!

At a pinch, you could say that calissons recall elegant white swans, and that the gebrannte Mandeln are a rich, golden colour like the five rings, but that’s all a bit of a stretch. Overall though my favourites were the “Italian” Rainbow Cookies. Not as hard as I thought, and they tasted wonderful as well as looking utterly crazy. I’ll definitely make them again.

Now…time to think about recipes for 2021. Should I go for an “all-stars” edition (and reinterpret the most popular cookies from previous years), focus on cookies that are all about decoration and looks rather than traditional recipes, or hunt out another set of Twelve Festive Delights? Let me know what you think!

7 Comments

Filed under Uncategorized

{8} Queen’s Cinnamon Stars

Today’s festive delight is a right royal treat, quite literally.

I came across a recipe for Cinnamon Stars from the royal kitchens of Buckingham Palace (original here, including a video of how they do it). So, of course, I just had to have a go at making them.


These may be familiar to you as German Zimtsterne, or cinnamon stars. You start off making a dough with ground nuts and cinnamon, then finish them with a meringue topping. I’ve made cinnamon stars before, but they were a bit more basic.

The Queen’s version includes candied orange peel, a lot of cinnamon, and a dash of cloves. They are also topped with snow-white icing and feature a bit of elaborate piping. Very fancy, but you’d expect that if you’re ever popping round for a festive cuppa at the Palace.


When I read the recipe, I was convinced by the idea. However, I had a couple of quibbles with the method. The suggestion was to make a meringue, and use two-thirds of it to make the dough. Then you roll out the dough, cover it with the reserved meringue, and then cut out shapes. I think the idea is that the cookies are then pre-iced? Hmmm. This struck me as quite wasteful, as you would not be able to re-roll the offcuts since the meringue would make it all too sticky. Also I knew that smearing something with meringue was likely to be a messy affair with a child in the house who is enjoying touching everything within reach.

So I adapted the method. I adjusted the amounts of the meringue to start with – I made two-thirds of the amount to go in the dough, and would make the “missing” meringue later for the icing. Then I made and rolled the dough, cut out the shapes without the icing, and then I could happily gather the scraps and keep re-rolling until I was done. We did stars and moons (using a circular cutter and overlapping the cuts to get the right shape). Diamond shapes would also be good – easy with a knife, and I think rather fitting.

Once they were baked, I finished them off with the meringue royal icing suggested by the Palace. This looks like a bit of a pain to make, as you are essentially making thick icing and then thinning it down, and it would be easier just to make thinner royal icing to start with. However, the Palace’s approach results in a very light icing rather than one which cracks when you bite into it. You just need to be very, very patient as you sit down to finely ice all the cookies. Maybe that’s what the Palace’s all-in-one method is seeking to get round?

My split approach also had some extra benefits – the cookies looked very neat and the icing stayed perfectly white. I know that this all sounds terribly fiddly, but once you get into the swing of things, it’s the perfect sort of activity to do with a film or a radio play on in the background. And the final result is a tray of perfect-looking regal cookies.


In the Buckingham Palace version they are finished off with some sort of red jam in the centre and there is lots of intricate icing piped all over them. Piping icing is not one of my skills, and I don’t have the equipment to do it properly. I managed to find a small nozzle to give it a go, but I gave up around half-way. It looks kind of nice, but I don’t think it really adds that much to them overall unless this is something you are really good at. Of course, that might just be my frustration talking!

So all in all, were they worth making? Yes, I think so. They are up a level from my own take on cinnamon stars from a few years ago. The different technique to make the dough gives a far neater result, and I like the addition of the citrus peel and the hint of cloves. I would definitely make these again, but I’d perhaps use 50/50 ground hazelnuts and ground almonds. Then, my friends, I truly would have the ultimate cinnamon stars. I just won’t be piping decorations on top.

To make Queen’s Cinnamon Stars (my adapted, less wasteful approach)

For the dough

• 115g candied orange and lemon peel
• 240g icing sugar

• 55g egg whites (2 medium egg whites)
• 1 tablespoon lemon juice
• 300g ground almonds
• zest of 1/2 lemon or orange
• 5 teaspoons ground cinnamon
• 1/4 teaspoon ground cloves

For the icing

• 1 medium egg white (30g)
• 225g icing sugar
• 1 teaspoon lemon juice
• water

1. Put the candied peel into a food processor. Blitz to a paste – you will need to scrape down the sides a few times to get it perfectly smooth.

2. In a very clean bowl, whisk the egg whites to soft peaks. Add half the icing sugar and whisk until it is well-combined. Add the lemon juice and the rest of the icing sugar. It will start off quite soft and wet, but keep beating until you have a soft meringue (more like the texture of floppy whipped cream). It might seem a bit wet at the start, but keep going and it will happen.

3. Add the candied peel paste and the rest of the ingredients to the meringue bowl. Mix well until it forms a dough. Don’t worry about being delicate with the dough, and towards the end you will have to use your hands. If it seems a bit sticky, add a few tablespoons of ground almonds. Wrap the dough in cling film and chill for an hour, or overnight.

4. Time to bake and shape. Preheat the oven to 160°C (320°F). Line a baking sheet with greaseproof paper.

5. Place the dough on a separate piece of greaseproof paper. Roll it out to 1cm thickness. Cut out shapes (stars, moons, diamonds…) and transfer to the baking sheet. Your cutters will get sticky, so keep a clean damp cloth to hand to wipe the edges often.

6. Bake the cookies for around 12 minutes, turning half-way to get an even bake. They will puff up slightly and darken a little on the edges. Remove from the oven and allow to cool on the tray for a couple of minutes. Transfer to a wire rack to cool completely. They might seem quite hard at this stage, but they will soften.

7. Time to ice the cookies. Put the egg white into a bowl and whisk to soft peaks. Add the icing sugar and lemon juice, and beat well for several minutes until the mixture is thick and smooth – like the appetising texture of toothpaste. Now thin it down with water, a few drops at a time, until it is a flowing consistency. You want to be able to leave a trail on a plate that stays in place and does not run and spread. Put the icing into a piping bag with a small nozzle, and with a lot of patience, use to cover the tops of the cookies. Use a clean cocktail stick to manipulate the icing to cover any gaps. Leave in a dry place, away from children and pets, for the icing to dry.

Note: I found it easiest to ice the cookies one at a time – pipe on the icing to cover most of the top, then go in with the cocktail stick to tease the icing to cover any bald patches and burst any air bubbles. If you ice a few, then go in to clean up, the icing will be starting to set when you go back.

2 Comments

Filed under Christmas, Recipe, Sweet Things, Uncategorized

Cake of the Week: Lemon Drizzle

You’ve had cookie of the week, so here is our first cake of the week! I’ve actually been quite blown away from the feedback on the first part of my lockdown baking, and one reader has even made the Fryske Dúmkes and confirms they are easy and delicious. The next cookie is coming tomorrow…

In the last few days it has started getting much warmer in London, and we’ve just had some glorious sunny days. It seems so strange to imagine a parallel world in which we’re off out in parks, walking by the river, thinking about a trip to Kew Gardens to see blossom and daffodils and planning Easter trips to beauty spots. But as temping as any of that might seem, it is all off limits as part of our efforts to support the greater good. Just peek out the windows and you will see rainbows painted by children reminding you to #StayHomeSaveLives. There has been some debate in the UK about exactly what the rules mean and how far people can interpret them. Personally I think it’s pretty obvious that we need to say at home, only shop for food once per week, and while we’re allowed out for exercise once per day. And in doing this, we need to avoid other people. Yes, it’s a pain, but if we all play our part, we can only hope that our corona lockdown will pass sooner.

What this period has enabled me to do is to fish out some craft ideas from deep in my memory for entertaining my son. The big hits this week were colour chromatography (separating the colours in ink using filter paper) and drawing out a map of the London Underground. He managed to do pretty much the whole thing from memory! Next week is the two-week Easter Holiday, so home school is shut and we’ll have holiday club based around “theme of the day”. Today was “France”, Tuesday is “London Transport”, Wednesday is “Plants” and the rest of the week is still under development. Ideas welcome!

Anyway, back to cake, as that’s what you’re here for. As spring creeps upon us, I decided to make a cake which has a little sunshine in in, and opted for lemon. This is one of the iconic British classics – it is a sponge loaf cake and while it is still warm you pour over a syrup of granulated sugar and lemon juice. Then you leave it to cool, and the glaze forms a crunchy, tangy glaze on top and makes sure that they cake is very moist. We’ve enjoyed it over the last week each afternoon. This is definitely one to have with a cup of tea (Earl Grey, pinkie raised) rather than coffee, and the bright, zesty flavour is a much needed pick-me-up as the afternoon air feels warm and pleasant.

If you want to play around with the flavour (or you need to make do with what you have at home) then you can use whatever citrus fruit you like. You could make it with just orange zest, go for a St Clements cake (orange and lemon, like the famous song) or make it even more tropical with lime. Grapefruit might even be interesting – but a caveat that I have not tried it, but if you do, let me know if it worked!

To make a Lemon Drizzle Cake (makes one 1lb loaf)

For the batter:

• 175g white caster sugar
• 175g softened butter
• zest of 1 lemon
• 3 medium eggs
• 175g self-raising flour
• 3/4 teaspoon baking powder
• 1 tablespoon milk

For the glaze:

• 100g granulated sugar
• juice of 1 lemon

1. Preheat the oven to 170ºC (340ºF). Line a loaf tin with greaseproof paper.

2.Put the eggs, sugar and lemon zest in a large bowl. Beat until pale, light and fluffy. Add the eggs, one at a time, beating well after each addition. Add the flour and baking powder, and mix well. Finally add the milk and beat to a smooth batter.

3. Pour the batter into the prepared tin. Bake the cake for around 40 minutes. An inserted skewer should come out clean and the surface should be springy when lightly pushed. If it looks like it is getting too dark, cover it loosely with tin foil. When done, remove from the own and place on a wire rack. Do not remove from the tin.

4. Immediately make the glaze. In a bowl, mix the lemon juice and granulated sugar. Pour evenly over the warm cake, then leave to cool completely.

Leave a comment

Filed under Afternoon Tea, Cake of the Week, Recipe, Sweet Things, Uncategorized

{12} Sugar Cookie Fantasy

This is not the recipe that I planned for my final instalment of the 12 Bakes of Christmas, but for one reason that was very clear to me and will become obvious, it certainly felt like the right one to do.

We spent Christmas this year with family in Scotland, enjoying a frosted landscape, a crystal-clear Christmas day, good times and lots of lots of food. On Christmas Eve, I was in the kitchen with my son making cookies as we’d decided that asking a four-year-old to focus on an activity the night before getting presents was a really great idea! We also got a suggestion from school that this would be a great activity to try together over the holidays, so here we were. As we worked through the process of weighing out the ingredients, making the dough (after ensuring that hands were scrubbed and scrupulously clean!) and then rolling and shaping them, it occurred to me that this was what I should use to finish off this year’s serious. Maybe they’re not the most glamorous, the most sophisticated or the most unusual cookies in the world. But they are a first for me as I don’t think I’ve ever done a joint festive bake with someone else before, and definitely not with someone who is four-and-a-half.


Now, I’ll level with you. There was a high degree of oversight going on here. The making of the dough was messy fun and I was pretty related about that. It took less than 5 minutes so it was suited to the attention span of someone who was very, very excited.

But the cutting out of the cookies…aargh, that was a bit more of a battle of wills. The wee lad was enjoying himself with the same small bit of dough that was becoming mankier and mankier as it was worked repeatedly and got too soft as the butter in it melted. Sticky fingers went into his nose at least twice (and how do those hands get sticky right after being washed?). He managed to roll the dough out wafer-thin and cut in a manner that I’ll generously describe as creative. But never mind – he was having great fun with it. I was on the other side of the table, diligently rolling (clean) chilled dough out between sheets of parchment so that the cookies would hold their shape and bake properly. My assistant then happily came round and pressed down the various cutters, but wandered off to look at something to do with toy trains when it was time to transfer them to the baking sheet and deal with things like timers and making sure they were properly baked.


The dough recipe is very simple – it’s a basic shortbread-type cookie which I’ve flavoured with vanilla. However you can vary it a little bit too – add a few drops of almond extract instead, or flavour with grated lemon or orange zest. You can even swap some of the white caster sugar for soft brown sugar and add some mixed spices if you don’t feel you’ve yet had enough of ginger, cinnamon and cloves for the year.

If you’ve ever found yourself wanting to make one of those plates filled with many different types of cookie, this is a great recipe. The only limit is your imagination. I made this at my parents’ house where my mum had a set of circular and scalloped cutters. So here’s how we improvised:

To make moons: use a larger circle cutter, then take a smaller circle, offset it, and voila – you’ve got a moon shape.

To make wreaths or rings: use a circular or scalloped cutter to cut a shape, then use something small and circular to form the hole – be creative, it could be a large piping nozzle, an apple corer or the tube your vanilla pods come in!

To make hexagons: trace around a hexagonal jam jar.

To make squares: freestyle them with a good sharp knife.

To make triangles: again, freestyle!

For decoration, again you are only limited by your ingenuity. Here are a couple of ideas you can use before the cookies go in the oven:

For the almonds wreaths: I just brushed them with a little milk so the surface was tacky (actually I used my index finger). Then I sprinkled some with crushed flakes almonds.

For the sugar rings: brush them with some milk, then sprinkle with granulated sugar (the bigger crystals give a bit more sparkle and crunch).

For the nut stars: brush them with milk, then sprinkle with some finely chopped pecans in the centre, and cover with more granulated sugar. I also drizzled them with some white icing once they had baked and cooled.

Once you’ve baked your cookies, there is another quick trick that makes simple cookies seem more fancy. Use dark or milk chocolate, as I did on some other stars, and drizzle it in stripes. I think it makes them seem quite sophisticated. Before the chocolate sets you can also sprinkle over some nuts – flaked almonds, chopped hazelnuts of pieces of pistachio.

Buuuuuuut…of course the main show is cookies covered in a sweet coating of icing. I think tis is what springs to mind for many people when they think of sugar cookies. I’ve seen those little films on YouTube where someone using little piping bags to create amazing intricate designs, and while I can definitely recognize the skill that goes into that, it is not really my thing. If you want to do that, you need to use royal icing. I prefer the lazier route, which means mixing up a simple thick water icing, and just applying it carefully using a spoon or a table knife as neatly as I can. It’s fairly easy – you want it to be thick and only just settle back and go smooth when you stop touching it. The key here is to add less water than you think you need – if the stuff is flowing easily from your spoon, you’ve got too much liquid in there. Once the consistency is right, add some sprinkles and you’re done.


And that’s how I made this impressive platter of shapes and cookie types from a single batch of dough and with a bit of ingenuity in the kitchen. The one thing I have not mentioned is where that bright pink came from. I kid ye not, this was made from the skin of about 10 black grapes. I peeled them, mixed them with a bit of water, blitzed them in the microwave for a minute, then pulverized them with a spoon. I mixed the resulting liquid with the icing sugar and a few drops of lemon juice, and I got that lovely deep shade of fuchsia.

Now that that we’ve got white icing and pink icing, you might be able to guess how I did those marbled cookies – I just covered one half with the white icing, the other with the pink, then used the back of a spoon to roughly mix the two of them to end up with the duotone effect.

And with that, it’s time for me to sign off from the 2019 edition of the 12 Bakes of Christmas! As in previous years, I’ve had great fun making these recipes, and I hope you’ve enjoyed reading about them and seeing the pictures of the fruits of my efforts. I’ll be hanging up the apron for a little while, and will take the chance to reflect on what I’ve managed to learn this time around!

To make sugar cookies (makes around 30-35 cookies depending on size)

For the dough

• 115g unsalted butter
• 100g white caster sugar
• 1 medium egg
• 1 teaspoon vanilla extract
• pinch of salt
• 240g plain flour (plus more if needed)
• 1 teaspoon baking powder

To decorate

• 100g icing sugar
• water
• colouring (optional)
• sprinkles

1. Put the butter, sugar and salt in a bowl. Beat until light and fluffy.

2. Add the egg and whisk well until the mixture of smooth and light. Beat in the vanilla (or other flavourings if using).

3. Combine in the flour and baking powder, then add to the bowl. Mix with a spoon, then finish with your hands. Add more flour if necessary to get a soft dough that is not sticky, and comes away from the bowl. Wrap in cling film and chill for at least an hour, or overnight.

4. When you’re ready to bake, preheat the oven to 180°C (355°F) and line two baking sheets with greaseproof paper.

5. Roll the dough to around 1/2 cm thickness, and cut out whatever shapes take your fancy. Transfer them to the baking sheet, the pop the sheet in the fridge for 2 minutes. I recommend baking cookies of a similar size on the same sheet – if you bake small and large together, the smaller ones can burn before the big ones are ready.

6. Bake the cookies for around 12 minutes, turning half-way to get an even colour. They are done when they are lightly browned around the edges, so go by eye and keep a close watch. Remove from the oven and transfer to a wire rack to cool completely.

7. To make the icing, put the icing sugar in a bowl. Add some colour and then water, a few drops at a time, until you get a smooth but very thick paste. When you stop stirring, it should slowly fall back and the surface should be smooth. If it is at all runny, it is too thin – add more icing sugar. Put some in the middle of the cookie, then use a spoon to spread it evenly. When you’re happy with it, add sprinkles before starting the next cookie. Alternatively, you can put some icing in a small piping bag or drizzle it from the back of a spoon to make lines across the cookie.

3 Comments

Filed under Uncategorized

{10} Navettes de Marseille

My tenth recipe in this year’s Twelve Days of Baking is one I had not originally planned to feature. This was supposed to have been something very different indeed. I had planned to make an Icelandic shortbread and prune cake called Vínarterta. The idea is to make between five and eight layers of thin shortbread, then between each add some prune jam, to get an attractive layered effect. Well, I made it, I tasted it, and it was awful. It was the sensation can best be described as an excess of butter combined with thrill of prunes. I think I’d managed to get the whole concept of the Vínarterta very wrong. Plenty of people have made it and seem to like it, so perhaps I’ll have a go at it another time, but this year it just didn’t make the cut. After all the effort that went into the one that didn’t work, I just could not face the idea of going through it all again. So if you every wonder if I try making something and fail at it – yes, it does happen, and those recipes don’t appear on here.

So…what do we have instead of the Icelandic cake of terror? We’ve headed back instead to the loving embrace of la douce France, and I’ve made navettes de Marseille which I came across when I was researching the pompe a l’huile. I had originally made a note that they might be one for next year, so here they are! The word navette might be familiar today as the term for a shuttle bus, but it used to have a nautical connection, which makes sense as Marseille is port town.


Navettes are cookies that can appear as part of the Thirteen Desserts in the Provençal Christmas tradition. They are simple light sweet biscuits made with olive oil and orange blossom water. The texture is rather like biscotti, as they are made with egg as the binding agent, but perhaps less hard and crisp. The good news is that they are an absolute doddle to make (which was also a sweet relief for me – that Icelandic thing had 15 layers in it between the cake and the prunes!). While orange blossom water is traditional, there are other flavours emerging, with one of the more popular being aniseeed. I could imagine they would look very striking if you used saffron, and you could get festive and add seasonal spices, but you’re probably straying rather far from the originals if you get too wacky. Personally I quite like orange blossom so I wasn’t in the mood for any experimentation here.


For me the fun bit was in the shaping. You just roll them into a sausage, pinch the ends, then slice along them. You can open this a little bit, and it opens up a further during baking. They end up looking live a cross between little loaves of bread, a boat, and a pea pod! Now I have seen different sizes of navettes ranging from big to bite-sized. I went for ones on the larger size in part because I’ve got small cookies galore in the kitchen at the moment, and in part because I was too lazy to make them smaller. I think the larger size also avoids them looking too much like doggie treats!


My navettes reminded me of Middle Eastern pastries and would be excellent with coffee or green or mint tea. While my navettes were very hard after baking, they did seem to soften when left out overnight. I sorted this by letting them dry in a very low oven (maybe 70°C) to get that very dry, crisp texture.

To make navettes de Marseilles (makes 10)

• 100g sugar
• 1 medium egg
• pinch of salt
• 250g plain flour
• 3 tablespoons olive oil
• 1 tablespoon orange blossom water
• zest of 1 orange

1. In a bowl, mix the sugar, egg and pinch of salt until the mixture is pale and fluffy (about 2 minutes). Stir in the orange blossom water and orange zest, then gently fold in the olive oil.

2. Gradually add the flour. Start with a spatula, then you will have to finish off with your hands to make sure the dough is properly mixed! If it is too moist, add a bit more flour but it will still have a very slight stickiness. Cover with a clean tea towel and leave to rest for an hour at room temperature.

3. Preheat the oven to 180°C (350°F). Line a baking sheet with greaseproof paper.

4. Roll the dough into a long sausage, then cut into 10 equal pieces (or weigh the dough and form 10 equal pieces). Roll each piece into a ball, then form into a sausage about 10cm long. Transfer to the baking sheet, then pinch the ends and use a sharp knife to cut along the length of the navette. Gently push the sides slightly open – it should look like a set of lips! Keep going until all 10 are done.

5. Brush the navettes with milk, then put the tray in the oven.

6. Bake for 20 minutes, turning half-way to get an even colour. When done, remove from the oven and cool on a wire rack.

Leave a comment

Filed under Uncategorized