Tag Archives: 12 Days of Baking

{3} Mantecadas de Astorga

For the third instalment of our festive baking frenzy I decided to take things a little easier and go with a fairly straightforward recipe. These little treats are called Mantecadas de Astorga, and they are exactly what they look like – very simple but very delicious little cakes.


Truth be told, they are similar to sponge cakes or pound cake. While modern recipes suggest adding cinnamon, citrus zest of even just some vanilla, traditionally there is no additional flavouring. Does that mean they are not interesting? Well, they’re more interesting than our modern tastes might lead us to think.

A lot of Spanish baking uses olive oil or lard. Think of the similarly-named mantecados which are crumbly shortbread cookies where lard is essential to get the right texture. Seen against these other recipes, the use of butter was a differentiator. Perhaps a sign of a luxurious good when they were first created. Today we might see butter cookies are being rather plain, but there was a time when enjoying a sweet, buttery treat at Christmas would have been something quite special.

Of course, having just said all that, there are plenty of recipes for these case that use either just lard or a combination of lard and butter, but I’ve opted for the dairy-loving approach here as I don’t use lard in my baking.


These cakes hail originally from the Spanish city of Astorga in the north-west of the country near the border with Portugal. And if you are being correct, they should to be baked in little paper cases called cajillas. And to get authentic cajillas you need to take pieces of paper and carefully fold them so that when the cake is unwrapped we see the shape of a cross left on the paper. Of course I tried making them. I first gave this a go with some greaseproof paper but it didn’t work as the folds kept unravelling. The lesson: you need to use plain paper and ensure you have oodles of patience. And if you doubt the seriousness with which these paper cases are taken in the city of Astorga, there is even a mural in the old town to the ladies who specialise in making them.

While Mantecadas de Astorga are traditionally made in a small square or rectangle shape, it is not going to change the flavour if you use a round pan, but I do quite like the square shape as they look just a little touch more special. I’ve previously bought specialist square cupcake cases to use in a muffin tray with square holes, but then discovered that you can just use normal round cases, press them down, and they’ll fit the square shape. If you’re not folding your own cases, that is…


I did wonder whether these cakes would be worth making. No spice, no citrus, no chocolate, no nuts. It turns out they are really nice. Simple, but nice. Perfect with tea or coffee. Rich, buttery and sweet, but also very light. That said, they’re probably not a viable diet option (they do contain all that glorious butter after all) but they do seem light. Sort of in the way that a croissant is light, and we know we ought not to consume too many of those.


So I encourage you to try these – they’re easy to make, you probably have the ingredients already, and you get all the thrill of making your own paper cases. If you are so minded, I followed this online tutorial. It is in Spanish, but easy to follow, and after the first few you get into the knack of it. Soon you’ll be giving the mural ladies a run for their money!

To make Mantacadas de Astorga (makes 12-16, depending on size)

• 125g butter
• 125g sugar
• 3 medium eggs
• 125g self-raising flour
• granulated sugar, to finish

1. Prepare your cake cases. Either make the paper moulds by hand, or line a muffin tin with paper cases.

2. Preheat the oven to 180°C (355°F).

3. Put the butter into a bowl. Beat until very soft. Add the sugar and beat until light and fluffy. Add the eggs one at a time, beating well after each addition. Finally fold in the flour.

4. Divide the mixture between the prepared cake cases. Even it out with a spoon (it won’t be perfectly flat). Sprinkle generously with granulated sugar. Bake for 18-20 minutes until the cakes are risen and the tops are a rich golden brown.

Leave a comment

Filed under Christmas, Recipe, Sweet Things

{2} Qagħaq tal-Għasel (Maltese Honey Rings)

Today’s festive delight comes from the Mediterranean land of Malta. The name is a bit tricky for those not familiar with the Maltese tongue (i.e. me!) but qagħaq tal-għasel (kaka-tal-hassah) translates to the more familiar honey rings – even if they often are not made with honey, but rather treacle or syrup.

I did think that perhaps it would be more apt to save these for the No 5 spot so as to follow the famous Twelve Days of Christmas carol, but I’ve not been that organised with my planning.


These ring shape of these sweet, spiced treats is said to represent eternal happiness, and the filling inside that sticks out a little apparently symbolises that happiness being in abundance. Perhaps a little bit shmaltzy, but I think we all need that sort of approach to life right now.

Now, I think I know what you’re thinking: these look complicated. I thought the same, and for years they were on my “too hard” list. but I grasped the nettle and it turns out they are actually fairly straightforward. They take a bit of time, but the technique is not tricky. The filling itself is easy to make, then you roll out the dough, wrap it around the filling, and make a very long sausage roll. Form into a loop, and then use a very sharp knife or a (clean) razor to make the patterns on top.

The filling is made with all manner of things which combine to create the essence of Christmas – honey, spices and orange – with the addition of fine semolina to give it some substance. However it was not smooth sailing. I like to check various recipe sources to be sure that the method I am going to use will have a sporting chance of working. This time I saw lots of recipes which talked about making a syrup and letting it cool. So I did just this, and what started as a super-runny syrup while warm remained stubbornly runny when it had cooled down. I had assumed it would thicken up, but it was a great big no. I thought I would have to throw it away, but then I tried just adding water to it. I reasoned that semolina needs liquid to absorb and then thicken the syrup, so I added a whole lot of water. And just like magic, after a bit of cooking, I did indeed end up with a nice thick filling that could easily be used to stuff pastries. Maybe bakers in Malta know this trick and it is so obvious to them that it does not need to be stated in a recipe? I don’t know, but I was pleased I got it to work.


After all that work of getting the filling to work, I finally got the chance to taste it. My immediate through was: “why on Earth did I wait so long to make these?” If you are a fan of a classic treacle tart, then think of these are a ring-shaped and portable version of that. It is sweet, sticky, rich and has lots of festive flavours. I admit that I ate quite a bit of it from the pan as part of my testing phase.

So top marks for flavour, and they also last really well. The pastry is crisp after baking, and stays so even when left out for a few days. If you want something that is similar to mince pies but is also a little but different , then I think these are great. They would be really nice to nibble on with a cup of tea watching a Hallmark Christmas movie while it is a raging storm outside. So it’s handy that I have a tray of these, as we’re having a fairly wet-and-wild festive season here in London so far this year. And I can see myself making these again, especially now that I know they’re not that tricky after all.

To make Qagħaq tal-Għasel (makes 6-8):

For the filling:

• 220g (150ml) golden syrup or honey (or a combination)
• 75g (50ml) black treacle or molasses
• 50g muscovado sugar
• 125ml water plus 200ml water
• 1 tablespoon cocoa powder
• zest of 1/2 orange
• juice of 1 orange
• 85g fine semolina

For the dough:

• 350 plain flour
• 50g caster sugar
• 50g butter or vegetable oil
• juice of an orange
• cold water

1. Make the filling. Put the golden syrup/honey, treacle, sugar and 125ml water into a saucepan. Bring to a boil over a gentle heat. Add the cocoa powder, orange juice, orange zest, spices and semolina and mix well.

2. Add another 200ml water and mix well. It will seem very runny. Allow to sit for 10 minutes, then place over a gentle heat. Bring to the boil, then reduce the heat and simmer for 10-15 minutes or as long as you need for the mixture to become really thick. It should leave a trail when you pull a spoon across the bottom of the pan. Cover with a lid and leave to cool completely.

3. Make the dough. Put the flour, sugar and butter/oil in a large bowl and rub together. Add the orange juice and just enough cold water to form a soft dough. Wrap in cling film and chill for an hour or overnight.

4. Preheat the oven to 180°C. Line a baking sheet with greaseproof paper.

5. Divide your dough into 6-8 pieces. Roll each into a long strip, around 20cm. Divide the filling into 6-8 portions. Sprinkle the worktop with fine semolina, then take a piece of filling. Roll it out into a long sausage. Brush the dough with water, then place the filling on top. Wrap the pastry around the filling, then press down the seam to seal. Make sure the seam is at then bottom, and join the ends to form a ring. Seal using water. Transfer the ring to the baking sheet, then use a very sharp knife or a clean razor to make various decorative cuts along the top.

6. Bake the rings for around 15-20 minutes. They should remain pale, and be only very, very slightly golden. Serve warm or allow to cool.

Leave a comment

Filed under Christmas, Recipe, Sweet Things

{1} Gozinaki

Greetings of the season to each and every one of you! Yes, it’s that time of year again when we’re back with another edition of the Twelve Days of Festive Baking!

Did you miss me? I’ve missed you. But blogging has not felt like a priority this year. Work, home schooling, lockdowns and the like have left us all frazzled, and I was frankly a bit baked-out from last year. Even as a keen baker there is a limit to how many cakes and cookies you can or should consume when not really going far from the house.

As we head into the final weeks of 2021, we can look back on what has been one heck of a year. When we finished 2020, we reflected on a year which turned so many lives upside-down. We got used to new ways of living, we wondered what changes were here to say, and we shared the losses of so many. And I think many of us imagined that 2021 was somehow going to be a lot better; we invested emotionally in the promise of New Year’s Eve, only for those of us here in London to go right back into a lockdown and another round of trying to coax recalcitrant children to do their schoolwork. But the year did get brighter. We travelled. We reconnected. We even got to be spontaneous. But now many parts of Europe are going back into various levels of restrictions. It’s not easy, and we need to seek comfort and reassurance in whatever ways we can.

So having said that, let’s embark on our annual festive frolic with our tempting dozen delights from around the world. We can still visit lots of places via their culinary heritage, in the anticipation of actually being able to physically travel again at some point in 2022…


Our first festive treat comes from the country of Georgia. If you love honey and nuts, then this little taste from the Caucus mountains is just the thing for you.

I just happened across the recipe, and it proved to be the trigger for doing the 2021 series. I was in two minds about whether to do it this year with all that is going on, but in the end I was drawn to the comfort of tradition and familiarity. Having decided to do it, I would love to say that there are lots and lots of recipe out there that I still need to try and that I’m loving exploring them. The reality is I’m now into the 11th cycle of my Twelve Days of Festive Baking (which means 132 separate festive recipes!).

As a consequence I’ve already made lots of the more familiar recipes, so I need to look harder and harder to find inspiration. I’ve got a few criteria: things need to look interesting; they need to be somehow distinctive; and I like them to come from a specific place. Bonus points if they feature a novelty ingredient or need a special culinary tool. This means each year there is an ever-increasing need for detective work to get ideas, but it also means I get to explore food cultures I’m less familiar with. That is always a good thing. Actually I find it curious that thanks to pure happenstance one recipe is very well known, while another – which might be even more delicious – remains tucked away and known only in its home territory.

So I was frankly delighted when I was leafing through my copy of a Dorie Greenspan cookie book, and found this recipe. An interesting approach, great flavours, and from a new country for our Christmas baking list. It just had to feature.


The ingredient list for gozinaki is short – walnuts, honey, sugar – and you probably have these things in the cupboard already. Essentially this is like making praline or nut brittle, but the texture should be a little softer. They remind me very much of those little sesame brittle bars you get in health food stores, and which I remember consuming as a child on the basis they were a “healthy snack”. Were they really healthy? I’m not sure that lots of sugar counts, but they sure were tasty.

Given there are so few ingredients here, you want to make them shine. Toasting the walnuts lightly will bring out their flavour. And you also want a decent honey. Don’t use the expensive stuff that you bought on holiday (holidays – remember those?), as you’re going to boil it, but something that has a bit of flavour will serve you well. I used a decent runny honey and added a couple of teaspoons of Scottish heather honey for flavour while not overpowering the recipe.


Walnuts are traditional and feature in most Georgian recipe websites, and are also favoured by Dorie. But you can easily use other nuts if you prefer – hazelnuts, almonds or pecans would all be good, albeit less authentic. However, you can also avoid nuts completely. Sunflower and pumpkin seeds also feature in some websites, and will also develop a rich, nutty flavour when lightly toasted. One tip here is that you are best to start off with more nuts (or seeds) than you need, and chop by hand to get pieces about the size of a grain of puffed rice. Next, sieve the nuts to remove any power. This is actually just ground nuts and can be used in another recipe, but the sieving will help you avoid them mixture getting claggy when you mix in the caramel.

And so to the baking. I’ve stuck with Dorie’s version on the basis “who am I to question?” but with one small tweak. I’ve added a dash of sea salt, which was ground to a fine powder. I thought this would help provide just the slightest balance to the sweetness of the honey and sugar and makes for a more complex flavour profile. This really is about a tiny enhancement, and I was not aiming for a salty-sweet taste.


The method is fairly simple. Just make sure that you take the usual sensible precautions when you are working with very hot sugar (keep children and pets in another room), have everything ready so you can move quickly once the honey-nut mixture is up to temperature, and remember that greaseproof paper and silicone spatulas will serve you well here. You’re basically in a race against time to transfer the mixture to a tray, flatten it out, and then score it so that you’ll be able to get pretty diamond shapes rather than a tray of something that looks like shattered glass. Even if you struggle with the shapes it will still taste wonderful, but if you can get looks and flavour, then so much the better.

The big question: how do they taste? I thought they would be really sweet, but as you are using a lot of nuts in this recipe, they were surprisingly balanced. Very nutty, then sweet from the honey, so much so that they did seem to be more like a cookie than a piece of candy. And the salt was a smart addition too. But labels don’t matter, suffice to say they taste great and make a superb addition to a holiday cookie platter when arranged to form a dazzling golden star.

To make Gozinaki (makes around 30 pieces)

• 300g chopped walnuts (weight after sieving)
• 170g honey
• 100g white sugar
• 1/8 teaspoon flaky salt, finely ground
• neural oil, for greasing

1. Line a baking sheet with greaseproof paper and rub lightly with neutral oil. Get a silicone spatula and keep it to hand.

2. Toast the nuts. Put them into a clean frying pan. On the lowest heat, gently toast until lightly golden. It is important to stir them constantly and watch like a hawk – they go from toasted to burnt very fast. When done, pour onto a plate (do not leave in the pan – they will keep cooking and burn). Set the warm walnuts to one side.

3. Make the syrup. Put the honey and sugar into a medium saucepan. Heat until the sugar has dissolved, then bring to a rolling boil. You can either use the scientific method and cook it to 120°C/250°F on a candy thermometer, or drop a little of the mixture into a glass of cold water. It first it should form a stringy-looking mass, but when it starts to form clear flattened balls, you’re good.

4. Remove the pan from the heat. Immediately add the warm nuts and salt, and stir vigorously. Quickly transfer to the baking sheet. Use a silicone spatula to press and shape the mass into a large rectangle, around 1cm deep. You can use a silicone rolling pin to get it smooth, or you can use a normal rolling pin and place a sheet of oiled greaseproof paper on top before rolling.

5. While still warm and pliable, cut the gozinaki. Get a very sharp knife, and rub lightly with oil. Cut the rectangle into whatever shapes you like. You may need to clean and re-oil the knife several times. Diamond shapes are traditional, but you can also cut squares or triangles.

6. Leave to cool completely. Store in an airtight container (if it is not airtight, the gozinaki will go soft and sticky).

7 Comments

Filed under Christmas, Recipe, Sweet Things, Uncategorized

{11} Baci di Dama

For my eleventh post this year, I decided that I had to make something with chocolate. When I look back at my bakes so far in the 2019 edition of the 12 Bakes of Christmas, I was struck by the fact I’ve only used chocolate once, and I’m not sure that the other recipe with just cocoa really counts.

To rectify this I decided to attempt baci di dama – these are two little hazelnut biscuits sandwiched together with a little dark chocolate. Their name means “lady’s kisses” as they resemble a pair of plump puckered lips ready to lavish romance on someone fortunate. I’ve seen these cookies described as a symbol of sensuality.

Something I am also very curious about is what you think of the pictures I took of these cookies. I tried a few different setups to set a festive mood, some using tinsel, some using ribbon and some with a textured cloth. But none of them quite hit the mark for me, and I felt that I was going to have to resign myself to using shots I was not completely in love with. Then, as I was packing up, I noticed how they were reflected on the white surface and I thought that was the way to capture how they look – a sort of stripped-back, wintery look as if they are reflected in ice. Lady’s kisses, but that lady happens to be the White Queen of Narnia!


I have to be honest and declare that these are not really Christmas cookies per se, it just happens that they look adorable and they have flavours that seem very festive. They were created around a century ago in the city of Tortona in Piedmont, an area famed for its hazelnuts. One story says that they were the creation of a pastry chef in the employ of the House of Savoy, who was asked by Prince Vittorio Emanuele II to create something new. The chef could only use what he had to hand – nuts, sugar, butter and chocolate – and so baci were born. The other story is that they were born of fierce competition between two pastry chefs in Tortona. One created a version using hazelnuts and the other using almonds, and they both sought to obtain protection for their own special creations. Passion and rivalry seem somehow fitting for a cookie symbolising sensuality, not?

I started to do a little bit of digging for the “authentic” way to make these, and they all seem to be a bit of a variation on a theme – ground nuts, butter, flour and sugar in various quantities. But the recipe that really piqued my interest was this recipe from David Leibowitz using rice flour, and I decided to stop there and try that recipe. I liked the idea of using the rice flour as I expected it to provide a particular crispness and slight crunch to the cookies after baking in a way that plain old flour would not.


In following his recipe, I did find that the dough does seem to be very dry when you’re working it. He does recognise this and suggests you just keep working it until it does come together. I kept going and while I definitely noticed that the heat from my hands did help the mixture become more cohesive as I kept kneading, I also knew that I had gone way past the point I would have gone with a recipe using just flour. Ultimately I gave in and added tiny extra amounts of butter to get the dough to form. I didn’t need much, so when I say tiny, I mean tiny. The other option he suggests is adding a tiny amount of water, but this one I was really dubious about. That approach might work if you didn’t need to do too much with the dough, but I was concerned that given all the shaping and rolling of lots of small cookies that the rice flour would absorb the water and the texture would be affected (and that the dough would probably turn crumbly again and be impossible to work when you’re rolling the last of the cookies). The choice is yours, but this is basically a nutty shortbread. I’m Scottish, we’re shortbread experts, and would never add water when making shortbread!

For the hazelnuts, you have a few choices. You can use whole hazelnuts, and gently toast them in the oven until the skins start to come off. You then remove them from the oven, roll them in a teatowel, then carefully pick out the nuts as you try to avoid spreading the pieces of nut skin around your kitchen like brown confetti. I mean it – keep doors closed, as otherwise the slightest puff of wind and you’ll be finding bits of hazelnut skin for months. Otherwise you can use the cheat’s method and use ground hazelnuts, and just spread them on a piece of greaseproof paper on a baking sheet – bake at around 150°C (300°F), checking every few minutes until they are toasted. While less rustic than grinding your own hazelnuts, it does make life a lot simpler!

You don’t need to limit yourself to hazelnuts, although the flavour is delicious and combines wonderfully with the dark chocolate – the success of Nutella alone testifies to a winning combination. However, I think toasted ground almonds would also be good perhaps paired with some milk chocolate, and you could get very creative and use ground pistachios and white chocolate to create a little festive selection.

And in case you’re wondering, what does that rice flour do? It means when they come out of the oven the cookies are utterly fragile – I accidentally brushed against one and it collapsed. But they do firm up and go hard if you leave them, so patience if useful here. The texture is very crisp, and the rice flour and the hazelnuts give them an almost gritty texture (think breadstick rolled in polenta). I really liked it makes for a more interesting biscuit. However, in the interests of science, I also made a few using plain flour. The texture is closer to what you would expect from a nutty shortbread, so if you prefer to keep them classical, go with that. They are both, of course, delicious and they’ve been one of the most popular cookies I’ve made this year. They are wonderful with coffee, and their dainty size means you can easily nibble your way through a few of them without the feeling that you have over-indulged. I mean, you probably have, but you just don’t feel that way!


To make Baci di Dama (makes 40-50) – recipe by David Leibowitz (here)

For the dough

• 140g ground toasted hazelnuts
• 140g rice flour
• 100g unsalted butter, plus more if needed
• 100g white caster sugar
• pinch of salt

For the filling

• 60g dark chocolate

1. Put the ground hazelnuts, rice flour, sugar and salt in a bowl. Add the butter and use your hands to work it until you have a dough. Keep kneading it as the heat from your hands will soften the butter. If you find you’re really struggling to get it to come together, add a tiny amound more butter and keep going.

2. Preheat the oven to 160°C (325°F) and line a baking sheet with greaseproof paper.

3. Divide the dough into 4 pieces. Take the first piece and roll to a long sausage – I did mine 22cm, as I worked out that this would give me pieces of 5g each. Then use a knife and cut into equal pieces. I lined my dough up against the ruler and cut into 1cm pieces – they came out very even.

4. Take each piece of dough and roll into a ball. I found it easiest to press the dough into as round as shape as possible, then to work the dough quickly between my palms to get a perfect sphere. Place each ball on the baking sheet, leaving some room for them to expand. Repeat until you’ve used up all the dough. Do the same with the remaining 3 chunks of dough.

5. Bake the cookies for around 12-14 minutes until they look slightly golden – they will have puffed up ever so slightly, formed little dome shapes, and have slight cracking. Remove from the oven and allow to cool – they are extremely fragile when they come out of the oven, but they will become firm when cool. When they have stabilised, transfer them to a wire rack to cool completely.

6. Once the cookies are completely cool, match them up in pairs of the same size. I recommend you then line them up in rows, one row with the base facing upwards, and its partner immediately above it.

7. Melt and temper the chocolate (the easy way – finely chop all the chocolate. Melt 1/3 in the microwave, then add the next 1/3 and stir until melted, then add the final 1/3 and stir until smooth, and reheat in the microwave for 5 seconds on full power). Put the chocolate in a piping bag, then put a little chocolate, the size of a chocolate chip, onto the base of a cookie, and gently place its partner on top – you want chocolate peeking out of the edges. Keep going until they are all done, and leave to set completely.

2 Comments

Filed under Christmas, Recipe, Sweet Things

{9} Pompe à l’Huile

I’ve written recently about my modest luck in the past when tackling festive breads, but I thought I would have another go this year. Meet the pompe à l’huile, which hails from the south of France.

The name refers to the shape of an old olive oil press (rather than an “oil pump” – a pompe à huile). It is a lightly sweetened bread made with young and fruity extra-virgin olive oil, which would normally still be just a few weeks old when making this around Christmas time. It also happens to be natually vegan if you brush the loaf with water rather than milk just before baking.


In addition to olive oil, it is traditionally flavoured with orange blossom water. I must admit I was more than a tad dubious as it can be very much like perfume and it is easy to add too much. But I thought I would give it a try as I could always make another if got too heavy-handed.

If you are using it, a little word of warning – check exactly what you are using, as you can get anything from very dilute to highly concentrated, and when it’s pure it is extremely powerful. Helpfully it is not always clear exactly what you’ve got, so I can’t give a more specific guide other than to say just be careful and remember you can add more but you can’t take away! If you can’t get hold of orange blossom water, a passable substitute is to use orange zest, plus a little vanilla extract and a dash of almond extract. It’s not the same, but you do get a sweet, floral and citrussy aroma that works in a pinch.

The stuff I got was from a Turkish grocery, and two tablespoons were quite enough to give it all the flavour and perfume I wanted. If you’re using the concentrated stuff, you may find just half a teaspoon does you.


As this is traditional French loaf, I assumed there would a clear single way to make it. Oh, how wrong I was. I found there are lots and lots of frankly dodgy recipes out there which are going to provide some strange results. One suggested equal weights of flour and olive oil, which would be marvellous if you just wanted greasy flour, and I discounted that one right away. Another suggested using no pure water, just orange blossom water. Either they were using something that was extremely dilute of they are the sort of person that enjoys swigging Chanel No 5 with their morning coffee. Next!

Anyway, I initially settled on a recipe which was about five parts flour to one part oil. I selected this one on the basis that surely the oil was important and therefore there should still be a lot of it in the dough. All seemed fine during the kneading even if it was a bit greasy, and it was easy to shape and bake, but it ended up being heavy and claggy (great word by the way!).

But I was determined to succeed. I kept looking and saw that several sources refer to this as being akin to an “olive oil brioche”. My first attempt was definitely not like brioche. That made me think that actually what I wanted was to keep the dough light, and that the oil was there more for flavour and aroma than to pool around the base of the bread as it baked.

My second attempt (and the recipe you see below) came out very differently. The dough was much more like an enriched dough and was not oily at all. It rose proved perfectly, and the resulting loaf was golden when it came out of the oven. It got a light brushing of more extra-virgin olive oil and a light sprinkling of sugar. It looked lovely and was light and aromatic when we ate it. You get the orange blossom flavour, but it is not overpowering.


So…I had made a pleasant slightly sweet dough. Had it all been worth it? Well, I also read that traditionally this would have been eaten with grape jam, which is not something I have in the house or actually ever see when I’m out and about. So instead I used blackcurrant jam made with fruit from my mum’s garden (and I carefully carried that container of berries all the way back from Scotland in the train to London to make that jam!). It was, quite simply, amazing. A complete flavour sensation. The bread is light, sweet and aromatic, and it merges just wonderfully with sharp dark fruit jam. I’m glad I persevered – it’s very different to most Christmas baking, and absolutely delicious.


To finish off, it is worth knowing a bit more about the pompe à l’huile. It forms part of the Provençal tradition of the Thirteen Desserts. While this might sound like a truly epic way to finish a meal, it is not actually a seemingly endless supply of little cakes. Instead it is a tradition that is rich in symbolism, and there are thirteen elements representing those present at the Last Supper – Jesus and the Twelve Apostles.

There is not a single fixed list of the Thirteen Desserts, but you find there are some common treats and then local variations depending on their specialities. For example, you will find fresh fruit, dark and light nougat, dates, and the “four beggars” standing for four monastic communities – almonds for the Carmelites, figs for the Franciscans, raisins for the Dominicans and walnuts for the Augustinians. Then there are a few regional variations (which probably also reflect the tastes of the host or hostess) and can include calissons from Aix, made from candied melon and almonds, or navettes from Marseille. I really like the idea of this tradition, as it is fun at the end of a meal to have little things to nibble on as you chat about anything and everything with your family and friends. Maybe not the high drama of setting fire to a plum pudding as the British do, but probably one that is more suited to the end of a large meal.

Traditionally there would be one loaf for Christmas Eve, and a second to enjoy for breakfast on Christmas Day. A few people suggest hot chocolate as the prefect accompaniment, which sounds pretty good to me. I just wonder if you would find that it lasted that long if you’ve got hungry people in the house?

To make pompe à l’huile (makes 1 loaf)

For the dough

• 250g strong white flour
• 1/2 teaspoon salt
• 50g sugar
• 1 teaspoon instant yeast
• 2 tablespoons extra virgin olive oil
• zest of 1/2 orange
• orange blossom water (or use vanilla and almond extract)
• water

To finish

• milk (to glaze, optional – skip to make a vegan version)
• olive oil
• caster sugar, to sprinkle (optional)

1. Put the orange blossom water into a measuring jug. Make up to 130ml with cold water.

2(a). If using a bread machine: put everything into the mixing bowl. Run the “dough” cycle. Simples! [But do check the consistency – you might have to add more flour or water if the mixture seems too wet or too dry]

2(b). If making by hand: put the flour, salt, sugar and oil into a bowl and mix well. Add the rest of the ingredients and work with your hands until you have a dough. Start to knead it until it is smooth, stretchy and elastic (at least 5 minutes). Leave the dough a warm place for two hours until the dough has doubled in size. Knock back and knead again for 2-3 minutes.

3. Put a piece of greaseproof paper on a baking sheet. On the paper, roll or press the dough out to an oval around 1cm thick. Use a wooden spatula with a straight edge to make a cut in the centre. Make 8 more cuts in the same way so that the dough looks like a wheel. Stretch the dough a little so that the holes are prominent. Put the whole baking sheet in a large plastic bag and leave somewhere warm to prove for at least an hour.

3. Preheat the oven to 180°C (355°F). Brush the top of the bread with milk if using. Put a pan of hot water into the bottom of the oven to create steam. Add the bread and bake for around 15-20 minutes until golden, turning half-way to get an even colour.

4. When they loaf is baked, remove from the oven, and brush lightly with more extra-virgin olive oil. Sprinkle with caster sugar, and leave to cool.

4 Comments

Filed under Christmas, Recipe, Sweet Things

{8} Pazinski Cukerančić

Today we have not just any old cookies, but cookies with status. They are called pazinski cukerančić (pronounced “paz-in-ski ts-ook-er-an-chick”) and they were declared to be part of the intangible cultural heritage of Croatia back in 2018.

Pazinski cukerančić hail from the city of Pazin on the Istrian peninsula in the north-west of Croatia. The second part of the name comes from the local word for “sugar”. They are traditionally leavened with just baker’s ammonia, which gives you a lot of lift and a light texture. However it does mean you get a really pungent whiff of ammonia when you open the oven door after baking so you do need to be prepared for that! And once they have been baked, they covered in brandy and coated in sugar. I’ve done that here, but rather than dipping I’ve used a brush to make sure the hot cookies are given a boozy coating.

I’d love to be able to say that I have loads of history about them. However writing this post has been a bit tricky, as I’ve not been able to find out much more than the fact these cookies exist, where they come from, they are made for special occasions including Christmas, and the recipe to make them! So if you do know more, please do share your insights!


What is undeniably special about these cookies is their branched shape. I think it makes them look very whimsical and they remind me of reindeer antlers. While they may look complex, they are easy. You simply need to roll a piece of dough to a long, thin sausage, then cut a little into either end, shape them into an arch, then open up the ends. Do the same with a few additional cuts along the length of the body, and hey presto you have the funky shapes that really do look amazing once they have been in the oven.


Once the cookies are baked, I mentioned they get a brandy-and-sugar treatment. Various recipes suggest that you do this by dipping the cookies in the booze and then in the sugar, but after a couple of them decide to spontaneously break apart and go for a little swim in the brandy, I decided another approach was needed. The easiest way is to put them on a wire rack with a tray underneath (the tray is important, for reasons which will become apparent!). Then dip a pastry brush into some brandy, and coat a part of a hot cookie. Then sprinkle it immediately with some granulated sugar, and it will stick to the surface. If you cover the whole cookie in brandy, then do the sugar, the brandy evaporates and the sugar falls off. It sounds fussy, but actually if you’ve got one hand with the brush and the other for sprinkling, it’s quite easy. And all that sugar that falls off the cookies will collect in the tray, and won’t fall all over the worktop and end up on the floor!

One fun detail I was pleased to see was that in taking my pictures I ended up not just with a reindeer antler, but what looks to me like a little deer in profile – rather sweet, yes?

To make Pazinski Cukerančić (makes around 25)

For the dough

• 200g plain flour
• 50g sugar
• 1/4 teaspoon salt
• 1/2 teaspoon baker’s ammonia
• zest of 1/2 lemon
• zest of 1/2 orange
• 1/2 teaspoon vanilla extract
• 1 egg, beaten
• 40ml milk

To finish

• 150ml brandy
• 200g caster sugar

1. Put the dry ingredients in a bowl and mix well. Add the lemon and orange zest and butter, and rub together.

2. Add the beaten egg and enough milk to form a dough. It should not be sticky so add more flour if needed. Wrap in cling film and chill for an hour or overnight.

3. Preheat the oven to 170°C (340°F). Line two baking sheets with greaseproof paper.

4. Take pieces of the dough, the size of a small walnut.  Roll them to a long sausage, around 15cm, then transfer to the baking sheet. Form into an arc, then use a pastry cutter or knife to make incisions at either end, and open up the shape. Make two more cuts along the length of the dough, and open them up too.

5. Bake for around 20 minutes until golden, turning half-way to get an even colour. Watch out for ammonia fumes when you open the oven door!

6. When done, take each cookie in turn. While still hot, put a cookie on a wire rack over a tray. Brush part of the cookie with brandy and immediately sprinkle with granulated sugar. Cover the whole cookie, then repeat until all the cookies are done. If they do get too cool, you can pop them back in the oven for a minute to make them hot again. Once they are all sugared, leave to cool completely until the sugar is dry.

1 Comment

Filed under Christmas, Recipe, Sweet Things

{7} Bruttiboni

Sometimes I am all for making something that looks neat and precise, and I get a certain pride when each cookie in a batch ends up looking identical. The most recent case in point was my checkerboard cookies.

However, today we’re going to the opposite end of the scale with these little guys. They’re from Italy and they’re called bruttiboni. The name roughly means “ugly-good” because they look as they look, but the are utterly delicious.

As with many Italian celebratory cookies, their precise origin is not clear. Today they are typical of the city of Prato in Tuscany, and they are also known as brutti ma buoni (“ugly but good”) or the more poetic-sounding mandorlati di san clemente. They are delicious little cookies made from meringue and hazelnuts.


To make them, you start with a simple meringue mixture, which I flavoured with some vanilla and a little hint of cinnamon. I don’t know if the spice addition is tradition, but I think it works well with the flavour of the nuts. Then you fold in ground, toasted almonds and hazelnuts – you can grind them to a fine powder, or leave a few more chunky bits if you prefer a bit more texture. And then…you do something plain weird. You put the whole bowl over a pan of barely simmering water, and then stir it gently. This makes the mixture somewhat looser, and all I can think that this does is to cook the meringue mixture in a similar way to making Swiss meringue. I’ve never come across this technique before, and in fact, not every recipe that I saw for bruttiboni thought this was necessary. One recipe even suggested making a Swiss meringue and just adding nuts. But I’m all for experimentation so I decided to give this strange approach a go.

From what I could tell, this extra step makes the mixture both a little softer and more stable, as once I had done it, the batter certainly seemed to keep its volume. I think it might also have impacted on the texture – these really are nothing like the miniature meringues I had been expecting – there was no brittle exterior and or marshmallow centre. They are more like the sort of thing I would expect from a “traditional” cookie made with flour and butter, so there is clearly some kind of magic at play here. But they do have a crisper outside and a softer middle. And they are, indeed, absolutely delicious!

To make Bruttiboni (makes around 24)

• 125g ground almonds
• 125g skinned hazelnuts
• 3 large egg whites
• pinch of salt
• 140g white caster sugar
• 1/2 teaspoon vanilla extract
• 1/4 teaspoon ground cinnamon

1. Start by toasting the nuts. Preheat the oven to 150°C (300°F). If you are using whole nuts, ground them in a food processor. They can be fine or you can leave chunks for texture. Spread the ground nuts on a baking sheet lined with greaseproof paper, and until the nuts are golden and fragrant (tip: I put them in for 5 minutes with the timer on; check them, then keep doing them in 2 minute intervals, in each case using the timer to make sure they don’t burn). When done, remove them from the oven and allow to cool.

2.When you’re ready to make the cookies, start by preheating the oven to 170°C (340°F). Line two baking sheets with greaseproof paper. Also put a saucepan of water on the stove over a medium heat.

3. Now make the meringue. Get a heatproof bowl. Add the egg whites and salt. Whisk to the soft peaks stage. Now add the sugar, a spoonful at a time, mixing well after each addition, until you have a stiff meringue. Fold in the vanilla and ground cinnamon. Finally fold in the cooled nuts.

4. Now put the bowl over the pan of water – it should be barely simmering. Gently stir the mixture with a spatula for 10 minutes. It will become slightly darker and slightly more runny by the end, but don’t expect to see massive changes.

5. Next, remove the bowl from the heat. Take tablespoons of the mixture and put them on the prepared baking sheet. The neatest way to do this is with an ice-cream scoop, but spoons work just as well. Just don’t expect them to be too neat or too regular!

6. Bake the cookies for around 25 minutes until golden, turning half-way to get an even colour. When done, remove from the oven and leave to cool on a wire rack. The cookies will become firmer as they cool.

1 Comment

Filed under Christmas, Recipe, Sweet Things

{6} Schwarz-Weiß-Gebäck

Today’s post is one that I’ve been in a bit of a muddle as to what to call it, as it seems to span borders. In German these cookies are called Schwarz-Weiß-Gebäck (black-white-cookies) but they also pop up in the Czech  tradition of vánoční cukrovi (Christmas sweets), which involves making lots and lots of cookies on the off chance you get visitors. And those Czechs have a name that just trips off the tongue…the very simple linecké dvoubarevné těsto, which as far as I can make out means Linzer two-coloured dough.

On the one hand, these cookies are easy – it is a simple rich butter dough which is quick to prepare. You just make one big batch, split in two, and colour one portion with some cocoa powder. So far, so easy. But the fun bit is when you have to combine the two doughs into all manner of different shapes and patterns. If we’re staying with the Czech terminology, you’ve got the choice of chessboards (šachovnice), pinwheels, (závitky) or salami (salam) – this last one is for those that don’t have a lot of time, or a good way to use up the scraps after you’ve made the intricate shapes!


I have something of a soft spot for these cookies, and I remember making them when I was very young. Or perhaps I just remember them being made while I watched? I’ll admit my memories of being a young child are not exactly crystal-sharp these days. But they do have a definite retro charm to them – they look striking and intricate, but this is nothing to do with layers of icing or complicated decorative techniques. And they also taste delicious – slightly sweet and buttery with vanilla and chocolate. Getting them looking good is just down to someone taking the time and having the patience to prepare everything very, very precisely.


While these might look complex, don’t be intimidated. The dough is done in about 5 minutes, and the design just needs time. Put the radio on and list to carols, a play or one of those overviews of the year that we’re about to finish, and it’s a great little job to take your mind off things. The chess pattern takes the longest, but all you are really doing is cutting strips of each dough which have the same width and height, and then building an alternating pattern. It’s not unlike playing with those number blocks we used to have in school for counting! The spiral is the easier option, as you just need to get two pieces of dough on top of each other and then roll it up like a small carpet.

Another approach which I’ve seen but not tried is to roll the dough as for plain cookies, then use smaller cutters to cut out shapes – so you can cut out a large dark star and a large plain star, then use a small circle cutter to swap the centres of each to get the contrast. And of course, when you have all the scraps left over, you just gather then up and make a marbled salami cookie – tastes as good as the rest, and an easy one to do with small children.


I was also very pleased with how these cookies turned out. They are cut just half a centimeter thick, and as there is no baking powder in them, they don’t spread or change their shape. So they are very thin, very crisp and I think really quite elegant. I think they look a little bit like the sorts of fancy cookies you see in a chocolatier or a patisserie wrapped in film with a little golden bow. And who knew that all you need to achieve the same thing at home is just patience, patience and more patience?

To make Schwarz-Weiß cookies (makes around 40-50)

For the plain dough

• 175g butter
• 110g caster sugar
• 1 teaspoon vanilla extract
• 1/4 teaspoon salt
• 1 egg yolk (reserve the egg white to assemble the cookies)
• 250g plain flour
• cold water

For the dark dough

• 10g cocoa powder

1. Put the butter, sugar, vanilla and salt in a bowl and beat until well combined. Add the egg yolk and mix well (keep the egg white for assembling the cookies). Add the flour until the mixture forms a crumbly dough. Add just enough cold water to get it to come together to make a firm dough (be careful with the water – add just half a teaspoon at a time – you really don’t need much).

2. Once you have your dough, divide it in two (ideally weigh it to be precise). Wrap one part in cling film and put in the fridge. Put the other half in a bowl, add the cocoa powder, and mix well until you have an even colour. Wrap the dark dough in cling film and put in the fridge. Leave both doughs to chill for at least an hour.

3. Time to make some patterns! Remove the dough from the fridge, and work it briefly so that it becomes malleable.

3a. Checked cookies – the time-consuming method. Roll out each piece of dough to 1 cm thickness (keep them separate). Now use a sharp knife to slice them into 1 cm strips. Once you have done the dark and light dough, start to build up the pattern. Take the first colour, the other, and alternate to make the first layer, brushing the pieces of dough with some beaten egg white to ensure they stick properly. Now build the second layer, being sure to alternate the colour (so if you started layer one with the light dough, start layer two with the dark). Repeat for the third later. Press everything to ensure you’ve got straight sides (or as straight as possible without squeezing too hard and ruining the pattern you’ve made!). Wrap the log in cling film and chill for at least 30 minutes, or overnight.

3b. Spiral cookies – the easier method. Roll the light dough to a rectangle of 20cm x 15cm and 1/2 cm thick. Do the same with the dark dough. Brush the light rectangle with lightly beaten egg white, and place the dark on top. Press gently. Brush the top with more lightly beaten egg white. Now roll it up from the long side like a Swiss roll. The dough might look like it is cracking initially, but don’t worry – just keep rolling it up tightly, then when you are done, roll it back and forward on the worktop to get as good a perfect cylinder as you can. Wrap it in cling film and chill for at least 30 minutes, or overnight.

3c. Marble cookies – the easiest method. Break the light and dark dough into chunks, mix them up and press together to create a marbled effect. You can fold and roll it as much as you want, but the more you play with the dough, the less pronounced the different colours will be. Form it into a fat sausage shape, wrap in cling film and chill for at least 30 minutes, or overnight.

4. Baking time. Preheat the oven to 170C (340F) and line a baking sheet with greaseproof paper.

5. Take your cookie log from the fridge. Make 1/2 cm marks along it, then use a very sharp knife to cut clean slices. Like magic, your pattern should appear! Lay them on the baking sheet, and when the sheet is full, pop it in the fridge for 2 minutes.

6. Take the baking sheet from the fridge and put straight into the oven. Bake for around 10 minutes, but watch them as they will burn easily. I found the best way is to bake them for 5 minutes, then turn the tray round to get even colouring. Set the timer for 5 minutes, and keep a close eye on them – as the cookies are thin, those at the edges may bake more quickly than those in the centre. If they need more baking, leave them in for another minute, then check again – remove any which have a slight golden colour, then pop the rest back in for another miniute. I know this sounds fussy, but when you think of all the work that went into making them, you really don’t want to burn them!

2 Comments

Filed under Christmas, Recipe, Sweet Things, Uncategorized

{5} Canistrelli

One place that has firmly stood outside of my past festive baking efforts has been France. I’ve only featured one recipe – chocolate, fruit and nut mendiants that form part of the tradition of the 13 desserts in Provence (calm down – this is not 13 actual separate miniature desserts, it includes items like fresh fruit and nuts).  There are, of course, lots and lots of delicious things that the French enjoy at Christmas, including the famous bûche de noël (perhaps a bit too much work for me unless I am making it for a very, very special occasion) and various sweet treats such as candied chestnuts, and the various buttery biscuits that comprise the brederle of Alsace. But I’ve just not found that many French cookies to feature.

Well, today we break that trend. I’ve made canistrelli cookies from Corsica which are made with white wine and flavoured with anise, and they can also include almonds or chestnut flour. I’m not entirely sure that these are a Christmas cookie per se, as they are eaten all year round on their home turf, but I like the recipe, it is a contrast to some of the other things I’m making this year, and they also looked quite easy. Sometimes I like to make things that are complex, and sometimes I’m lazy. And look at the pictures? Those diamond shapes form giant snowflakes!


I don’t know if it is a sign of age, but I increasingly appreciate the flavour of anise. I was not such a fan when I was younger, but I find it a nice alternative to gingerbread spices, chocolate or citrus. It still seems festive but doesn’t have the ubiquity of other flavours of the season. Perhaps it is a sign of an increasingly sophisticated palate, or perhaps it is no longer drinking dodgy liqueurs like sambuca with wild abandon? We can only surmise.

Anyway, to our guest cookies. Canistrelli are reminiscent of Italian biscotti in the sense they are a crispy and crunchy cookie but they are much easier to make than their Italian cousins. No need to roll a log, bake it, slice it and bake it again. You just mix up a quick dough, shape it and bake it. Then just accept that as the dough is quite soft, they will inevitably have a somewhat rustic look, and if that worries you, drink some of the same wine you used to make the cookies and you’ll feel better.


When making these cookies, the method seemed very familiar to me – it is essentially a recipe for making little scones (of “biscuits” if you’re American) as you’re pouring liquid into the dry ingredients, then working quickly with a fairly soft mixture. However you’re not looking for a soft, pillow-like bake which is still fluffy on the inside. You bake them for a longer time so that they turn golden and start to dry out. As you can see, I did not worry too much about the shaping beyond getting pretty rough approximation of a diamond shape using a fluted cutter (actually a Play-Doh tool that I had washed quite intensively!). You can also do this with a knife, and go for any shape you want – squares, longer logs, or even circles if you want to go for the looks-like-a-scone-but-is-rock-hard approach and indulge in some festive trickery. You will just have to adapt the baking time so that they get enough time to properly dry out and harden in the oven.


If you’re keen on some anise action, I can share a little tip. I ended up making these twice, as they vanished pretty quickly. The first batch used just anise liqueur, and for the second I also added some crushed aniseed. The seeds really help give a stronger flavour, especially after you’ve stored them for a few days, whereas the liqueur on its own is a much milder affair.

But if that’s not your thing you can play around by adding lemon or orange zest, roughly chopped almonds or raisins. I think anything that you could imagine being grown and harvested on a warm, sunny island in the middle of the sea would work well. You could even add some chocolate chips if that’s your thing. You’re starting to stray rather far from the Corsican flavours but hey, things move on, and even the most traditional of recipes were new and experimental once upon a time!

For the wine, you want a dry white. Canistrelli should not be very sweet, and in any event they are sprinkled with sugar. However if you don’t want to use wine, you can use water or a mixture of fruit juice and water, which would make them a little more child-friendly. I mean, if you’re baking with kids, you want to recipe to be quick and easy to counter short attention spans, but you probably don’t want to be mixing wine in there. Of course, the alcohol will evaporate off during baking, so you don’t need to worry about serving these to little ones even if they didn’t help to make them.

Oh, and that comment I made about the bûche de noël? It might be a lot of work, but I am planning to make one this year, flavoured with pear and chestnut. But it will be at Christmas, hopefully by the time that I’ve done all 12 festive bakes, so it won’t be on here. Sorry!

To make canistrelli (makes around 30)

For the dough

• 275g plain flour
• 100g caster sugar
• 1 teaspoon baking powder
• 1/4 teaspoon salt
• 60ml olive oil (not extra-virgin)
• 2 tablespoons anise-flavoured liqueur e.g. pastis, ouzo
• 1/2 teaspoon vanilla extract
• 1/2 teaspoon crushed aniseed or pinch of ground star anis (optional)
• 5 tablespoons white wine

To decorate

• water
• granulated sugar

1. Preheat the oven to 175°C (350°F). Line a baking sheet with greaseproof paper.

2. Put the flour, sugar and baking powder in a large bowl and mix well.

3. In a separate bowl combine the salt, oil, liqueur, vanilla, aniseed/star anise and three tablespoons of white wine. Pour into the dry ingredients and mix with a fork. Add more wine, a tablespoon at a time, until you get a soft but workable dough rather like when making scones (aka “biscuits”).

4. Transfer the mixture to a workstop dusted with flour. Roll out or press to around 1 cm (1/2 inch) thick.

5. Cut out the cookies – use a fluted pastry wheel or a knife to cut strips about 2cm wide, then cut diagonally into diamonds. Don’t worry too much about getting them perfect as you won’t manage!

6. Transfer each piece of dough to the prepared baking sheets, leaving some space for them to expand during baking. Brush or mist with water and sprinkle with granulated sugar.

7. Bake the cookies for around 25-30 minutes until golden, turning half-way to get an even colour if needed. Watch them closely – you might need to reduce the heat by 10 degrees if they are colouring too fast. When done, remove from the oven and allow to cool. Store in an airtight container.

2 Comments

Filed under Christmas, Recipe, Sweet Things

{4} Kletzenbrot

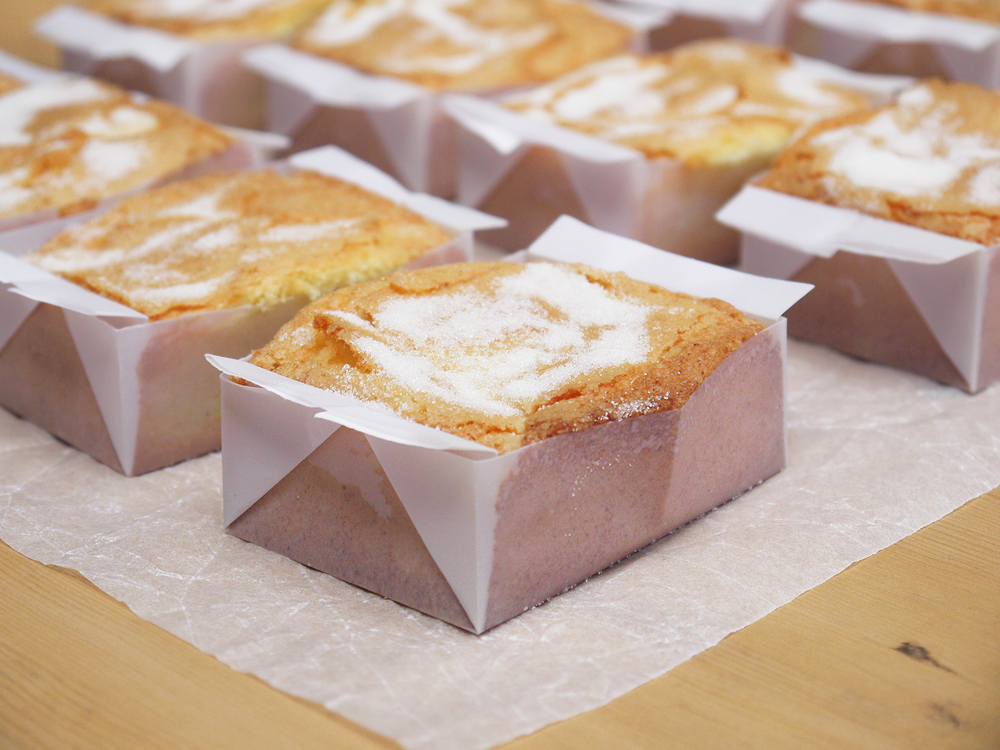
Oh, festive breads. I’ve got a thing about them. You see, we’ve got a bit of a history, and frankly it’s not exactly glorious. To be frank, my success in the past can be described as “mixed” and that’s only if we’re being very charitable.

I can make a decent Italian panettone without any problems, but that’s pretty easy. You just form the dough it into a ball and let it rise. But where I start to struggle is with those loaves that need to be elaborately shaped. I do my best to make they look good, but then during the baking they seem to go crazy, and I struggle in making sure that they’re going to keep their shape after a spell in the oven. Last year I tried making a Dutch duivekater, which should look smooth and bronzed with intricate patterns cut into its surface after a spell in the oven. Well, my attempt ended up looking like something from a barbecue rather than a festive loaf fresh from the oven, with the various cut patterns just serving as new ways for the inside of the loaf to make a break for freedom. It did taste great (lightly sweetened, with lemon and cardamom if you’re curious), but it certainly wasn’t a winner in the looks department. It might feature in 12 Days of Baking one year, but it won’t be this year.

However, I’m not one to let a few past culinary wobbles put me off. Maybe it was just a case of trying a different approach? And this is how I came across a recipe for Kletzenbrot and knew I had to try it.


Kletzenbrot means “pear bread”. The name comes from Kletzen, the Austrian German word for pears. When I learned German back in school, we were taught it was die Birnie for a pear, but hey, different ways in different places, and they do it differently in Austria. Indeed, those crazy Austrians, it’s Schlagobers rather than Schlagsahne, and my personal favourite, Paradiser rather than Tomaten, as tomatoes are thought to resemble red apples of the sort that might have been found in the Garden of Eden. Cute, eh?

I’d describe this loaf as something with has more than a passing resemblance to British mince pies, but in the form of a loaf, and not as sweet. You start off by cooking dried pears until soft, then chop them up and mix them with other dried fruit, nuts and spices. I added a good glug of rum, and what do you know, the whole thing really does smell like Christmas in a bowl. That’s to be expected, as by this stage you’ve essentially made rustic mincemeat. Leave it to rest for a day, then the next day you make a rye dough using the water that the pears were soaked in, work in the fruit, and then pray, I mean pray that after shaping that the loaves will bake as intended. Mixing the dough and the fruit is pretty good fun, as it’s stick and really needs you to get in there with your hands to make sure it is all properly combined.

When looking at different recipes, some recipes suggested just shaping and baking, but I came across one that covered the loaf in a sheet of plain bread dough called a Bladl which seems to be a Bavarian/Austrian term for a leaf or a sheet (like paper). You just take a couple of handfuls of the dough before mixing into the fruit, roll it thin, enjoy the fun of trying to get a piece of not-very-stretchy rye dough to stick to your filling and end up looking vaguely neat. Helpfully the recipe makes two loaves, so you can try with one, make all your mistakes, then nail it on the second one. I think the Bladl step is worth doing – it provides protection for the filling, and it avoids one of my pet hates when baking with dried fruit, which are the over-baked raisins and sultanas peeking out the top, waiting to stab the top of your mouth when you eat them. The names does sound a bit like “bladder” which is good for a bit of cheap humour, but we can overlook that part.


I might be making this sound really easy, and making the fruit and the dough was simple. However the Bladl step actually ended up taking quite a bit of practice since this is a low gluten flour with limited desire to be flexible as compared with strong white flour. I rolled it out a couple of times and tried to lift but it kept breaking. Finally I realised that the way to do it was to roll out the Bladl, then dampen the surface of the shaped fruit loaf with water, then lift the loaf on top of the Bladl. Then it was quite easy (well, easy-ish) to gather the dough up the sides and tidy it up. Then flip it over and transfer back to the baking sheet. The key thing to keep in mind is not to completely envelope the filling. The yeast still has its thing to do, and it will rise a bit when it goes into the oven. If you’ve wrapped it tightly in the Bladl dough, you’ll get some big cracks and splits on the surface. If you’ve just done it on the top and sides, there is enough slack to enable to dough to rise and not look too unsightly. Remember you’re really only doing this to protect the interior, rather than worrying too much about it looking neat, and I can live with discrete cracks on the sides!

So having worked hard to make my Kletzenbrot, how does it taste?  I was actually really pleased with how it turned out. It’s a bit like fruitcake, but far less less sweet, and with a distinct savouriness from the rye bread component. The texture is dense, so it slices very neatly. It is delicious spread with butter (which has to be salted if you ask me) or otherwise eat it with cheese. I loved it with blue cheese, or with a nice sharp cheddar and a dash of chutney on top. If you’re feeling fancy, try to cut it into very thin slices and drying it out in the oven as some sort of very posh cracker for your festive cheeseboard. Traditionally Austrian? No idea. Delicious? For sure!

To make Kletzenbrot (makes 2 loaves)

For the fruit mixture

• 250g dried pears
• 600ml water
• 100g prunes
• 100g sultanas
• 200g dried figs
• 30g candied orange peel
• 30g candied lemon peel
• 2 teaspoons ground cinnamon
• 1/2 teaspoon ground nutmeg
• 1/4 teaspoon ground cloves
• 60ml rum dark rum
• 125ml apple juice
• 75g whole hazelnuts
• 75g chopped walnuts

For the dough

• 450 g rye flour
• 2 teaspoons dried yeast
• 30 g soft brown sugar
• 2 tablespoons vegetable oil
• 1 teaspoon salt
• 1 teaspoon mixed spice or ground cinnamon

1. Put the dried pears in a saucepan with 600ml cold water. Slowly bring to the boil, the cook gently until the pears are tender (10-15 minutes). Drain and reserve the water. Leave the pears to cool. Keep the water covered in the fridge to use in the bread dough.

2. Chop the cooled pears, prunes and figs into chunks, and finely chop the candied peel. Put everything into a bowl and add the sultanas, spices, nuts, rum and apple juice. Mix well, cover and leave to rest overnight.

3. The next day, make the dough. Put the flour, yeast, sugar, oil and spice in a bowl. Heat the water from soaking the pears in the microwave until lukewarm, and add enough to make a dough. Don’t add it all in one go to avoid the dough being too sticky, but if you use it all and the dough is too dry, just add more water. Knead the dough for 10 minutes, then cover and leave in a warm place to rest for 2 hours. I made the dough, then took the nipper to football and shopping, so it had nearer 3 hours and seemed all the better for it.

4. Time to make the loaves. Remove 2 handfuls of the dough for the Bladl covering. Add the fruit mixture to the remaining dough and mix well with your hands. It’s going to be a very moist mixture, so be prepared for some mess! Then the mixture onto a generously-floured worktop and form the dough into 2 loaves approximately 10 x 20 cm (just shy of 4 x 8 inches).

5. Preheat the oven to 180°C (355°F). Line a baking sheet with greaseproof paper and rub lightly with vegetable oil.

6. Now make the Bladl. Take one piece of the reserved dough and roll it out thinly until large enough to cover the top and sides of a loaf. Spray or brush the loaf with water, then lift the loaf onto the Bladl. Now bring the dough up the sides of the loaf and trim off any excess, leaving the base exposed. Flip the loaf over, exposed side facing down, and transfer to the baking sheet. Repeat with the second loaf.

7. Prick the surface of the loaves with a fork (be as neat or crazy as you like), then brush them with milk.

8. Bake the Kletzenbrote for around 40 minutes. Keep an eye on them – if they look like they are getting too dark, cover loosely with aluminum foil. Tap them to test if they are done – they should sound hollow. Remove from the oven and allow to cool completely before slicing.

1 Comment

Filed under Christmas, Recipe, Sweet Things