Tag Archives: cake

{3} Mantecadas de Astorga

For the third instalment of our festive baking frenzy I decided to take things a little easier and go with a fairly straightforward recipe. These little treats are called Mantecadas de Astorga, and they are exactly what they look like – very simple but very delicious little cakes.


Truth be told, they are similar to sponge cakes or pound cake. While modern recipes suggest adding cinnamon, citrus zest of even just some vanilla, traditionally there is no additional flavouring. Does that mean they are not interesting? Well, they’re more interesting than our modern tastes might lead us to think.

A lot of Spanish baking uses olive oil or lard. Think of the similarly-named mantecados which are crumbly shortbread cookies where lard is essential to get the right texture. Seen against these other recipes, the use of butter was a differentiator. Perhaps a sign of a luxurious good when they were first created. Today we might see butter cookies are being rather plain, but there was a time when enjoying a sweet, buttery treat at Christmas would have been something quite special.

Of course, having just said all that, there are plenty of recipes for these case that use either just lard or a combination of lard and butter, but I’ve opted for the dairy-loving approach here as I don’t use lard in my baking.


These cakes hail originally from the Spanish city of Astorga in the north-west of the country near the border with Portugal. And if you are being correct, they should to be baked in little paper cases called cajillas. And to get authentic cajillas you need to take pieces of paper and carefully fold them so that when the cake is unwrapped we see the shape of a cross left on the paper. Of course I tried making them. I first gave this a go with some greaseproof paper but it didn’t work as the folds kept unravelling. The lesson: you need to use plain paper and ensure you have oodles of patience. And if you doubt the seriousness with which these paper cases are taken in the city of Astorga, there is even a mural in the old town to the ladies who specialise in making them.

While Mantecadas de Astorga are traditionally made in a small square or rectangle shape, it is not going to change the flavour if you use a round pan, but I do quite like the square shape as they look just a little touch more special. I’ve previously bought specialist square cupcake cases to use in a muffin tray with square holes, but then discovered that you can just use normal round cases, press them down, and they’ll fit the square shape. If you’re not folding your own cases, that is…


I did wonder whether these cakes would be worth making. No spice, no citrus, no chocolate, no nuts. It turns out they are really nice. Simple, but nice. Perfect with tea or coffee. Rich, buttery and sweet, but also very light. That said, they’re probably not a viable diet option (they do contain all that glorious butter after all) but they do seem light. Sort of in the way that a croissant is light, and we know we ought not to consume too many of those.


So I encourage you to try these – they’re easy to make, you probably have the ingredients already, and you get all the thrill of making your own paper cases. If you are so minded, I followed this online tutorial. It is in Spanish, but easy to follow, and after the first few you get into the knack of it. Soon you’ll be giving the mural ladies a run for their money!

To make Mantacadas de Astorga (makes 12-16, depending on size)

• 125g butter
• 125g sugar
• 3 medium eggs
• 125g self-raising flour
• granulated sugar, to finish

1. Prepare your cake cases. Either make the paper moulds by hand, or line a muffin tin with paper cases.

2. Preheat the oven to 180°C (355°F).

3. Put the butter into a bowl. Beat until very soft. Add the sugar and beat until light and fluffy. Add the eggs one at a time, beating well after each addition. Finally fold in the flour.

4. Divide the mixture between the prepared cake cases. Even it out with a spoon (it won’t be perfectly flat). Sprinkle generously with granulated sugar. Bake for 18-20 minutes until the cakes are risen and the tops are a rich golden brown.

Leave a comment

Filed under Christmas, Recipe, Sweet Things

{12} Vasilopita Cake

Happy New Year! We’ve made it out of 2020, and we’ve also reached the last instalment of our 12 Festive Bakes for the year. Or more accurately last year.

I normally try to finish everything before Christmas Day so that all the goodies are on offer over the festive holiday, ready to hand to all those guests who will be popping in. Except that imperative was not there this year, and we’re working our way through the various baked goods. Another thing that is different this year is that I’ve run a little later, and as the final bake was due to coincide with New Year, I decided to make something that celebrates this time of year. Well, I found out that in Greece it is traditional to eat a vasilopita. So I made one.

The name vasilopita means “St Basil’s pie”. It can be no coincidence that the Feast of St Basil is on 1 January, and he happens to be the patron saint of wishes and blessings. Very fitting for the time of renewal, new hopes and good intentions. The vasilopita can come in one of two forms. It can either be an enriched yeasted bread, or a cake. As I was making this late on New Year’s Eve, I decided to go the cake version as I thought it would be quicker to make. Truth be told, on that day I had already spent many, many hours outside in the park, and all that fresh air and very cold temperatures left me ready for bed quite early. Those New Year’s Eve celebrations where we partied until the wee hours seem but a distant memory these days…


There is also a lovely ritual that goes with these cakes. A coin is hidden in the bread or included in the cake when it is baked. When the vasilopita is served, it is cut into pieces and offered to guests in turn, from the oldest to the youngest. The one that gets the coin will enjoy good luck in the year to come. This is presumably on the basis that they’ve already enjoyed some good luck by neither ingesting the coin nor breaking a tooth on it? Anyway, I think this is a fun thing to do, but make sure you have a clean coin, wash it thoroughly in hot, soapy water, and wrap it tightly in tin foil. Safety first.

Vasilopita cakes are usually smooth, and decorated with a dusting of icing sugar. Often the year will be written in numebrs on top, either using a stencil, in icing, or perhaps using nuts. However, I decided that I would just dust with icing, as this was a good chance to use my intricate Dutch cake mould, which is shaped like a Zeeuwse Knoop. This is traditional symbol from the Zeeland region. It has twelve points on it rather like a clock, and that felt like enough of a link to New Year’s Eve to justify using it.


The traditional flavour in a vasilopita cake is orange zest, which I’ve used here. Note that I was quite heavy-handed and used the zest of two whole oranges, plus a bit of lemon zest. I loved the result, but I love citrus and this cake did pack a punch. If you want a more delicate flavour, use just one orange.

I also saw a couple of recipes that suggested using mahleb (the ground pits of the St Lucie cherry, which has a bitter-almond flavour) and ground mastic resin which is popular in Greek sweets and baking. The flavour and aroma of mastic are hard to describe, but I think it’s reminiscent of something light, fresh and resinous, with a touch of pine about it. So I added both of those since I happened to have them in the spice drawer. Neither dominates, but they add to the overall result – an aromatic, zesty cake.

After all those rich spices and chocolate over the last couple of weeks, this made a very pleasant change. We enjoyed it with breakfast on New Year’s Day, then set about taking down the decorations. We always do this on New Year’s Day, and it feels right. The festive period is drawing to a close, the house returns to a calmer state, and we get to marvel at how spacious and airy our home suddenly feels. Yes, in lockdown times it feels a little sad to be putting away all the sparkle and wrap all the tree ornaments in their protective paper, but I’m hopeful that we will be unwrapping them again in December 2021 surrounded by our nearest and dearest.

I mentioned that the vasilopita can be both a bread and cake. I think I’ll also have a go at the bread version. I’ve seen a couple of recipes, and it seems similar to an Italian panettone, but without the dried fruit and the inclusion of orange zest and mastic. If it’s good, perhaps it will make the 2021 edition of the Twelve Bakes of Christmas?

To make a Vasilopita Cake:

For the cake

• 150g butter
• 250g white caster sugar
• zest of 1 or 2 oranges
• zest of 1/2 lemon
• 1 teaspoon mahleb (optional)
• 1/2 teaspoon ground mastic resin (optional)
• 1/2 teaspoon vanilla extract
• 3 large eggs
• 225g self-raising flour
• 1/2 teaspoon baking powder

• 50ml whole milk
• 75ml yoghurt
• 2 tablespoons orange juice
• 25g ground almonds
• 25g flaked almonds, roughly crushed

For the glaze

• 100g icing sugar
• 2 tablespoons orange juice

To finish

• icing sugar, to dust

1. Prepare a 20cm (8 inch) diameter cake pan. Either line one with greaseproof paper, or if using a fancy mould, grease it generously with butter, then dust it with plain flour.

2. Put the butter in a large bowl, and beat until fluffy. Add the sugar and beat until smooth, then add the flavourings (orange zest, lemon zest, mahleb, mastica and vanilla extract). Mix well.

3. Add the eggs, one at a time, and beat until smooth. Add a spoonful of flour with each egg to prevent the mixture from splitting.

4. Mix the remaining flour and the baking powder in a separate bowl. Combine the milk and the yoghurt in another bowl. Add one-third of the remaining flour, and mix; then half the milk mixture; then next third of the flour; the rest of the milk mixture; then the last of the flour. Finally fold in the orange juice, ground almonds and flaked almonds

5. Transfer the mixture to the prepared baking tin. If you’re using a fancy mould, spoon it gently so that you do not disturb the flour layer lining the mould.

6. Bake the cake for 1-1 1/2 hours until an inserted skewer comes out clean. Cover with tin foil after 45 minutes to prevent the cake from getting too dark. Remove from the oven and allow to cool completely.

7. Make the glaze. Mix the icing sugar and orange juice until smooth, then cover the top and sides of the cake. Leave to dry.

8. Just before serving, dust the cake with icing sugar.


Leave a comment

Filed under Cake of the Week, Christmas, Recipe, Sweet Things

{11} Italian Rainbow Cookies

My previous festive baking post offered simplicity, so it was only inevitable that today we’d go back to complexity. And as it is New Year’s Eve, albeit the low-cal and less exciting version, it is only fitting that we do something that is colourful and has a bit of panache to it.

Earlier in this year’s baking extravaganza I posted some cookies from the Philippines and mused that I had not made many recipes from outside of the gingerbread-spice world of Western Europe. Then I got a suggestion from a helpful reader, Jamie, who suggested I have a go at Italian Rainbow Cookies. In spite of the name, they are a staple of American Christmas baking, particularly amoung the Italian-American community, so would tick the box of stepping beyond Europe for holiday inspiration. So…I did just that. I did actually have another recipe in mind for the No 11 slot this year, but for better or worse it has been bumped. Maybe it will make the cut for the 2021 edition?

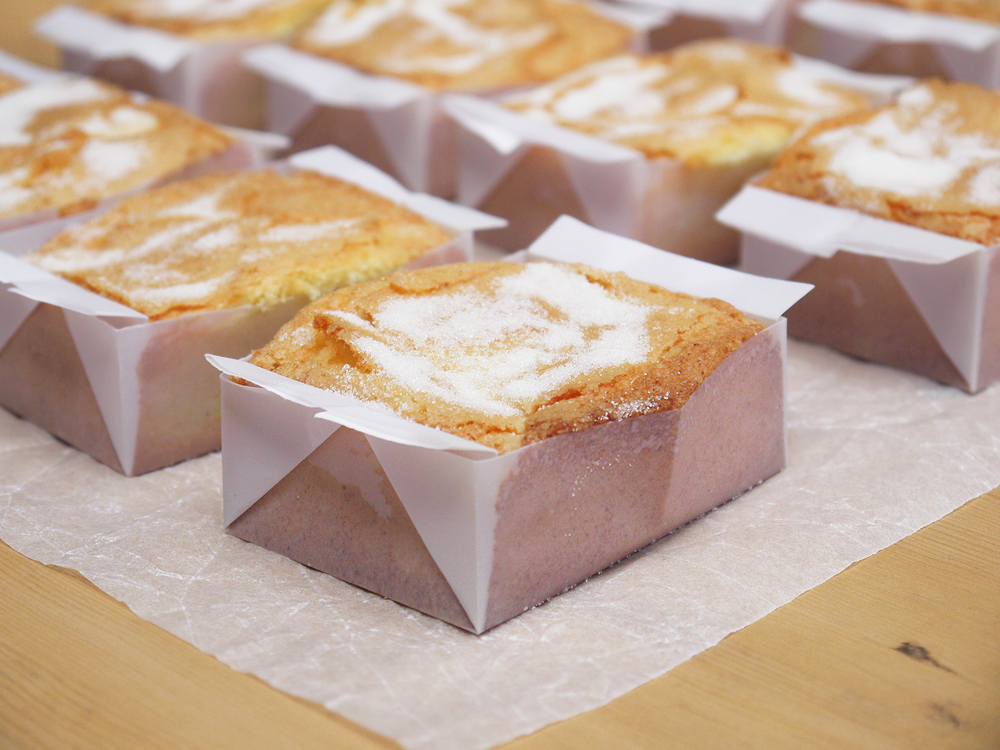
Truth be told, I’ve seen these before, but I’ve been put off from making them as they look complicated. However what with lockdowns and the like, I’ve got plenty of time on my hands (i.e. my excuse has gone), so we were all set for some lurid rainbow cookies. All fabulous seven layers of them. And here is what I made!


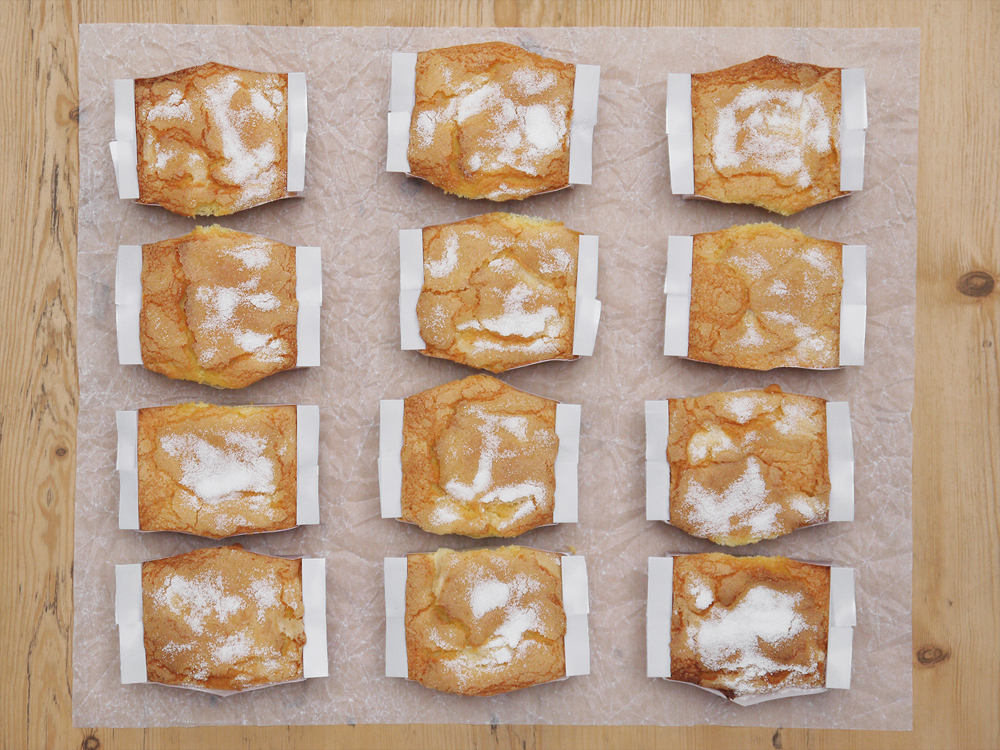
I’m beyond thrilled with how they worked out. Seeing them all laid out neatly like this I have the vague feeling that I’ve made some sort of edible interactive Tetris set. I originally arranged them in neat lines all in the same way but it looked too orderly. Hence the more random arrangement. It’s chaos within order.

These little guys are also called Seven-Layer Cookies, and it’s easy to see why. There are three layers of almond-flavoured sponge, sandwiched together with jam, and then the top and bottom have a layer of dark chocolate. They are made as one giant sheet, then cut into individual bite-sized cubes.

I find them both cute and oddly extravagant. But are they Italian? Are they a rainbow? And are they really cookies? The last two are easy. You could go with any colour you wanted, but the red/white/green tricolore seems to be pretty ubiquitous. The tricky thing is to get more of a rainbow, you need more layers, which makes them more complex, and the size would become impractical. I also think it is wise to go with colours that could be natural as opposed to blues and purples. So they’re not a real rainbow, but I think the three colours do work well together.

Are they cookies? Well, not in the sense of something that is made from dough that has been rolled out and shaped or cut. But neither are they cookies made from balls of dough, or drops of batter. While the term “cookie” is pretty flexible, these guys are really are more like little cakes. The closest I can think of are petit fours, those fancy little bite-sized French cakes you might get with afternoon tea or after a special dinner.

So, they’re at least Italian, right? This is where things get more mixed. Some think they’re not Italian at all, while others think they must have at least a tenuous link to the old country. Other sources suggest the recipe was developed within the Jewish community that lived alongside Italians in American cities. Whatever the true origin, they have acquired the “Italian” moniker and they seem to be a key part of an Italian nonna’s festive baking repertoire, and given that it’s probably best not to argue.

But where to start with baking them? Jaime pointed me in the direction of the Smitten Kitchen recipe from Deb Perelman. I’ve followed some of Deb’s recipes in the past, and been pleased with the results. In a pretty crowded online recipe world, and with what seem like dozens of YouTube videos of those nonnas making these things, I decided to go with a recipe that I was pretty confident would work. She also writes with candour about how she found the process and offers tips for getting it right, which is something I always like to see. A tricky recipe being described as “easy” or “a breeze” does no service to the reader and it underplays the work of the baker too.

I planned to do this over two days, as they baked cake part needs to chill for at least 8 hours with a weight on it. I think the idea is that this helps to ensure the cookies are perfectly flat, the layers bond to each other, and I think it helps with the texture too. I figured I could do all the baking and assembly one day, then do the chocolate and the chopping the next. I recommend doing it in this way as it helps keep you sane. The kitchen does end up covered in a fair few bowls coated in many different colours.

But was the whole process a breeze? I did have one major wobble. Once I’d done the baking, assembling and chilling, I removed the tray from the fridge to start doing the chocolate layers. I trimmed the sides, partly to neaten it all up, and partly to have some offcuts to eat. With a nice sharp knife it was a dream to cut. Then I was frankly horrified upon doing a sneaky taste – the cakes seems dry and hard. I panicked. Had they been over-baked? Had I wasted my time? In fact, they were just cold. As they came up to temperature, they softened and that delicious jammy almond flavour emerged. So yeah, just note that this happens!

The chocolate layer was the bit that worried me. You need to do the top and the bottom. Now, I can temper chocolate, but it takes time and patience. Plus it is about 1 degree (centigrade) outside, so our old London brick house is freezing which makes it all the more tricky to get chocolate to a precise temperature – not too hot, not too cold. This was a problem that the Smitten Kitchen recipe had too. Well, it turns out the answer was actually mercifully simple – you just add a little unsalted butter to the melted chocolate. No tempering, and this also means the chocolate has a bit of “give” so that it becomes easier to cut.


And what’s the verdict? Well this comes in two parts. How much work were they, and how do they taste.

In terms of effort, they are a lot less work than I thought. I probably spent one hour doing all the baking, and that was alongside keeping an eye on my son, who also tried to help (and promptly made a mess). Then maybe 20 minutes assembling it all before leaving to chill overnight. The chocolate was the job for the second day. Splitting it up in this way makes it quite easy. Manageable mess, and you don’t end up going doolally from it all. Italian Rainbow Cookies are also quite fun to make them if you’re slightly obsessive about precision in your baking. For indeed, my much-treasured Japanese steel metal ruler helped get those sharp lines and equal cuts.

In terms of how they taste, I love them. They have an intense almond flavour and lovely fruitiness from the jam (which I boosted with a little amaretto and some cherry liqueur). This is all balanced by the dark chocolate. I’d even go so far as to say that they taste much better than they look. While I’m all up for a bit of whimsy in the baking, the red/white/green colour scheme is a touch lurid for my tastes. But then, it is iconic, and I wonder if anything else really would do? Plus, where else are you going to find cookies that can symbolise the flags of Italy, Hungary, Ghana and Mali depending on how you place them? They are certainly some of the most striking things I’ve ever made in terms of the looks department.

So there we have it – my efforts in accepting one reader’s challenge. I’ll wrap up by sharing a tip of my own for recipes like this one where you have to divide the batter and the jam into equal portions. Get some electric scales, and weigh your bowls before using them. This makes it really easy to work out by weight how much batter or jam should be in each portion. I happen to know my main mixing bowl is 580g. Believe me, it saves a lot of guessing, eyeballing and general culinary angst. And it does help get even layers when making something like Italian Rainbow Cookies where you want to be precise to show off just how fancy you can get with your baking.

To make Italian Rainbow Cookies (recipe from Smitten Kitchen, with some tweaks)

For the batter

• 4 large eggs, separated
• 200g white caster sugar
• 200g almond paste (see note)
• 285g unsalted butter
• 1 teaspoon almond extract
• 1/2 teaspoon vanilla extract
• 260g plain flour
• 1/2 teaspoon baking powder
• 1/2 teaspoon salt
• red food colouring
• green food colouring

To fill

• 1 x 340g jar apricot jam
• 4 tablespoons water or amaretto and cherry liqueur (I used Luxardo Maraschino)

To finish

• 200g dark chocolate
• 20g unsalted butter

1. Preheat the oven to 175°C (350°F). Prepare 3 sheets of greaseproof paper to fit a 33 x 23cm (13 x 9 inch) baking pan.

2. Put the egg whites into a large bowl. Beat until you have soft peaks, then add 50g of caster sugar, a tablespoon at a time, until it forms stiff peaks – it should look like a meringue.

3. In a separate bowl, grate the almond paste. Work with your hands so that it gets soft, then add the remaining 150g caster sugar and the butter. Beat until pale, fluffy and everything is combined. Add the yolks, almond extract and vanilla extract, and keep beating on high speed. If you can still see a lot of flecks of almond paste, keep beating to get it super-smooth. When done, fold in the flour, baking powder and salt and mix well.

4. Add half the meringue mixture to the other bowl, and fold in to lighten the batter. Then add the rest of the meringue mixture and fold that in.

5. Split the batter between 3 bowls. Add red food colouring to one, and green food colouring to another. Put the green batter into the fridge, and put the white batter to one side. Pour the red batter into the prepared baking tray, and spread as evenly as you can. Don’t worry if the batter does not seem very deep – it is supposed to be just under 1/2 cm (1/4 inch) deep.

6. Bake the red layer for around 10 minutes. It will still look a bit wet on top, but a cocktail stick should come out clean. You don’t want more than the lightest of browning at the edges. Remove from the oven, allow to cool for a couple of minutes, then transfer to a wire cooling rack.

7. Remove the green batter from the fridge to bring it up to temperature. Set aside. Now prepare the baking tray again, and bake the white layer. When that’s done, repeat for the green later.

8. While the cakes are cooling, prepare the jam. Put it into a saucepan, add 4 tablespoons or water or a mixture of amaretto and cherry liqueur, and bring to the boil. Pass through a sieve, and set aside to cool.

9. Once all the layers are completely cool, prepare a shopping board or tray by lining with a sheet of greaseproof paper. Flip the green layer onto the paper. Spread with half the cooled jam mixture, getting it as even as you can. Then flip the white layer onto the green layer, and spread with the rest of the jam. Finally, flip the red layer and place on top. Wrap the whole lot in cling film, place in the fridge, then put a heaving baking tray on top and add a few jars to weigh it all down. Leave to chill overnight.

10. Time to finish it off. Remove the tray from the fridge. Use a clean straight knife to trim the edges. You’ll notice that they seem quite firm and dry – this is normal.

11. Prepare the chocolate. Put 100g chocolate in a bowl, and microwave in 30 second bursts until it is melted. Add 10g of unsalted butter, and mix well. Spread evenly on the red layer, getting it as smooth as you can. Place in the fridge for a few minutes to set.

12. Remove the tray from the fridge, and flip it onto another tray (so now the chocolate is at the bottom, and you have a green sheet of cookie facing you. Melt the rest of the chocolate, then add the rest of the butter. Spread on top, and put it back to the fridge for 5 minutes to set.

13. Use a serrated knife to score lines on top of the chocolate, marking first vertical, then horizontal Go back over the vertical lines to cut through the layer of chocolate. Then switch to a clean straight-edged knife to cut through the cake layers, and swap back to the serrated knife to cut through the bottom lawyer of the chocolate. You should have long strips of rainbow cookies.

14. Take each strip and place on its side do you can see the pattern facing you. Use a small sharp knife to cut into individual pieces in a swift downwards motion. Keep going until all the cookies have been done. Store in an airtight container in the fridge, but allow to come to room temperature before serving.

Note: this recipe calls for almond paste (which is 50/50 almonds and sugar). The brand I used was Odense Mandelmassa that I panic-bought earlier in the year. The stuff you find in British supermarkets called marzipan is usually 75% sugar, 25% almonds. It’s great for decorating, but it’s not right for this as the sugar content is too high.

2 Comments

Filed under Christmas, Recipe, Sweet Things

Cake of the Week: Tiger Cake

I realised that so much of my lockdown baking has featured almonds and nuts, so today I’ve opted for something different. Good old marble cake, or as I’ve also seen it called, the more exciting-sounding tiger cake. Since this cake is being made with the assistance of a five year-old, we’re going with tiger. Raaaaaar!


I have always think that a tiger cake is a very German sort of cake, something that you have with afternoon coffee when you’re not able to get hold of something richer and laiden with cream from a Konditorei. Or perhaps for when you’ve had too much whipped cream and want something simpler. I don’t know that it is particularly German, but that’s just the way I think of it. However a quick check on Wikipedia suggests that this is indeed where it hails from, originating in the 19th century.

What I love about this cake is that there is an element of magic to it – you mix up the batter, then there is a little bit of creativity in how you put it into the pan. Once it has baked, you have to hope that you have a nice marbled pattern inside and that you didn’t mix the two colours too much before it went into the oven.


The trick to master is getting the right sort of patter inside. I do this using two spoons of the plain mixture, and then a spoonful of the chocolate batter, and keep going until you’ve put everything in the pan. Then I take a clean knife, insert it gently into the batter, and drag it carefully to get a bit more definition without mixing it up too much. But you can equally dump it all in and mix it up a bit with a spoon, or get super-fussy and put the batter into piping bags, and then squeeze out thin ribbons to get really detailed patterns. My son definitely enjoyed the spooning of the batter most, apart from the eventual eating of the cake…

When I make this, I always add vanilla, but sometimes I add a tiny amount of almond extract. Not so much that it is a dominant flavour, but it can add a little extra something to a cake that will be otherwise unadorned.

This is also a great cake to make ahead of time, and I think it tastes better the day after making. If you wanted to make it fancier, by all means add some sort of glaze, but I think it is fine as is, or with a simple dusting of icing sugar.


There you have it – tiger cake! This recipe is adapted from recipe of the fabulous Nordic Bakery in central London, albeit I’ve reduced the quantities so you don’t end up with a massive cake. There are just three of us in the house during lockdown, so there is a limit on just how much cake is safe to eat!

To make a Tiger Cake:

For the batter

• 180g butter
• 150g white caster sugar
• 2 teaspoons vanilla extract
• 3 large eggs

• 180g plain flour
• 2 teaspoons baking powder
• 2 tablespoons milk

For the chocolate mixture

• 2 tablespoons cocoa powder
• 1 1/2 tablespoons milk

1. Preheat the oven to 180°C (350°F). Prepare a ring pan or bundt tin (mine was 20cm diameter, 10cm deep) – grease liberally with butter, then dust with plain flour, shake to get everything coated, and tip out any excess flour. Pop the pan into the fridge until you’re ready to use it.

2. Weigh your empty mixing bowl. Write down how much it weighs.

3. Make the batter. Beat the butter and sugar until light and fluffy. Add the vanilla, and mix well. Next one egg, beat well, plus a tablespoon of the flour. Repeat with the rest of the eggs. Finally, combine the remaining flour and the baking powder, then fold it into the batter. Finally add the milk and mix well. It should be smooth and soft, not firm.

4. Now you need to put one-third of the batter into a separate bowl. Weigh the main bowl again, and then subtract the weight of the empty bowl. Divide that number by three, and then take that amount of batter and put it into a separate bowl. Congratulations – you’re done this far more accurately than if you were doing it by eye with spoons!

5. Add the cocoa powder and milk to the separate bowl, and mix well.

6. Get the ring pan from the fridge. Add spoonfuls of the two mixtures – two of the plain, then one of the chocolate – and keep going until it is all in the pan. Try to get as much variation as you can so that the cake has lots of marbling / tiger pattern when you cut it later. Finish by dragging a clean knife gently through the batter for even more swirling.

7. Bake the cakes for around 40-50 minutes or until and inserted skewer comes out cleanly. Remove from the oven and leave to cool until lukewarm. Finally place a cooling rack or plate on top, then flip the cake over and it should come out cleanly. Wrap in cling film and leave to rest overnight.

8. Serve the cake as is, dust with icing sugar, or drizzle with chocolate or icing.

4 Comments

Filed under Afternoon Tea, Cake of the Week, Recipe, Sweet Things

Cake of the Week: Battenberg

Oh, but I have been so lax when it comes to keeping up with my lockdown posts! Not that I have skimped on the baking – we’ve kept the cakes and cookies coming throughout – but work and home school leave very little time for other pursuits. I have been diligently taking pictures too, so you can expect a fair few things to pop on here in the coming days…this also means we’ve acquired what the Germans are calling Coronaspeck, or “corona bacon” referring excess weight carried during the lockdown. Can’t wait for the gym to open up again!

I don’t know about your lockdown experience, but all I can surmise from Zoom quizzes, FaceTime chats and work conversations is that everyone, everyone, everyone is finding it tough. And every set of circumstances presents its own unique challenges. My son is five, so he needs a lot of attention, but equally he can be great fun and say some really profound things. Younger children still nap (gosh how I miss that!) but their capacity to understand what is happening is more limited, so how do you handle that? Older children can really understand what is going on, but perhaps they are worrying more, and trying to bottle things up so as not to upset their families? If you’re on your own or a couple, you might have time to do all those things you always wants to turn your hand to, but equally does all that time leave you anxious or lonely?

I think the only conclusion I can really draw at this time is that it is hard for us all, we we just want this to be over as soon as possible, to see our friends and loved ones while balancing the public health risk.

With that, let’s turn to cake. I love a Battenberg cake – I’ve made one before, and you can read all about its regal history here.


Whenever I see a slice of Battenberg it is a piece of complete whimsy – pink and yellow sponge squares, wrapped in marzipan. It looks sweet and crazy, and it is absolutely part of a British childhood. This is one of the key elements of a visit to granny’s house, when a tray of tea, juice and cakes would appear. When I was young it always seemed so fancy. And it is also good in a lockdown to get small children to count to four…

I will level with you – this is not as easy to make as a loaf cake or a sponge cake. However, it’s also not as tricky as it might look. I used Claire Ptak’s recipe (she of the Harry and Megan wedding cake fame), and I liked the result. You just make one batter, split it, colour some of it pink and some yellow. The only tricky bit is baking it – either you can acquire a special tray that has four equal compartments for baking the cake into perfect bars to form the distinctive pattern, or you can use a square tin and improvise with a home-made tin foil barrier to act as a separator. I had to make do the latter, which involved being very precise with scissors and a ruler, but we got there.

I’ve also tweaked the method slightly – Claire’s approach is to split the batter before adding the eggs. I just made the batter, then divided it at the end before adding the colourings. I happen to know my mixing bowl is 580g, so I weigh it again, and subtract that amount, then divide by two to split the batter equally. By all means go by eye, but I prefer to take the danger factor our of it. I mean, just imagine if you ended up with three pink squares and one of yellow?

Once the cake is baked, make sure you are using a straight and very sharp knife. You want impeccably neat lines. I will admit, I got that ruler back out, and was a little obsessed about getting it as scrupulously tidy as I could. Once all the cutting is done, you glue it all together with warm apricot jam, then enrobe it in marzipan. The genius trick that Claire suggests is rather than trying to coat the cake in jam and making an absolute mess (which is what I’ve done in the past), you brush the jam on the marzipan, and then put the cake on top. Then brush then next bit of marzipan, then roll the cake onto that, and keep going until the whole cake is cocooned in marzipan.


There you have it – a classic British cake that is fit for a queen!

To make a Battenberg Cake:

For the batter

• 215g butter
• 215g caster sugar
• 1½ teaspoons vanilla extract
• ½ teaspoon almond extract
• 3 large eggs

• 215g plain flour
• 2 teaspoons baking powder
• pink and yellow food colouring (ideally gel)

To decorate

• 150g apricot jam
• 500g marzipan (golden or white)
• icing sugar, for rolling

1. Preheat the oven to 170°C (335°F). Prepare a tin – either use a Battenberg tin (20 x 15cm) or use whatever square tin you can find, and mark out two rectangles of 20 x 7½ cm using little walls of tin foil. Line with greaseproof paper.

2. Weigh your empty bowl. Write down how much it weighs.

3. Make the batter. Beat the butter and sugar until light and fluffy. Add the vanilla and almond extract, and mix well. Add the eggs, one at a time, and combine well after each addition. Finally, combine the flour and baking powder, then fold it into the batter.

4. Weigh the bowl again, and then subtract the weight of the bowl alone. Divide that number by two, and then split the batter equally. Congratulations – you’re done this far more accurately than if you were doing it by eye with spoons!

5. Add some pink colour to one of the bowls, a little at a time, until you get the desired intensity. You can always add more, so start carefully. Or go crazy and add a lot to get a nice hot pink colour. Repeat with the yellow, going for delicate or neon as you prefer.

6. Pour the batter into the prepared tin. If you’re using a Battenberg tin, you make two rows of yellow batter, and two rows of pink. If you’re using the make-do-tin-foil method, you’re making one yellow and one pink rectangle.

7. Bake the cakes for 40-50 minutes or until and inserted skewer comes out cleanly. Remove from the oven and leave to cool completely

8. Take the cooled cakes out of their tins. If you used a Battenberg tin, congratulations, just remove them and trim them if needed. If you used the other method, use the sharpest knife you have to cut each cake in half lengthways, then trim to make four neat bars of cake. It looks best it you cut off any browned parts of the cake. Just eat those.

9. Time to assemble the cake. Heat the apricot jam in a saucepan. Brush the jam along the sides of the bars of cake to for a 2×2 pattern of alternating colours.

10. Time for the marzipan. Dust the kitchen worktop with icing sugar, and roll out your marzipan to a large rectangle, around 20 x 30 cm.

11. Brush an area on the left side of the marzipan with the melted jam. Place the cake on top, and press gently. Now trim the marzipan on the left edge of the cake with a knife for a clean edge. Now brush the area to the right side of the cake with more jam, then gently tip the cake over so it lands on top. Keep going until all four sides of the cake are covered. Trim the excess marzipan.

12. Let the cake sit for 30 minutes so the jam can set and keep everything together. Tidy up the cake – trim both ends so it looks neat, and if you want to be fancy, you can crimp the edges of the marzipan along the cake.

Leave a comment

Filed under Afternoon Tea, Cake of the Week, Recipe, Sweet Things

Cake of the Week: Plum Cake

Hope you’re all doing alright. I’ve ended up being really, really busy as we juggle two jobs and home school. In many ways that makes us some of the lucky ones, and we’re fortunate to still be working and to have so many things that keep our minds focused and occupied. All this means I’m a little behind on posting my lockdown bakes, even if we’ve been making and eating lots recently! But no worry, we’ll catch up this week, so here’s No 2 of Cake of the Week, and they’ve be coming thick and fast for the next few days.

Today I’m sharing (again) one of my favourite cakes, which I make fairly often. It looks impressive, tastes delicious, and it is actually very easy to make. I think it rather resembles an apricot tart, with the bright colours, flaked almond and the glaze of jam.


The thing is, this really is just a simple sponge recipe, flavoured with almonds and vanilla, and then you plonk in some sliced plums on top. During baking they become soft, add some sweet-sharp contrast to the cake, and depending on the variety, they take on a glorious deep pink colour. Normally I am all for experimentation, but I would really urge you to stick with the plums. I’ve tried it with apples and pears, and while they were alright, it really is best made with plums. I think it’s something to do with the moisture content of the plums as compared to apples, but in place of anything more scientific, let’s put it down to culinary magic.

The only real tip when making this is that it is important is to glaze the cake with warm, sieved apricot jam when it comes out of the oven, and before it cools down. This ensures that the cake does not get dry, and the top stays very soft, moist and glistens beautifully.

In terms of accompanying beverage, I think this goes equally well with tea or coffee, but with a slight preference for the latter. What do you think?

To make Plum Cake:

• 140g butter
• 70g white caster sugar
• 70g soft brown sugar
• 1/4 teaspoon almond extract
• 1/4 teaspoon vanilla extract
• 2 large eggs
• 165g self-raising flour
• 25g ground almonds
• 2 tablespoons milk
• 5-6 large plums
• 2 tablespoons flaked almonds
• 2 tablespoons apricot jam

1. Preheat the oven to 180°C (355°F) and line a 22cm cake tin with greaseproof paper.

2. Cut the plums into quarters, and discard the stones.

3. Make the cake batter. Beat the butter and sugars until creamy. Mix in the almond and vanilla extract. Beat in the eggs, then fold in the flour and ground almonds and mix well. Finally, stir in the milk and beat until the mixture is smooth and soft.

4. Pour the batter into the prepared tin. Level the top and then arrange the plums on top. When you’re happy with the design, press them slightly into the batter. Make sure to leave some gaps between the plums for the cake mixture to puff up during baking, but don’t worry about leaving big gaps – the fruit will shrink and sink a bit during baking, so be generous! Sprinkle any visible cake batter with flaked almonds.

5. Bake the cake for around 45 minutes until golden. If the top is browning too quickly, cover loosely with tin foil. When done, remove from the oven and leave to cool.

6. Finish the cake with the glaze – heat the apricot jam with 2 tablespoons of water until runny, then pass through a sieve. Brush the sieved jam all over the top of the cake. You’re done!

1 Comment

Filed under Afternoon Tea, Cake of the Week, Recipe, Sweet Things

Cake of the Week: Lemon Drizzle

You’ve had cookie of the week, so here is our first cake of the week! I’ve actually been quite blown away from the feedback on the first part of my lockdown baking, and one reader has even made the Fryske Dúmkes and confirms they are easy and delicious. The next cookie is coming tomorrow…

In the last few days it has started getting much warmer in London, and we’ve just had some glorious sunny days. It seems so strange to imagine a parallel world in which we’re off out in parks, walking by the river, thinking about a trip to Kew Gardens to see blossom and daffodils and planning Easter trips to beauty spots. But as temping as any of that might seem, it is all off limits as part of our efforts to support the greater good. Just peek out the windows and you will see rainbows painted by children reminding you to #StayHomeSaveLives. There has been some debate in the UK about exactly what the rules mean and how far people can interpret them. Personally I think it’s pretty obvious that we need to say at home, only shop for food once per week, and while we’re allowed out for exercise once per day. And in doing this, we need to avoid other people. Yes, it’s a pain, but if we all play our part, we can only hope that our corona lockdown will pass sooner.

What this period has enabled me to do is to fish out some craft ideas from deep in my memory for entertaining my son. The big hits this week were colour chromatography (separating the colours in ink using filter paper) and drawing out a map of the London Underground. He managed to do pretty much the whole thing from memory! Next week is the two-week Easter Holiday, so home school is shut and we’ll have holiday club based around “theme of the day”. Today was “France”, Tuesday is “London Transport”, Wednesday is “Plants” and the rest of the week is still under development. Ideas welcome!

Anyway, back to cake, as that’s what you’re here for. As spring creeps upon us, I decided to make a cake which has a little sunshine in in, and opted for lemon. This is one of the iconic British classics – it is a sponge loaf cake and while it is still warm you pour over a syrup of granulated sugar and lemon juice. Then you leave it to cool, and the glaze forms a crunchy, tangy glaze on top and makes sure that they cake is very moist. We’ve enjoyed it over the last week each afternoon. This is definitely one to have with a cup of tea (Earl Grey, pinkie raised) rather than coffee, and the bright, zesty flavour is a much needed pick-me-up as the afternoon air feels warm and pleasant.

If you want to play around with the flavour (or you need to make do with what you have at home) then you can use whatever citrus fruit you like. You could make it with just orange zest, go for a St Clements cake (orange and lemon, like the famous song) or make it even more tropical with lime. Grapefruit might even be interesting – but a caveat that I have not tried it, but if you do, let me know if it worked!

To make a Lemon Drizzle Cake (makes one 1lb loaf)

For the batter:

• 175g white caster sugar
• 175g softened butter
• zest of 1 lemon
• 3 medium eggs
• 175g self-raising flour
• 3/4 teaspoon baking powder
• 1 tablespoon milk

For the glaze:

• 100g granulated sugar
• juice of 1 lemon

1. Preheat the oven to 170ºC (340ºF). Line a loaf tin with greaseproof paper.

2.Put the eggs, sugar and lemon zest in a large bowl. Beat until pale, light and fluffy. Add the eggs, one at a time, beating well after each addition. Add the flour and baking powder, and mix well. Finally add the milk and beat to a smooth batter.

3. Pour the batter into the prepared tin. Bake the cake for around 40 minutes. An inserted skewer should come out clean and the surface should be springy when lightly pushed. If it looks like it is getting too dark, cover it loosely with tin foil. When done, remove from the own and place on a wire rack. Do not remove from the tin.

4. Immediately make the glaze. In a bowl, mix the lemon juice and granulated sugar. Pour evenly over the warm cake, then leave to cool completely.

Leave a comment

Filed under Afternoon Tea, Cake of the Week, Recipe, Sweet Things, Uncategorized

{1} Jólakaka

Hello, we’re back for the 12 Days of Festive Baking, 2019 edition! It’s time for another selection of seasonal delights from around the world.

I’ve decided to start with something at the easier end of the spectrum. I’d love to say that this is all down to me experiencing some sort of epiphany and embracing a new ethos of cooking and living simply and in the moment. In reality, I’ve had an extremely busy November and have just survived hosting a Christmas party for ten 4-year-olds, and I thought I would take the chance to avoid making things more complex than they need to be for the next couple of days. So, ladies and gentlemen, here is a festive loaf cake all the way from Iceland – the jólakaka.


Bizarrely, as I write this it is colder in London than it is in the Icelandic capital. 0°C degrees here, and a positively tropical 7°C degrees in Reykjavík. We’re in the middle of a cold snap, so it feels very much like the festive season has started properly. Personally I love it!

And so to our cake. The jólakaka is an Icelandic classic, and the name literally means Christmas cake, although it is apparently eaten all year round. While it has raisins in it like a British Christmas cake, any similarities pretty much end there. It is similar to a pound cake and in my case I’ve flavoured it with cardamom and vanilla. I’ve found some variation in recipes, some with just vanilla, some with lemon zest, others with just cardamom, so it seems there is not one right way to do it, apart from (I would imagine) the way someone’s grandmother on the far side of Iceland near the Eyjafjallajökull volcano makes it. I’m also pretty sure that none of these things are native to Iceland? Flavours aside, raisins seem pretty ubiquitous, so I would add those, but I have also some people using dark chocolate chips too, so if you want to do that, throw in a handful. And if you’re planning to put this anywhere near small children, I would skip dried fruit altogether and embrace chocolate and vanilla and accept your lot. So in short, use this recipe as just a guide, change it as you want, and to each their own!


The texture is fairly dense and the cake is on the “dry” side. It reminded me of a madeira cake. I mean that in the sense that it is firm and has a close crumb and it is definitely not moist and soft like a banana loaf. This is a robust cake, as you’ve expect from the land of ice and massive volcanos. It’s the sort of thing I would like to eat with tea or coffee, and I did find that it was better the day after baking, so I recommend baking it, letting it cool slightly, then wrapping it in cling film. This will keep moisture in the cake, and I think lets any spices develop their flavour a little.

I’d love to be able to say that I have stories about the history of this cake, but I’ve not been able to find out much at all about it. If you do know anything about its origins, then do share! The nearest I got was finding a fun fact – the Icelandic word for baking powder is the cute-sounding lyftiduft which I am guessing is pronounced “looft-ee-dooft” and translates literally as air powder. And if you’re wondering…yes, our house was completely turned upside-down after the party, and we’re still clearing up. That’s the price of creating those precious memories!

To make a Jólakaka (makes 1 loaf cake)

• 150g butter
• 150g caster sugar
• 2 large eggs
• 1/2 teaspoon vanilla extract
• 1 1/2 teaspoons ground cardamom
• 1 teaspoon lemon juice
• pinch of salt
• 250g plain flour
• 2 teaspoons baking powder
• 150ml whole milk
• 100g raisins

1. Preheat the oven to 170°C (340°F). Line a loaf tin with greaseproof paper.

2. Put the butter and sugar in a large bowl, and beat until light and fluffy. Add the eggs one at a time, beating well after each, until well combined. Stir in the lemon juice, cardamom, vanilla and salt and mix.

3. Fold in the flour and baking powder, then add the milk and mix to a smooth batter. You might find you don’t need all the milk.

4. Finally, fold in the raisins (or chocolate chips if you’re being rock’n’roll).

5. Gently pour the batter into the baking tin. Smooth the top and bake for around 45 minutes until done – an inserted skewer should come out clean. If the top of the cake looks like it is browning too quickly, cover the top loosely with tin foil.

6. When the cake is done, remove from the oven and leave to sit for 10 minutes before removing the cake from the tin. When cake is lukewarm, wrap in cling film, then allow to cool completely overnight.

3 Comments

Filed under Christmas, Recipe, Sweet Things

{9} Parrozzo

A couple of years ago, I made Marquesas de Navidad, some little Spanish Christmas cakes which at first I thought had some ancient pedigree, but which were actually created in the early part of the 20th century. Traditional recipes and classic bakes are great, but I also think it is nice that new things still appear from time to time.

And today is another fairly new kid on the block. This cake is called a Parrozzo. It was created in 1920 by an Italian gentlemen called Luigi d’Amico, who ran a pastry shop in Pescara in the Abruzzo region of Italy.

However Luigi’s idea was actually a modern take on a traditional local recipe called pane rozzo which means “rough bread”. This loaf had a domed shape and a dark colour due to being baked in a hot wood-fired oven. So his sweet Parrozzo kept the domed shape in homage to the source of his inspiration, and the chocolate glaze imitated the dark colour the bread would have gained during baking.


The Parrozzo is actually an almond sponge. It is traditionally flavoured by the judicious use of a few bitter almonds to provide the distinctive flavour. I’ve written already this year about how these can be risky if eaten in quantity, but I’ve taken the lazier route of using normal (sweet) almonds and added some almond extract. Some recipes also use lemon zest, which I’ve opted to use as I think it works very well with almonds, and lifts the flavour of the cake. You could miss out the lemon, or swap it for orange zest if you fancy something a little punchier.

The cake is finished with a simple chocolate glaze, but fret not – you don’t need to worry about tempering chocolate to get a nice sheet, you just melt chocolate with butter, and forget about the science of tempering and getting the right sort of chocolate crystals for a set. It’s Christmas and we’ve all got too many things to get done! You just melt, add butter, stir and pour. Job done!

This makes a fairly large cake, and it looks quite impressive as a centrepiece. I think it benefits from being made a couple of days in advance. The texture is light but not too fluffy, cuts well, and stays moist thanks to the butter, eggs and almonds in the batter. We really enjoyed this one – it tastes festive, but is very different to the fruit and spices of a British Christmas cake.

And as if a chocolate-covered dome cake that is impersonating a loaf of peasant bread is not exciting enough, this cake even has its own song: La Canzone del Parrozzo (the Song of the Parrozzo) written by poet and politician Gabriele D’Annunzio. It is a tango, and reminds me a little of the Italian socialist classic Ciao Bella.

To make a Parrozzo:

For the cake:

• 150g plain flour
• 150g ground almonds (skin on)
• 1 teaspoon baking powder
• 6 large eggs
• 50g butter, melted and cooled
• 250g caster sugar
• 2 teaspoons almond extract
• 1 teaspoon vanilla
• 1 tablespoon lemon juice
• zest of 1/2 lemon

For the glaze

• 200g dark chocolate
• 50g unsalted butter

1. Preheat the oven to 170°C (340°F). Prepare the cake mould (I used  20cm /8 inch hemispherical tin). Rub the inside really well with butter then dust liberally with flour. Shake out the excess.

2. Mix the flour, almonds and baking powder. Set aside.

3. Separate the eggs.

4. Beat the egg yolks, sugar, melted butter, almond extract, lemon zest and lemon juice for about 5 minutes until pale, thick and creamy.

5. In a separate bowl, whisk the egg whites to stiff peaks, around 4-5 minutes.

6. Folk the yolk mixture into the egg whites.

7. Fold in the flour mixture in 3 batches, as gently as you can until just combined.

8. Carefully pour the batter into a cake tin and bake for around an hour until an inserted skewer comes out clean. If the top looks like it is getting too dark cover it loosely with tin foil. When it is ready, remove from the oven and allow to rest for 10 minutes, then turn the cake onto a wire rack to cool completely.

9. Finish with the chocolate glaze. Melt the chocolate in a microwave (or use a bowl over a pan of barely-simmering water) then add the chocolate butter and stir until completely smooth. Pour the glaze over the cold cake, and either try to get it as smooth as possible, or make life easy and aim for generous swirls.

2 Comments

Filed under Christmas, Recipe, Sweet Things

{7} Cordiales de Murcia

I am a big fan of marzipan, so Cordiales de Murcia really caught my eye. They are traditional sweets that originate in the town of Pacheco in Murcia, Spain. Their filling is also a little unusual – cabello de ángel, a sort of pumpkin jam.


The name cabello de ángel means “angel’s hair” and comes from the texture of the pumpkin. When cooked, the flesh of the pumpkin separates into lots and lots of strands. It is turned into jam and flavoured with citrus and sometimes a dash of cinnamon, but the pumpkin keeps quite a bit of its texture, so think of it as being candied more than turning into a jam. I find it tastes a bit like apple jam, maybe with a hint of apricot. I’d had this in pastries on visits to Spain, and it took me a while to work out what the filling was, since it seemed to be apple but wasn’t quite.

Anyway, I had a jar of this stuff in my store cupboard for ages from a trip to Spain last year. I had planned to use then, got everything ready to make these cordiales and then remembered that at the end of summer I had used it all in the based of a quick apple tart. If I was going to make them, I would have to hunt high and low for a pretty niche ingredient, for it turns out that unlike membrillo, manchego or chorizo, you quite quickly find that cabello de ángel is not really stocked anywhere easy.


The Spanish supermarket near Ladbroke Grove was reporting on their website that they had sold out, so I had to trawl a number of websites to find one that, firstly, sold the stuff, and secondly, would be able to deliver it quite quickly. The good news is I managed (even if it meant paying a lot more than I would have had to do if I had been organised!). But if you don’t have cabello de ángel then you could use Spanish sweet potato paste or quince paste, or in fact any sort of very firm jam or fruit paste. You just want to avoid something too liquid, which could melt and pour out of the sweets during baking.


The actual baking process is quite easy – you make marzipan, then work out how to stuff it. The dough is quite soft, so I found the easiest way was to put a piece on some greaseproof paper or cling film, then cover and squash it flat. Then you can add some jam to the middle, and gather the edges up without everything sticking to your fingers. My first few attempts were cake-wrecks, so just do a bit of trial and error and find a method that works for you.

Once you’ve stuffed your cordiales, you need to shape them and it is traditional to place them on a circle of wafer. I normally don’t do this as the brand of greaseproof paper I use never ever sticks to whatever I am baking, and there is enough oil from the almonds to prevent sticking, but I wanted to go traditional here.

Now, I’ve mentioned the effort I went to in order to get that pumpkin jam? Well there were some recipes that suggested using discs of communion wafer, but by this point my commitment to authenticity had fallen asleep by the roadside, so I got hold of some rice paper and cut out circles of that. In fact, this actually worked really well, as you are able to shape them really easily and move them around on their pieces of rice paper (or wafers).

The most important question is, of course, how did they taste? Absolutely delicious. The marzipan has that lovely flavour of almonds and lemon from the zest, and the filling keeps the filling soft and is a little like apricot or even a gentle marmalade. They are slightly crisp when you’ve just baked them, and if you like them softer, just keep them overnight in a sealed container, and they will soften right up. All in all, a lovely addition to the festive table, provided that you’re willing to track down the right sort of filling, and you’ve got the patience for lots of shaping and stuffing!

To make Cordiales de Murcia (makes around 25-30):

• 250g ground almonds
• 1 teaspoon almond extract
• 200g caster sugar
• 2 medium eggs, beaten
• zest of 1/2 lemon
• 200g cabello de ángel jam

1. Make the marzipan mixture. Combine the ground almonds, almond extract, sugar and lemon zest. Mix well, then add one beaten egg. Mix, and then add enough of the second beaten egg to make a marzipan. It should be soft enough to work with, but not wet or sticky. I used just over half of the second egg. If you add to much egg, just add equal amounts of almonds and sugar to get a texture you can work with.

2. Preheat the oven to 170°C (340°F). Line two baking sheets with greaseproof paper.

3. Pinch off walnut-sized pieces of the marzipan. Flatten between two pieces of greaseproof paper. Add a small teaspoon of the angel hair jam (the size of a small grape). Fold the marzipan around the jam, seal, and roll into a ball.

3. Place the ball on a piece of rice paper, and shape to a slight cone with your fingers. Repeat until all the marzipan has been used up.

4. Bake the cookies for around 20-25 minutes until golden but not dark. Turn the tray half-way to get an even colour. Remove from the oven and leave to cool

5. To serve, dust lightly with icing sugar. Go easy, as these things are sweet, so you’re dusting for effect more than anything.

2 Comments

Filed under Christmas, Recipe, Sweet Things