Tag Archives: french food

{7} Calissons d’Aix

Do you like the idea of a grand total of thirteen desserts for your Christmas dinner? Then let’s take a jaunt to Provence in France where they do just that.

But first I will have to disappoint you. If you have visions of a seasonal table just groaning with thirteen separate cakes, it is not that. Not is it a selection of other puddings. Rather it is a selection of festive treats ranging from nuts and dried fruit to festive breads and small traditional sweets, including nougat. But hey, you still get thirteen things in total, and after lots of rich food, some vaguely heathy nuts and dried fruit might be just the little health kick you need as you promise not to over-indulge ever again. And, of course, you know it will happen again next year!

One of the traditional sweets is the calisson. They originate from the town of Aix-en-Provence and are made with several typical products of the area – candied melon, orange peel, orange blossom water and almonds. Everything is ground down to a smooth paste – with a texture similar to marzipan but somewhat fruitier – which is then shaped into almond-like lozenges and glazed with brilliant white royal icing. If you wanted to veganise these, you could even make your icing using aquafaba (update: I tried this and it works. I’ve added a note to the recipe below).


And as with all good Christmas sweets, they have both a bit of history and a disputed origin story.

One school of thought is that they trace their history back to medieval Italy, being mentioned in Martino di Canale’s Chronicle of the Venetians in 1275, and there are other references during the Middle Ages to “calisone” cakes being made from almonds.

The other version involved a bit more drama, and is therefore immediately more interesting. The tale goes that calissons were created after the marriage of René, Duke of Anjou and Count of Provence, to Jeanne de Laval in 1454. He was 45, she was 21. Before and after the marriage, the bride was reported to be in a dour mood, what with being basically told to enter into a marriage by her father. After three years of marriage the couple moved to Aix-en-Provence and the duke’s chef was charged with creating something to bring a smile to her lips so that the couple would impress their subjects. He created these sweets from melon and almonds, and upon tasting this new delicacy, she declared “di calin soun” which is “they are hugs” in the Provencal language. Alternatively, the assembled crowd said that the sight of the smiling Jeanne won their hearts and felt as if she was giving them all little hugs. Could one of these be true? It’s certainly a charming tale, and we can only hope the rest of their union was happy.

I’ve had an eye on making calissons for a while, but was always a bit dubious how much work it would take to make. The do look like it will be a lot of effort. Well it turns out that it actually…really easy. You let your food processor do all the hard work, which will blitz everything to a paste. Throw in the candied fruit, blitz to a smooth paste, then add the almonds and it all comes together like magic.


While making the fruit-nut base was easy, I’ll admit the shaping was a bit tricky. You roll out the dough, then place rice paper on top and cut out shapes. I thought this would leave you with a lot of waste, but you can pick off the rice paper and re-roll the scraps. No, the problem is they are supposed to have an almond shape, and I didn’t have that exact cutter. Time for a workaround…

My very practical solution was to use a circular cutter (mine was about 5cm diameter), then offset it to create that almond shape. Place the rice paper on the dough, then press down hard and fast. That means you get a clean cut through the rice paper, and the dough doesn’t get a chance to move position. It’s also marvellously therapeutic after the year we’ve had. Then remove the cut circle, flip it over so the rice paper is on the bottom (if you have the rice paper on the top for the second cut, it doesn’t work as well). Offset the cutter so you can cut an almond shape (this way you will get two from each circle). I found it best to press down, then flip over the cutter and gently run a knife over the rice paper to cut if cleanly. It is a little tricky to start with, but you get the hang of it. It is also important to have a clean cutter – keep a damp piece of kitchen roll nearby, and wipe it often.

The classic fruit in calissons is candied melon. This is something I’ve rarely seen, and it strikes me as something that must be tricky to make given how much water is in a melon. But I managed to order some candied cantaloup melon online, and even then it’s not exactly easy to find. It’s definitely an interesting flavour, aromatic, and it has an attractive orange-pink colour. Many recipes also use a little bit of candied citrus peel, and if you wanted to go for orange overload, you could just use that. Alternatively, any candied fruit will work well, In fact, I’ve made a little selection of different flavours for over Christmas, and the same recipe works as long as you hold to the same weight of candied fruit, candied citrus peel, ground almonds and icing sugar.

I got the idea to experiment because I came across a few websites that have given calissons the full macaron treatment, presenting them in a dazzling rainbow of colours and flavours. I don’t know how traditional this is (and can imagine some French purists throwing their hands in the air with a gasp of quelle horreur!) but I have to admit they do look quite fun. I think you need to be judicious with the flavours, and veer towards the natural. I made some using candied pear, and some with candied peach, both of which were delicious. You could also use different nuts – hazelnuts and pistachios seem like fairly safe bets. I could even see a festive version using dates and gingerbread spices. However, I would steer clear of some flavours like peppermint extract or lavender or rose essence, especially if they are artificial. You could rapidly end up with a tray of sweets that is more reminiscent of soap than the sunshine of Provence. That said, if you’re now fixated on the concept of a calisson that tastes like a candy cane with a red-and-white striped top, knock yourself out!

To make Calissons d’Aix (makes around 40-45)

For the dough

• 150g candied melon (or other candied fruit)
• 30g candied orange peel
• 20g candied lemon peel
• 1 tablespoon orange blossom water (or other flavour) – see note below
• few drops of almond extract
• 170g ground almonds
• 100g icing sugar

To shape

• edible rice paper

To ice

• 1 egg white (30g)
• 150g icing sugar
• colouring (optional)
• flavouring (optional)

1. Put the melon, orange and lemon into a food processor and blitz to a paste. Scrape down the sides, add the orange blossom water and almond extract, and blitz again. Scrape down the sides again, and blitz again until the paste is smooth.

2. Add the ground almonds and icing sugar to the food processor. Blitz until it looks like crumbs. Scrape down the sides and base, then blitz again. It should come together to form a marzipan-like dough. If it stays crumbly, pour into a bowl, knead briefly, and it will come together. If the dough is very sticky, add more ground almonds. Wrap in cling film and leave to chill in the fridge for at least an hour or overnight.

3. Time to shape the calissons. On a piece of greaseproof paper, roll out the dough to 1cm thickness. Place a sheet of rice paper on top, smooth side up. Start to cut out the calisson shapes. For the scraps, peel off the rice paper and re-roll until it is all used up. Check all the calissons – you might need to tidy up the edges or trim some stray bits of rice paper. When you’re happy, turn them all so the rice paper is at the bottom.

4. Time to ice. Make the icing by lightly beating the egg white, then sifting in the icing sugar. Stir until the mixture is smooth – it needs to flow, but a drop on a worktop should hold its shape and not run. Add in any colours or flavours. Use a spoon or a piping bag to top each calisson with a thin layer of icing. Leave uncovered overnight to set.

Note 1: check exactly what sort of orange blossom water you are using. You can get anything from very dilute to highly concentrated, and when it’s pure it is extremely powerful. I used a fairly light and dilute version from a local Middle Eastern grocery. If you have a concentrated version, you will need just a drop or two unless you want something that tastes like soap!

Note 2: to make a vegan icing (and thus make the whole recipe vegan), use 150g icing sugar and 30g aquafaba (water from a can of chickpeas). Make sure the chickpeas are unsalted, and pass the liquid through a fine mesh strainer before using, and use 30g of that strained liquid. Then just mix up the icing until smooth, and use to glaze the calissons. If you’re worried about a “beany” flavour, don’t be – you would never know the icing is made with aquafaba!

Leave a comment

Filed under Christmas, Recipe, Sweet Things

{9} Pompe à l’Huile

I’ve written recently about my modest luck in the past when tackling festive breads, but I thought I would have another go this year. Meet the pompe à l’huile, which hails from the south of France.

The name refers to the shape of an old olive oil press (rather than an “oil pump” – a pompe à huile). It is a lightly sweetened bread made with young and fruity extra-virgin olive oil, which would normally still be just a few weeks old when making this around Christmas time. It also happens to be natually vegan if you brush the loaf with water rather than milk just before baking.


In addition to olive oil, it is traditionally flavoured with orange blossom water. I must admit I was more than a tad dubious as it can be very much like perfume and it is easy to add too much. But I thought I would give it a try as I could always make another if got too heavy-handed.

If you are using it, a little word of warning – check exactly what you are using, as you can get anything from very dilute to highly concentrated, and when it’s pure it is extremely powerful. Helpfully it is not always clear exactly what you’ve got, so I can’t give a more specific guide other than to say just be careful and remember you can add more but you can’t take away! If you can’t get hold of orange blossom water, a passable substitute is to use orange zest, plus a little vanilla extract and a dash of almond extract. It’s not the same, but you do get a sweet, floral and citrussy aroma that works in a pinch.

The stuff I got was from a Turkish grocery, and two tablespoons were quite enough to give it all the flavour and perfume I wanted. If you’re using the concentrated stuff, you may find just half a teaspoon does you.


As this is traditional French loaf, I assumed there would a clear single way to make it. Oh, how wrong I was. I found there are lots and lots of frankly dodgy recipes out there which are going to provide some strange results. One suggested equal weights of flour and olive oil, which would be marvellous if you just wanted greasy flour, and I discounted that one right away. Another suggested using no pure water, just orange blossom water. Either they were using something that was extremely dilute of they are the sort of person that enjoys swigging Chanel No 5 with their morning coffee. Next!

Anyway, I initially settled on a recipe which was about five parts flour to one part oil. I selected this one on the basis that surely the oil was important and therefore there should still be a lot of it in the dough. All seemed fine during the kneading even if it was a bit greasy, and it was easy to shape and bake, but it ended up being heavy and claggy (great word by the way!).

But I was determined to succeed. I kept looking and saw that several sources refer to this as being akin to an “olive oil brioche”. My first attempt was definitely not like brioche. That made me think that actually what I wanted was to keep the dough light, and that the oil was there more for flavour and aroma than to pool around the base of the bread as it baked.

My second attempt (and the recipe you see below) came out very differently. The dough was much more like an enriched dough and was not oily at all. It rose proved perfectly, and the resulting loaf was golden when it came out of the oven. It got a light brushing of more extra-virgin olive oil and a light sprinkling of sugar. It looked lovely and was light and aromatic when we ate it. You get the orange blossom flavour, but it is not overpowering.


So…I had made a pleasant slightly sweet dough. Had it all been worth it? Well, I also read that traditionally this would have been eaten with grape jam, which is not something I have in the house or actually ever see when I’m out and about. So instead I used blackcurrant jam made with fruit from my mum’s garden (and I carefully carried that container of berries all the way back from Scotland in the train to London to make that jam!). It was, quite simply, amazing. A complete flavour sensation. The bread is light, sweet and aromatic, and it merges just wonderfully with sharp dark fruit jam. I’m glad I persevered – it’s very different to most Christmas baking, and absolutely delicious.


To finish off, it is worth knowing a bit more about the pompe à l’huile. It forms part of the Provençal tradition of the Thirteen Desserts. While this might sound like a truly epic way to finish a meal, it is not actually a seemingly endless supply of little cakes. Instead it is a tradition that is rich in symbolism, and there are thirteen elements representing those present at the Last Supper – Jesus and the Twelve Apostles.

There is not a single fixed list of the Thirteen Desserts, but you find there are some common treats and then local variations depending on their specialities. For example, you will find fresh fruit, dark and light nougat, dates, and the “four beggars” standing for four monastic communities – almonds for the Carmelites, figs for the Franciscans, raisins for the Dominicans and walnuts for the Augustinians. Then there are a few regional variations (which probably also reflect the tastes of the host or hostess) and can include calissons from Aix, made from candied melon and almonds, or navettes from Marseille. I really like the idea of this tradition, as it is fun at the end of a meal to have little things to nibble on as you chat about anything and everything with your family and friends. Maybe not the high drama of setting fire to a plum pudding as the British do, but probably one that is more suited to the end of a large meal.

Traditionally there would be one loaf for Christmas Eve, and a second to enjoy for breakfast on Christmas Day. A few people suggest hot chocolate as the prefect accompaniment, which sounds pretty good to me. I just wonder if you would find that it lasted that long if you’ve got hungry people in the house?

To make pompe à l’huile (makes 1 loaf)

For the dough

• 250g strong white flour
• 1/2 teaspoon salt
• 50g sugar
• 1 teaspoon instant yeast
• 2 tablespoons extra virgin olive oil
• zest of 1/2 orange
• orange blossom water (or use vanilla and almond extract)
• water

To finish

• milk (to glaze, optional – skip to make a vegan version)
• olive oil
• caster sugar, to sprinkle (optional)

1. Put the orange blossom water into a measuring jug. Make up to 130ml with cold water.

2(a). If using a bread machine: put everything into the mixing bowl. Run the “dough” cycle. Simples! [But do check the consistency – you might have to add more flour or water if the mixture seems too wet or too dry]

2(b). If making by hand: put the flour, salt, sugar and oil into a bowl and mix well. Add the rest of the ingredients and work with your hands until you have a dough. Start to knead it until it is smooth, stretchy and elastic (at least 5 minutes). Leave the dough a warm place for two hours until the dough has doubled in size. Knock back and knead again for 2-3 minutes.

3. Put a piece of greaseproof paper on a baking sheet. On the paper, roll or press the dough out to an oval around 1cm thick. Use a wooden spatula with a straight edge to make a cut in the centre. Make 8 more cuts in the same way so that the dough looks like a wheel. Stretch the dough a little so that the holes are prominent. Put the whole baking sheet in a large plastic bag and leave somewhere warm to prove for at least an hour.

3. Preheat the oven to 180°C (355°F). Brush the top of the bread with milk if using. Put a pan of hot water into the bottom of the oven to create steam. Add the bread and bake for around 15-20 minutes until golden, turning half-way to get an even colour.

4. When they loaf is baked, remove from the oven, and brush lightly with more extra-virgin olive oil. Sprinkle with caster sugar, and leave to cool.

4 Comments

Filed under Christmas, Recipe, Sweet Things

{5} Canistrelli

One place that has firmly stood outside of my past festive baking efforts has been France. I’ve only featured one recipe – chocolate, fruit and nut mendiants that form part of the tradition of the 13 desserts in Provence (calm down – this is not 13 actual separate miniature desserts, it includes items like fresh fruit and nuts).  There are, of course, lots and lots of delicious things that the French enjoy at Christmas, including the famous bûche de noël (perhaps a bit too much work for me unless I am making it for a very, very special occasion) and various sweet treats such as candied chestnuts, and the various buttery biscuits that comprise the brederle of Alsace. But I’ve just not found that many French cookies to feature.

Well, today we break that trend. I’ve made canistrelli cookies from Corsica which are made with white wine and flavoured with anise, and they can also include almonds or chestnut flour. I’m not entirely sure that these are a Christmas cookie per se, as they are eaten all year round on their home turf, but I like the recipe, it is a contrast to some of the other things I’m making this year, and they also looked quite easy. Sometimes I like to make things that are complex, and sometimes I’m lazy. And look at the pictures? Those diamond shapes form giant snowflakes!


I don’t know if it is a sign of age, but I increasingly appreciate the flavour of anise. I was not such a fan when I was younger, but I find it a nice alternative to gingerbread spices, chocolate or citrus. It still seems festive but doesn’t have the ubiquity of other flavours of the season. Perhaps it is a sign of an increasingly sophisticated palate, or perhaps it is no longer drinking dodgy liqueurs like sambuca with wild abandon? We can only surmise.

Anyway, to our guest cookies. Canistrelli are reminiscent of Italian biscotti in the sense they are a crispy and crunchy cookie but they are much easier to make than their Italian cousins. No need to roll a log, bake it, slice it and bake it again. You just mix up a quick dough, shape it and bake it. Then just accept that as the dough is quite soft, they will inevitably have a somewhat rustic look, and if that worries you, drink some of the same wine you used to make the cookies and you’ll feel better.


When making these cookies, the method seemed very familiar to me – it is essentially a recipe for making little scones (of “biscuits” if you’re American) as you’re pouring liquid into the dry ingredients, then working quickly with a fairly soft mixture. However you’re not looking for a soft, pillow-like bake which is still fluffy on the inside. You bake them for a longer time so that they turn golden and start to dry out. As you can see, I did not worry too much about the shaping beyond getting pretty rough approximation of a diamond shape using a fluted cutter (actually a Play-Doh tool that I had washed quite intensively!). You can also do this with a knife, and go for any shape you want – squares, longer logs, or even circles if you want to go for the looks-like-a-scone-but-is-rock-hard approach and indulge in some festive trickery. You will just have to adapt the baking time so that they get enough time to properly dry out and harden in the oven.


If you’re keen on some anise action, I can share a little tip. I ended up making these twice, as they vanished pretty quickly. The first batch used just anise liqueur, and for the second I also added some crushed aniseed. The seeds really help give a stronger flavour, especially after you’ve stored them for a few days, whereas the liqueur on its own is a much milder affair.

But if that’s not your thing you can play around by adding lemon or orange zest, roughly chopped almonds or raisins. I think anything that you could imagine being grown and harvested on a warm, sunny island in the middle of the sea would work well. You could even add some chocolate chips if that’s your thing. You’re starting to stray rather far from the Corsican flavours but hey, things move on, and even the most traditional of recipes were new and experimental once upon a time!

For the wine, you want a dry white. Canistrelli should not be very sweet, and in any event they are sprinkled with sugar. However if you don’t want to use wine, you can use water or a mixture of fruit juice and water, which would make them a little more child-friendly. I mean, if you’re baking with kids, you want to recipe to be quick and easy to counter short attention spans, but you probably don’t want to be mixing wine in there. Of course, the alcohol will evaporate off during baking, so you don’t need to worry about serving these to little ones even if they didn’t help to make them.

Oh, and that comment I made about the bûche de noël? It might be a lot of work, but I am planning to make one this year, flavoured with pear and chestnut. But it will be at Christmas, hopefully by the time that I’ve done all 12 festive bakes, so it won’t be on here. Sorry!

To make canistrelli (makes around 30)

For the dough

• 275g plain flour
• 100g caster sugar
• 1 teaspoon baking powder
• 1/4 teaspoon salt
• 60ml olive oil (not extra-virgin)
• 2 tablespoons anise-flavoured liqueur e.g. pastis, ouzo
• 1/2 teaspoon vanilla extract
• 1/2 teaspoon crushed aniseed or pinch of ground star anis (optional)
• 5 tablespoons white wine

To decorate

• water
• granulated sugar

1. Preheat the oven to 175°C (350°F). Line a baking sheet with greaseproof paper.

2. Put the flour, sugar and baking powder in a large bowl and mix well.

3. In a separate bowl combine the salt, oil, liqueur, vanilla, aniseed/star anise and three tablespoons of white wine. Pour into the dry ingredients and mix with a fork. Add more wine, a tablespoon at a time, until you get a soft but workable dough rather like when making scones (aka “biscuits”).

4. Transfer the mixture to a workstop dusted with flour. Roll out or press to around 1 cm (1/2 inch) thick.

5. Cut out the cookies – use a fluted pastry wheel or a knife to cut strips about 2cm wide, then cut diagonally into diamonds. Don’t worry too much about getting them perfect as you won’t manage!

6. Transfer each piece of dough to the prepared baking sheets, leaving some space for them to expand during baking. Brush or mist with water and sprinkle with granulated sugar.

7. Bake the cookies for around 25-30 minutes until golden, turning half-way to get an even colour if needed. Watch them closely – you might need to reduce the heat by 10 degrees if they are colouring too fast. When done, remove from the oven and allow to cool. Store in an airtight container.

2 Comments

Filed under Christmas, Recipe, Sweet Things

Galette des Rois

Yesterday was Twelfth Night, the traditional end of Christmas festivities, and the day by which you’re supposed to have taken down all the decorations. We’re back to normal, but there are a couple of houses in the neighbourhood that are still holding on to the festive vibe.

So is that the end of the excitement? Well, not quite. Today (6 January) if Epiphany, so there is one last change to eat cake before we get to our resolutions to be healthier and more sporty in 2017. On of the cakes eaten on this day is the Galette des Rois (“cake of the kings”) which is popular in France and Belgium. It has a sweet almond filling between two layers of golden puff pastry. Probably best to start that diet on 7 January then…

We actually had one of these at work yesterday. We’d been discussing the phenomenon of “cake culture” and whether we should encourage or discourage the appearance of cakes in the office as part of a commitment to healthy eating. Afterwards, of course, I went to a bakery and rocked up with one of these guys, but we managed to agree it was OK, as this was a cultural cake, rather than a celebration of cake culture, so we were fine with that.

galettedesrois2
There is also a bit of fun that goes with this cake. Traditionally a ceramic bead would be added to the filling, and when the cake is cut and served, the person that finds the bead becomes king or queen for the rest of the day. If you buy a galette, you will usually get a golden crown to go with it, which the lucky monarch can wear to impress their subjects.

Now, you might be thinking that hiding a piece of ceramic in a cake is not a great idea if someone is hungrily tucking into it and they, oh, perhaps value their teeth? And you’d be absolutely right. As it turns out, I was the lucky king for a day at work, and it was a bit disconcerting to discover there was a piece of stone lurking in there. If you’re going to make one of these, I think the best way is to keep the tradition of something in the cake, but perhaps add a whole almond instead. All the fun, none of the risk of dental damage.

This is a very simple recipe to make. If you’re the sort of person that makes their own puff pastry, that’s great, but I am not one of those people. I bought mine from the store, and it makes life a lot easier. You just have to make the filling, then put it between two discs of pastry and bake it. But to make up for buying the pastry, I did make my own paper crown!

galettedesrois1

To make a Galette des Rois:

• 1 block of sheet of puff pastry
• 1 portion of filling
• 1 teaspoon apricot jam

• 1 egg, beaten
• 1 whole almond or trinket

For the filling:

• 100g butter
• 100g caster sugar
• 1 egg
• 1 teaspoon almond extract
• 1/2 teaspoon vanilla extract
• 100g ground almonds

• 2 tablespoons dark rum

1. Preheat the oven to 180°C (355°F) and line a baking sheet with greaseproof paper.

2. Make the filling. Cream the butter until soft, then add the sugar and beat well for a minute. Add the egg, almond extract and vanilla extract and mix until light and fluffy. Fold in the ground almonds, then add the rum and mix well.

3. Roll out the puff pastry so that you can cut two discs of at least 20cm, but try to get 25cm if you can. Cut out the two discs, and transfer one to the baking sheet. Use some of the beaten egg to moisten the edge of the pastry disc. Put the apricot jam in the middle and spread evenly, avoiding the egg.

4. Gently spoon the filling onto the pastry disc and spread it evenly – you might not need all the filling, particularly if the pastry disc is on the smaller side. Pop an almond or lucky charm into the mixture.

5. Place the other pastry disc on top, and working from the centre, use your hands to gently pat it down, getting rid of as many air bubbles as you can. Finally press down on the edges where you brushed the beaten egg to get a good seal. Crimp with a fork, then trim with a very sharp knife to get a neat edge.

6. Brush to top of the galette with beaten egg. Make a hole in the centre with a skewer to allow steam to escape, then use the back of a sharp knife to make a pattern on top of the galette.

7. Bake the galette for 25-30 minutes until puffed up and golden. You many need to turn it round half-way to get an even bake.

7. Remove from the oven and leave to cool. Warn your guests about any ceramic or metal lucky charms in the galette before serving!

5 Comments

Filed under Recipe, Sweet Things

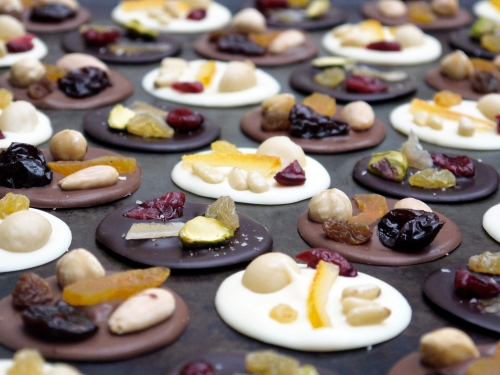
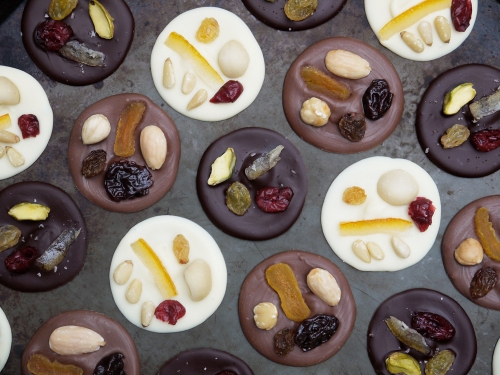
{3} Mendiants

If my last post about those buttery Swiss Mailänderli with a hint of lemon was a bit simple for your festive palates, today we are going just about as far from that as is possible. It’s a short hop across the border from Switzerland to France for mendiants, little discs of chocolate studded with all manner of delicious flavours.

mendiants5

mendiants12
You probably know what these things are if you’ve ever pressed your face against the window of a high-end chocolate shop and then been shocked at just how much they are asking for what seem to be little more than chocolate discs covered in “stuff”. I could make those at home, you think. Then you buy them anyway, and usually guzzle them in fairly short order. Or at least we do in our house…

Alright, so my basic description of mendiants not really do them justice, as they really one of those sweets that is so simple but the overall result is so much more than the individual parts. And after that Mailänderli business, this time we’ve got a pretty decent idea about where the name comes from too! Continue reading

6 Comments

Filed under Christmas, Recipe, Sweet Things

Pistachio Tuiles

I’m one of those bakers that likes to veer between madly complicated recipes and ridiculously simple bakes. Well, today I’ve had a bash at something that steers a nice line between both, using just a few simple ingredients that really just need to be mixed together. The magic part happens during baking, with a quick sleight of hand right after everything comes out of the oven. Intrigued? Then read on.

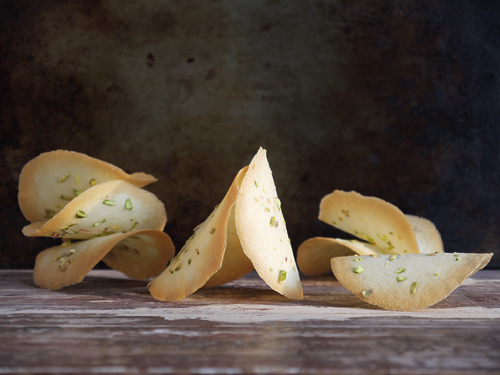
Today’s recipe is for delicate tuile biscuits. Tuiles literally mean “tiles” in French, as these thin, crisp little biscuits are said to resemble the look of Gallic rooftops. A simple batter is spread into very thin discs on a baking tray. They are baked briefly, and come of the oven with golden brown edges, but they are still soft. This allows you to lift them from the tray, drape them over some sort of mould (a rolling pin, a wine bottle…). The soft tuiles will wrap themselves around their new resting place, giving them their traditional curved shape. After a few moments, the tuiles will be cooled and very crisp. As you can see below, they take on a very elegant, almost ethereal appearance.

pistachiotuiles

These really as biscuits that you could mix up in a moment – you need nothing more than egg white, sugar, flour and butter. I’ve sought to jazz mine up a little, and have rather boldly referred to mine as pistachio tuiles. In fact, I’ve really only added chopped pistachios for the colour contrast, along with a few drops of almond extract for some added aroma. You could use anything you fancy for decoration – a few flaked almonds, a sprinkling of sesame, a scattering of poppy seeds or even dried citrus zest, so match them to your preferred dessert. The only thing to keep in mind is that these biscuits are delicate, so while slivers of pecan might work, whole walnut halves might look a touch bizarre.

Tuiles are delicious as they are, a crisp, sweet treat to enjoy with coffee, or to grace all manner of creamy puddings, from posset to custard, providing a pleasant crunch alongside your dessert. Alternatively, you could dip or drizzle with chocolate. One tip to bear in mind – while the tuiles will be crisp initially, they need to be kept in an airtight container, or they will soften after a couple of hours. It this does happen, then just pop them back in the oven – they will soften again, and you can place them back onto your rolling pin/wine bottle and they will be deliciously crisp again. Just don’t try this if you’ve already dipped them in chocolate…

To make pistachio tuiles (makes around 15):

• 1 large egg white
• 50g white caster sugar
• 25g plain flour
• 15g unsalted butter
• Few drop vanilla of almond extract
• Handful unsalted pistachios, sliced

1. Preheat the oven to 190 C. Grease a non-stick try with butter.

2. Melt the butter in a saucepan. Leave to one side to cool.

3. In a bowl, whisk the egg with the sugar until smooth. The mixture should be just slightly foamy. Add the flour and mix to a smooth paste. Add the vanilla or almond extract (if using), then stir in the butter and mix well.

4. Drop teaspoons of the mixture onto the baking tray. Use the back of a teaspoon to spread into a disc of around 10 cm (4 inch) diameter. Don’t worry if the batter looks like it has been too thinly spread, as long as there are no gaps. Sprinkle with a few pistachio slivers.

5. Bake for 4-5 minutes, until the edges are golden (you can bake them longer until they are completely browned if you prefer). Remove from the oven, then use a large, sharp knife to lift them off the tray and transfer to a rolling pin or wine bottle. Let the tuiles cool completely, then remove the crisp tuiles to a serving plate.

11 Comments

Filed under Afternoon Tea, Recipe, Sweet Things

Royal Baby: Petits Fours

Hurrah, after all that waiting, the royal baby has arrived! Even if you were not following the event closely, the atmosphere in London was exciting – one of the hottest days of the year, giving way to excitement in the warm evening as the news emerged. The media went into meltdown, getting more and more excited as we got to see the first pictures, then the news and the newborn was to be called HRH Prince George.

Never one to shy away from a bit of baking in honour of a national event, I’ve made a batch of little cakes with a suitably regal theme. Little blue petits fours flavoured with almond and topped with silver.

petitsfours5

petitsfours7

Now, in the interests of full disclosure, I have to admit that I made these little cakes just ahead of the birth, and hedged my bets by decorating some of them blue and others pink. I had planned to post the right colour on the day, but in the end I think they all look rather sweet so you get to benefit from the blue and silver look, as well as pink and gold.

For some reason, I had it most firmly in my mind that the Duke and Duchess of Cambridge would be having a girl. I even took a £5 hit on our office sweepstake where I went for the name Princess Charlotte Elizabeth Frances…maybe next time!

PetitsFours1

petitsfours4

Petits fours are one of those things that can seem like a lot of work, and I agree they are hardly the sort of thing that you can whip up in less than an hour. However, I think there is something quite satisfying about tackling something a little more complex when you have a few hours to spare. All the more so when you are in the middle of a heatwave – after each stage, you can pop out into the garden to bask in a little sunshine, which allows you to make sure you do not get too much exposure to the sun in one go.

If you’re keen to try making these, you’ve got two choices. I used a recipe from Martha Stewart to make thin layers of almond sponge, then sandwiched them together to make the cakes. However, there is a simpler way – get any sort of dense cake (like pound cake), then trim off the darker crusts and cut into cubes (or go crazy – use round or heart-shaped cutters to get creative). In all honesty, this latter option is a lot easier and ideal if you want to try making these little cakes with children. They tend to want to minimise the time between cake-making and cake-eating. You could still go for a fancy effect by using a marble cake as your foundation.

When it comes to the filling, this is entirely up to you. Jam would be traditional, with raspberry providing a slightly tart contrast to the sweet icing. Otherwise, try a firmer fruit jelly made with pectin if you want thicker layers of summery sweetness. However, I happened to have a pot of almond jam from Mallorca lurking at the back of the cupboard, and it was just perfect here (and fittingly – I bought it the week before the Royal Wedding in 2011). The flavour was nutty rather than sweet, with a dash of cinnamon and citrus to round out the flavour. To keep the almond theme going, I added a little marzipan square on top of each cake.

When it comes to icing, again Martha came to the rescue. I’ve tried simple water icings in the past, but they tend to be too thin, take too long to set and don’t give a great finish. The perfect – and traditional – option is to make sugar fondant, then melt it using sugar syrup. However, this is a bit of a faff, and I tend not to have an amazing hit rate when it comes to working with sugar syrup and getting things to set. The third way seemed like something I would work with – fill a large bowl with icing sugar, add liquid glucose (the nearest thing we have in the UK to corn syrup), water and any colouring, then warm in a bain marie until smooth. This went on like a dream and set fairly quickly.

So there you have it – pretty little petits fours which I might dare to suggest are fit for a prince. I would just make sure he has access to enough outdoor space to run around after all that icing!

For the cake recipe, see Martha’s recipe here. This was a great simple almond sponge so recommended whenever you need a thin layer sponge.

If you fancy making a pound cake, my butter-rich version is here.

Martha’s icing recipe is here, and there is a great video showing the technique here. It’s worth checking it out before having a go yourself! When I was making this, I found I needed to add a little water from time to time to keep the icing at the right texture. If it gets too thin, just pop back over the bain marie to warm and it should sort it out.

6 Comments

Filed under Afternoon Tea, Sweet Things

Snow and Salt

Last week I got to enjoy a rare luxury. Not the actual maracons themselves, but the luxury of free time. My year at work has been rather fraught (in the understated British sense, which means absolutely manic) and thus no easy dates on which to take leave. Sure, I had a mega-trip in the US in November, but I’ve still ended up with way too much leave to carry over to next year. As a result, I’ve been enjoying the bonus of a few long weekends. As I’m the only one around on these random Mondays and Fridays, I’ve foregone the idea of foreign jaunts, and instead I’m able to enjoy a slower pace of life in my own big city. I can go to some of my favourite cafés and just walk in and get a table. No waiting, no sharing. I can go to galleries and enjoy them peacefully, standing in front of the same picture for ages without being jostled or moved along. I can also engage in small talk with some interesting people who are equally unhurried. Bliss.

However, last week was another story altogether. Those first hints of spring from a couple of weeks ago had gone, like some sort of Phoney Spring, and were  replaced with snow. Lots and lots of snow. On Monday, the new cats and I just did not fancy leaving the house, so I was left with a little time to fill. After spending an hour getting the cats to chase a piece of string (their joint favourite thing, along with clawing the sofa), I decided to hit the kitchen and have a go at my kitchen nemesis – French macarons.

I know there are some people out there that have “the gift”, who can just knock up a batch at a moment’s notice without a second thought. I, however, am not one of those people. I’ve grappled with them on numerous occasions with varying levels of success. True, I’ve made them successfully on occasions, but I think my hit rate is about one in four at best. So for every batch of picture-perfect delicacies with their smooth domes, frilly feet and perfect symmetry, I’ve ended up with three batches of cracked almond meringue biscuits.

Well finally, finally, I think I’ve nailed it. I think my mistakes can be put down not to faulty technique as such, but the fact that many of my attempts were small batches. The smaller the batch, the more precise the measurements need to be, and I fear that trying to make macarons with just one egg white was pushing things too far. You need to be bold and think big. Large batches are the way to go! And as you can see below, the results look pretty darned good! There is still some irregularity there, but I find it hard to put into words just how utterly thrilled I was to remove the tray from the oven and find perfect macaron shells with no cracks. Yay!

salted_caramel_macarons

I opted for the salted caramel flavour as it’s actually delicious when made well, and the filling is a doddle to make. However, the one thing that I didn’t go to town on was the colour the shells. I know some people like shocking colours, and that salted caramel is often some sort of day-glow orange. However, I wanted something more subtle.There are two reasons. First, I am not that happy about using colouring that is highly artificial – if it only takes a few drops to turn something bright yellow, vivid red or electric blue, then you have to wonder just what it is doing to your insides. Second, on a purely aesthetic level, I find the intense colours of some commercially-available macarons rather lurid! Instead, I just used a few drops of some natural vegetable dyes in the sugar syrup to provide a light caramel colour to boost the colour of muscovado sugar, which I think looks rather pretty.

When it comes to the filling itself, it can only be described as filthy. The base is a simple caramel made from white sugar. Throw in some salted butter, cream and a few drops of vanilla, then whip once cooled with even more lovely butter. The result is a silky-smooth salted caramel cream which can be easily piped into the macaron shells, but which does not leak out (which pure caramel, delicious as it is, is apt to do). You’ll end up with quite a bit of the filling left over, and you’ll probably just want to eat it with a spoon. As I said – filthy, and irresistible.

One final trick – these are worth making ahead of time. If you can, leave the assembled macarons overnight in the fridge, and be sure to leave them to come up to room temperature before serving. This will help make the inside of the shells lightly chewy and the creamy filling with be delightfully soft and fluffy. Things to make you go wow.

So what’s your baking nemesis? Have you managed to beat it?

To make salted caramel macarons (makes 25-30):

For the shells:

• 175g icing sugar
• 175 ground almonds
• 130g egg whites (about 4 eggs), at room temperature
• 175g light muscovado or brown sugar
• 75ml water

• caramel food colouring

For the filling:

• 150g white sugar
• 50ml water

• 180g salted butter (divide into 30g and 150g)
• 150ml double cream

• vanilla extract
• salt, very finely ground

1. Preheat the oven to 150°C (300°F). Line two large baking trays with greaseproof paper.

2. Mix the icing sugar and ground almonds, and put into a food processor or spice mill. Grind until fine. Put into a large bowl.

3. Divide the egg whites into two portions (2 x 65g). Add one half to the almond/icing sugar mixture and mix until you have a smooth, thick paste.

4. Next, make an Italian meringue. Put the water and muscovado or brown sugar into a saucepan. Add caramel/brown colouring as desired (I used enough to enhance the brown tint from the sugar, probably 20 drops of water-based colour). Heat to 114°C (237°F). In the meantime, whisk the rest of the eggs whites until frothy. Acting quickly, pour the hot syrup into the frothy eggs and beat the living daylights out of them! The mixture should quickly start to turn pale and fluffy, and increase in volume. Whisk for 5 minutes until the mixture is stiff and glossy – it should easily hold its shape.

5. Take one-third of the meringue mixture, and fold into the almond paste mixture to lighten it. Fold in the next third, then fold in the final third. Try to do this gently, and don’t mix too vigorously or for too long.

6. Fill a piping bag fitted with a 1 cm hole nozzle. Pipe out the macarons, leaving a few centimetres between each. Leave to dry at room temperature for around 20 minutes.

7. Bake the macaron shells for around 12-15 minutes until the shells have developed little feet but they are not browned. You might want to open the door briefly during baking to let any steam escape. When baked, remove from the oven, allow to cool, then peel from the baking sheet. Arrange on a cooling tray and prepare the filling.

To make the filling:

8. Put the sugar and water into a small saucepan. Place on a medium heat until the mixture turns into a medium golden caramel (don’t be tempted to stir it at any point – it will turn into a crystallised mess!). The colour should be rich but without any burnt or acrid smell.

9. Remove the saucepan with the caramel from the heat, add the butter and stir well. It will sizzle, so watch out! Add the cream and vanilla to taste (just a drop or two) and stir until smooth. Put the pan back on the heat, and cook until it reaches 108°C (225°F). Remove from the heat and leave until almost cooled.

10. Put the cooled caramel and soft butter into a bowl and beat with an electric mixer until perfectly smooth. It might seem like the mixture has curdled at one point, but keep going and it will come good. You should end up with a very smooth cream. Add a dash of powdered salt (to taste, but go a little at a time).

11. Fill a piping bag with the salted caramel cream and use to fill the macarons.

12. Leave the macarons in the fridge for 24 hours, and remove from the fridge a couple of hours before serving.

Worth making? A complete faff, but the results are superb so it’s worth trying when you’ve got a few hours to yourself.

15 Comments

Filed under Recipe, Sweet Things

Diamond Jubilee: Diamants

Finally, after months and months of bunting and more Union Jacks than you could wave a stick at, the Jubilee Weekend has come and gone!

Today is the last in my series of royalty-inspired posts. I’ve made Regal Cola to serve at a street party, Edinburgh Tart (recalling HM’s previous title as Duchess of Edinburgh), Battenberg Cake (for Prince Philip’s family), Queen Cakes and Queen of Puddings. All well and good, but there is something missing. Something that reflects what this event is all about. Something that suits a diamond jubilee. What, oh what, should I make?

Clearly, it should be something that is based around the idea of the diamond. Biscuits in the shape of diamonds? Too easy. I could have gone for something that included edible diamonds, and while it is unlikely that HM will ever pop round to mine for a cuppa unannounced, I doubt that she would want to have a cake covered in fake diamonds. She’s got the real things back home. Nope, fake diamonds would be too tacky.

So I went rummaging in my cookbooks for a bit of inspiration…was there anything that referenced diamonds? Well, there  appears there is no such thing in the world of British baking. Nothing. Nowt. Nada. Rien…rien de rien…but wait…in the world of French baking, there is something. Something perfect. For France has some lovely little shortbread biscuits called diamants. Which means “diamonds”. Exactly what I had in mind!

If you don’t know these biscuits, they are super-simple. You make a shortbread dough, then chill it. Once very cold, you roll the whole log in granulated sugar to provide a little sparkle, then cut into slices for baking. Easy-peasy!

I think these are a suitable item to finish on. Shortbread seems to me to be somehow fitting – the Queen Mother was from an old Scottish aristocratic family, and we know that HM has a fondness for holidaying at Balmoral up on Scotland. Fine biscuits which are fit for a Queen!

To make diamants:

• 100 grams butter
• 50g icing sugar
• pinch of salt
• 1 egg yolk
• seeds of 1 vanilla pod or 1/2 teaspoon vanilla extract
• 120g plain flour
• 20g ground almonds

Mix the butter and sugar in a bowl until light and fluffy. Add the salt, egg yolk and vanilla seeds, and beat until well combined.

Add the flour and ground almonds, and mix until the dough just comes together, and avoid the temptation to over-work.

Roll the dough into a log with a diameter of 3-4cm (depending on the size of biscuits you want). Wrap in cling flim, and leave in the fridge to chill in the freezer for an hour.

When you’re ready to bake, preheat the oven to 180°C (355°F). Line a baking sheet with greaseproof paper.

Sprinkle some granulated sugar on a worktop, and take the dough “log” and roll in the sugar, pressing lightly to ensure it is well-coated. Use a sharp knife to slice biscuits of about a 1 cm thickness, and lay, cut side down, on the baking sheet.

Bake for around 10-12 minutes until the edges of the cookies are just turning golden. Remove from the oven, allow to cool slightly on the tray, and then move to a wire tack to cool completly.

1 Comment

Filed under Recipe, Sweet Things

Savoury Cake

Yes, yes, I know, it sounds so strange – a savoury cake?

This is exactly the reaction I had when watching a new series by the lovely Rachel Khoo, who runs a little restaurant in Paris from her studio apartment. How little? Well, she folds away her bed and can seat just two people in there. So while I think my kitchen is on the “bijou” side, I suspect she might be defying various laws of physics by producing lovely-looking food out of such a tiny space. Plus, she does it all while looking very chic and Parisienne, but happily for us, she’s a London lass at heart providing her take on classic French dishes.

So what is this savoury cake business? This is one of the recipes featured on the show. I’ll fess up to the fact I’ve never heard of this before, and my initial reaction was rather skeptical. I’ve often thought of savoury food, such as sauces, stews, soups, as being the sort of place where you can play fast and loose with the ingredients – a dash of this, a spot of that, and keep tasting to make sure you’re on the right track. In contrast, I tend to think of baking as being much more scientific – mix the same ingredients in one way and you get biscuits, another way and you end up with cake. Use the wrong quantifies, and things can go terribly wrong. Get the technique wrong, and you face collapsing macarons, sticky meringues of sunken cakes.

Coming at it from this perspective, the thought in my mind was…alors, le sucre? Yes, what would the absence of sugar mean here? I mean…how could this turn into a cake? How? How?

Well, let’s just think about what Rachel had to say on the subject. These things are (apparently) very popular in France, and so that alone should have given me some confidence. And her recipe looked fantastic – goat cheese, juicy prunes and pistachios struck me as a lovely combination, and the method did look very simple. Just whisk up the eggs, add milk, olive oil and yoghurt, then fold into the dry ingredients and bake. I imagined that the result would be something like a giant savoury muffin, studded with lots of flavoursome and complementary flavours. So…I crossed my fingers, baked one, and here it is:

I’m happy to report that this really is a delicious recipe. The crumb is soft and indeed very savoury, and it provides a medium for all the other flavours. In particular, the sweet-ish prunes and lightly acidic, tangy goat cheese were a great combination. I probably kept the chunks of cheese and prunes a little on the large side compared to the version that Rachel makes, but that’s only because I like them to be quite obvious when you cut the slices.

While delicious, this was actually ridiculously easy to make. I can definitely see myself making this a lot this summer. It’s a great way to make something for a picnic, it transports so easily, and you get lots of flavours in there. It also leaves lots of scope to adjust the recipe according to what you’ve got the cupboard or fridge – olives, nuts, cheese, dried tomatoes. You name it, it can probably go in here. I’m also going to try making half a batch to make into breakfast muffins, so I’ll let you know in due course how that goes.

And to response to my worries about what happens when you skip the sugar in a cake – it’s a cake, not perhaps as we know it in Britain, but very tasty nevertheless. Rachel has converted me.

To make a savoury cake (recipe slightly tweaked from Rachel Khoo)

• 250g self-raising flour
• 1/2 teaspoon baking powder
• 150g soft goat cheese, cut into chunks
• 80g pistachios, chopped
• 100g soft prunes, cut into pieces
• 4 eggs
• 150ml olive oil
• 100ml milk
• 50g natural yoghurt
• 1 tsp salt
• 1/2 teaspoon freshly-ground black pepper

Preheat the oven to 200°C (400°F). Line a loaf tin with greaseproof paper (no need to grease – the oil in the cake takes care of that).

Put the flour, baking powder, goat cheese, prunes and pistachio nuts in a bowl, and stir gently so that everything has a good coating of flour.

In a separate large bowl, whisk the eggs until very light and fluffy. Stir in the milk, olive oil and yoghurt. Add the salt and pepper, and fold in the dry ingredients. Use a spatula to mix until just combined. Over-mixing is not good, and you don’t want to smash the cheese into smithereens.

Pour the batter into the tin and bake for 30 minutes – the cake should be golden and an inserted skewer should come out clean. If it starts to get too dark too quickly, cover loosely with tin foil for the rest of the baking time.

When done, remove from the oven and leave to cool in the tray.

Worth making? This is an unbelievably easy recipe. In case you doubt me, this is likely to be my summer staple for days out and picnics – customise the additional ingredients and you’ve almost got a whole meal in there to keep you going on busy sightseeing days. Highly, highly recommended!

12 Comments

Filed under Recipe, Savoury