Tag Archives: Scotland

Scottish Food: Perkins for Burns Night

I was having a look back at some past posts and I realised that it has been 4 years since I last did a Scottish recipe in honour of Burns Night. I did manage 2 years ago to make some lamingtons for Australia Day, so it’s not been a complete failure, but I did think that it was time to have another go.

So what should I make? I was doing a bit of research and I chanced upon a recipe for perkins, traditional spiced Scottish biscuits made with oats. Super! I could make those! Except I had no clue what they were. I must say, it was an odd feeling to be researching something from my home country, but yes, it turns out there are Scottish biscuits that I have no idea existed. And it seems that I’m not the only one – Amy at Baking with Granny seems to have had a similar reaction to perkins as they were suggested to her via Facebook.


I started looking for some ideas of what they were, and after wading through dozens of websites referring to perkins recipes “like granny used to make” and telling me they were “excellent with a cup of tea” it became apparent fairly quickly that I probably do know what they are, I just don’t know them as perkins. They’re flat, slightly chewy cookies made with oats, syrup and spices – not dissimilar to Anzac biscuits. I guess I would call them “oat biscuits” or “oat crumbles”. Anyway, there are some suggestions that they are linked to the famous Yorkshire parkin which shares many of same ingredients, but I’m sure there are the spirits of many proud Yorkshire housewives ready to haunt my nightmares for suggesting that parkin could have come from anywhere other than God’s Own County. So I’ll just say “those ingredients lists and similar names are such a coincidence”. In fact, beyond the oats, spice and golden syrup, I don’t think they are that similar. I think parkin should contain treacle, which these definitely do not.

As for a recipe, I found on on the website of the National Trust for Scotland. Bingo! Surely if anyone knows about traditional biscuits, it will be these people? I mean, a day out to a castle or a stately home always involves a visit to the tea shop and some cake or biscuits. So, dead cert?

Well…I started to read the recipe and there were a few gaps. It needs “flour” which I assumed would be plain, since there is baking soda in there to leaven them. Then “oatmeal” but what was that? Fine oat flour? Coarse? Oat flakes? Big ones? Small ones? I just improvised – I took jumbo rolled oats, ground them in a food processor so they were about half flour and half chopped oats and reasoned that a bit of texture in a biscuit isn’t a bad thing. I was pleased that they did measure out the golden syrup by weight rather than volume, which in my opinion is the right way to do it. By the time you’re measured 100ml of syrup, you’ve usually coated about 5 utensils with sugar and it is a mess. The size of the egg is also not clear – I went with medium and hoped for the best, thinking that if it was too dry I could always add some milk, but if the mixture gets too sticky, it’s always a pain to add more flour as it can throw off the quantities. Thus, the recipe you see below uses the Trust’s quantities, but is based on my tweaks to ensure it would actually works. I also had to double the number of almonds – the recipe asks for split blanched almonds, which I’ve never seen on sale. By the time I had skinned some almonds, I lacked the will to split them apart with a sharp knife, so I just used them whole.


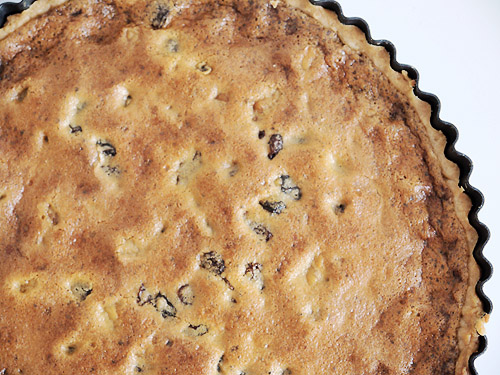
But the recipe wasn’t the strange part. I was not entirely convinced the picture they used was of the actual recipe they were presenting. Their biscuits looked too big, too smooth, too pale. Mine – and those made by quite a few others, including Baking with Granny – are flatter, rougher and with a deeper golden colour. If I’m making something I don’t mind that it doesn’t look exactly the same, but I’d like some sort of family resemblance as a minimum! Let’s just say there is a Russian website with gingerbread cookies that look awfully, awfully similar.

Making them was actually very easy – throw it in a bowl, and get mixing. Because they are leavened with baking soda, you also get a bit of chemical magic during baking, which gives that amazing golden colour. They go in as fairly pale balls of dough, and during baking they sort of puff up and then collapse. If you look at them about half-way, they look very pale and are only just starting to colour. However the baking soda will work its spell on them and a few minutes later they get a crinkled texture and take on a deep golden colour. So watch them like a hawk, of if you’re feeling very Scottish, like a golden eagle. I actually did a test run with the first cookie to see how it worked and how long it had to be in the oven. I’d rather get one wrong and save a batch than try baking 20 and ruin the lot. How you approach it depends on whether you’re a gambler.

For all that, how do they taste? They’re actually delicious – the oats mean they are substantial, and they have a lovely deep flavour from the syrup and spices. It’s the sort of biscuit that might also be improved massively by the addition of a layer of chocolate if you’re in the mood to start messing around with a thermometer to get that glossy, shiny finish, but all that Scottish restraint perhaps points to keeping them pure. I’ll definitely make them again, and the chocolate option is rather appealing. Views?

To make Perkins (make around 45):

• 250g rolled oats
• 250g plain flour
• 180g caster sugar
• 1½ teaspoon baking soda
• 1 teaspoon mixed spice
• 1 teaspoon ground ginger
• 1 teaspoon ground cinnamon
• 125g butter
• 1 medium egg, beaten
• 180g golden syrup (*)
• 60g whole almonds, blanched (**)

1. Preheat the oven to 160C (320°F). Line two baking sheets with greaseproof paper.

2. Put the oats in a food processor. Grind until medium-fine – about 2 minutes. Half should be flour, the rest should be chopped oats.

3. In a bowl, combine the oats, flour, sugar, baking soda and spices. Mix well, then sieve to ensure there are no lumps. You’ll have some oats left in the sieve – tip those into the bowl.

4. Add the butter, and work with your hands until it is incorporated. The mixture will seem quite dry – you don’t get a “breadcrumb” texture.

5. Add the egg and the syrup, then use your hands to mix to a firm dough. You should be able to take pieces and roll them into balls – if too dry, add a little milk. If too wet, add more flour.

6. Take pieces of dough “the size of a large marble” according to the National Trust for Scotland (or weigh them – 20g – they’re about the size of a Fererro Rocher, Mr Ambassador). Roll them into a ball, and place on the baking sheet. Press down very slightly, then gently press an almond on top. It should still be more or less a ball, not flat.

7. Bake for around 13-15 minutes, turning half-way to get an even bake. They are ready when they are an even, rich brown colour. Remove from the oven, allow to cool for a moment to firm up, then transfer to a wire rack to cool completely.

(*) That’s golden syrup, not corn syrup. You need this for flavour. As a substitute you could use honey or the Swedish-style “light syrup” which has a similar consistency and flavour. Maple syrup is not great here as it is much runnier so you will need to adjust the amounts…

(**) Either buy almonds that have been blanched, or do this at home – bring a pan of water to the boil, add the nuts and simmer for a minute. Drain, allow to cool for a moment, then the skins should slip off when you squeeze them gently.

2 Comments

Filed under Recipe, Scottish Food, Sweet Things

Scottish Food: Parlies (after a fashion…)

Hoots! Tonight is Burns Night, the official unofficial celebration of all things Scottish in general, and specifically the life and times of the national poet, Robert (Robbie) Burns. Up and down the land, people will enjoy traditional fare consisting of haggis, neeps and tatties (swede and potatoes). Simple stuff, but usually rounded off with a lot of whisky and followed with a poetry recital and some energetic Scottish folk dancing if you’ve managed to moderate the whisky intake.

I’ve been looking around for an interesting Scottish recipe, and from time to time I’ve seen a reference to biscuits called “parlies”. I must admit that parlies are not something that feature in my knowledge of Scottish baking, and it seems that I’m not alone. Most people think about shortbread and Ecclefechan tarts, perhaps with the occasional empire biscuit thrown in there, but parlies don’t feature much on blogs. So when it came to making these mysterious “parlies” I was pretty much guessing how they would turn out.

parlies2
Before I get to the baking, a little history lesson is helpful. The name parlies come from the word “parliament”, and they are also known as Scottish parliament cakes. The story goes that these ginger biscuits were purchased by the members of the original (pre-1707) Scottish Parliament from a tavern on Potterrow behind the University run by a Mrs Flockhart (who was also know as “Luckie Fykie”) , and were enjoyed with a tot of whisky. Parlies themselves were square in shape, and she also sold “snaps” which were round. In fact, you can read more about her in this extract from Traditions of Edinburgh written by Robert Chalmers in 1825. The title pages explain that it concerns itself with “conspicuous characters of the last century” and promises “the old-town ladies of quality”, which I can assume only refers to how they ran their hostelries. But remarkably, this book talks about her, the location of her tavern, and there is even a reference to parlies in there! However, I have not yet found a source that confirms whether these were enjoyed by any particular side of the house or they enjoyed cross-party appeal.

Armed with this knowledge, I knew that I was making some sort of ginger biscuit. I like ginger, so that was a plus. But what I quickly realised is that there is no one single way to make them. Given they seem to be at the very edges of the national baking consciousness, there is no single ideal to bake towards. Eeek! I knew what this meant – I might be facing baking failure, and I might end up in one of those kitchen frenzies when I’m trying recipe after recipe to get something that I deem acceptable. Yes, that happens sometimes!

All recipes I was able to track down used brown sugar, butter, flour, ginger and black treacle in varying quantities. Some used egg, others didn’t. There were also different ways to make them – some involved melting the butter, some involved the creaming method. While I am far from a baking expert, I knew this risked differing results. There was also a dearth of raising agents in the recipes I managed to find, which did make sense as the original parlies first popped up at a time when there was no baking powder, and other raising agents might have been hard to come by.

I bit the bullet and started with a recipe that involved mixing up the dry ingredients, then adding melted butter and an egg to make the dough, but with no raising agent. The dough looked good – it was fairly stiff, and once chilled it could be easily rolled into balls, then flattened and baked. I even added a criss-cross pattern with a fork, which provided a sort of portcullis look on the top of them. While they looked pretty good, and the flavour was decent, the lack of raising agent meant that they were thick and tough – these were not going to melt in the mouth, and I doubt that soaking them in tea or whisky would help soften them. Next!

My second attempt used the creaming method – whipping the butter and sugar, then mixing in the egg before adding the flour, ginger and treacle. This time the mixture seemed lighter and softer, and I assumed that the air I had beaten into it would mean that this batch would come out crisp and light. Well, nope. The spoonful of dough just baked into an unappealling lump of brown. I did try to rescue the dough with a spoonful of golden syrup and a teaspoon of baking soda, but the result looked horrible, and managed to taste worse than it looked. Next!

By my third attempt, I realised that since I had no clue what I was actually aiming for, I should go back to what I know about ginger biscuits. The mixture reminded me of gingernuts, but without any raising agent. I felt that the lack of anything to give them a lift might have been authentic, but it was also grim, and we live in a modern world where we don’t need to eat grim biscuits. I needed something for lift, and decided on baking soda. So my version of parlies are actually gingernuts, but with the sweet golden syrup replaced with the dark, spicy and tangy black treacle, and a bit of chopped cyrstallised ginger for extra spice.

This time, they worked like a dream – just mix all the dry ingredients, work in the butter, then add the treacle. The dough is easy to work and roll into balls, and in the oven, then collapse, take on an attractive random cracked appearance. Once cool, they are light and crisp. Perfect!

parlies1
So there you have it – my take on parlies! They might not be authentic, but I like to think that Mrs Flockhart might have approved (she did sell the round ones too, after all!). And I think they make a passable attempt and the black treacle is a definite nod to the original, and it adds an interesting flavour to them. If you’re not a fan of black treacle, you could use sweeter molasses, or if you like things very sugary, just use golden syrup and call them gingernuts. That still sounds rather Scottish, doesn’t it?

To make parlies (makes 20):

• 110g plain flour
• 1 teaspoon baking soda
• 1 teaspoon ground ginger

• 40g soft brown sugar
• 50g butter
• 1 teaspoon candied ginger, finely chopped
• 2 tablespoons (50g) black treacle or molasses

1. Preheat the oven to 190°C and line a baking sheet with greaseproof paper.

2. Put the flour, baking soda and ground ginger in a bowl. Mix in the sugar, then rub in the butter until it resembles coarse breadcrumbs. Mix in the chopped ginger.

3. Add the treacle and mix to a stiff dough.

4. Divide into 20 pieces (roll into a sausage of 20cm, the cut into 1cm pieces). Roll each piece into a ball, then place on the baking sheet and flatten slightly. They will spread out, so leave plenty space between them. It is easier to bake them in batches.

5. Bake for 10-15 minutes until the cookies have spread out and have a cracked appearance. They will be soft when they come out of the oven, but will go hard once cooled.

5 Comments

Filed under Recipe, Scottish Food, Sweet Things

Scottish Food: Skirlie

Burns Night might have passed, but I’ve got one last Scottish recipe that I would like to share. This one is great, as it is both incredibly tasty, very simple to make and really rather healthy given that the main ingredients is the wonderfood that is oats.

This dish is called skirlie, and I’ve been making it rather a lot recently. You can more or less make it from cupboard and fridge staples, and the taste is definitely a lot more than the sum of its parts.

Skirlie is made from onions that have been browned in butter or olive oil, and then you add some pinhead oatmeal and leave the lot to cook until the oats are slightly toasted. Season to taste. Voila! If you’re trying to imagine the taste, it is something like an onion stuffing (or at least, how a vegetarian might imagine stuffing to taste…). If you’re wondering what pinhead oatmeal is, it is the stuff that looks like little grains of oats, rather than the big, fat flakes. I don’t think there is any reason you could not use rolled oats, but don’t try to use oatmeal or oat flour, as they are too fine.

skirlie1
I’ve tried to find out more about skirlie, but this seems to be one of those traditional Scottish dishes that doesn’t really have a lot to say for itself. No links to the Jacobites, no links to Robert the Bruce, and not (as far as I’ve seen) a favourite of Queen Victoria during her visits to Balmoral. This just seems to be a good, honest, traditional recipe, and that’s that! If you’ve got any secret knowledge, please do share! What I was able to find out is that skirlie is traditionally made with beef dripping as the fat to brown the onions, so if that’s your thing, you might want to have a go for a more “authentic” flavour. I think butter works well instead, but of course you can go for a completely vegan option by using olive oil.

This really does have the flavour of a very traditional dish, but for its simplicity, it really packs a flavour punch. To make this well, I think there are a few secrets: first, get the onions really cook down slowly until they are nicely browned, which can mean taking the time to get them cook for as long as you can on a very gentle heat. Next, let the oatmeal cook for quite a while, so that you develop some “nuttiness” in there. Finally, get a little creative with the flavours. You’ll need to add some salt, but this also benefits from some black pepper and aromatic herbs. One version I’ve seen uses generous amounts of fresh thyme and lemon zest, which makes this into a very aromatic, fresh-tasting dish.

There is, however, one way in which my version of skirlie really veers away from more traditional recipes. All the versions I was able to find told me to add the oats to the onions, and cook the lot, job done. However, I tried this and found the resulting skirlie to be a bit too dry for my liking. This would be fine if you’re serving it alongside something with a lot of sauce, or plan to mix it into mashed potato for some added flavour and crunch, but on its own, I was not convinced. The answer was simple – just add some water at the end of the cooking time, then keep cooking. It will initially boil up and thicken, looking a bit like porridge (at which point you think “oh no, porridge for dinner!”), but keep cooking and it will dry out a bit, but it will turn fluffy and the oats will be slightly tender. The end result is something with a texture a bit like brown rice.

To serve this, I think it really is best as a side dish, to provide a bit of variety from rice or mashed potato (or as I say – mix it into the potato!). You can also add other vegetables, such as mashed carrot or swede, or even some pan-fried spinach or kale for a properly healthy dish. Yes, it contains butter, but all those oats have to be doing you some good!

skirlie2

To make Skirlie (serves 4 as a side disk):

• 2 large onions or 6 shallots
• 40g butter
• 3 tablespoons olive oil
• 150g pinhead oatmeal
• 1 lemon, zest only
• aromatic herbs (thyme works well here)
• salt
• freshly ground black pepper
• water

1. Peel the onions/shallots, and roughly chop. As the oats are fairly fine, you want the onions to add some texture.

2. Put the butter and olive oil in a frying pan. Heat until the butter melts, then add the onions/shallots and fry over a medium heat until they have a good brown colour.

3. Add the pinhead oatmeal and lemon zest, plus herbs, salt and pepper to taste. Cook for around 5 minutes, stirring frequently – the oats should start to brown, but should not burn!

4. Optional. Add some water to the mixture – it will thicken initially, but keep cooking until it starts to look try. Try the oatmeal – if you prefer it to be softer, add more water and keep cooking until you get the desired consistency.

11 Comments

Filed under Recipe, Savoury, Scottish Food

Scottish Food: Petticoat Tails

This evening is Burns Night, so time to celebrate all things Scottish! However, things like haggis can be a bit of an acquired taste, so I’ve gone for one of those perennial favourites, shortbread. Or more specifically, the rather pretty looking Petticoat Tails, a large disc of shortbread with a decorated edge and cut into elegant triangles.

petticoattails1
The actual origin of this rather curious name is lost, but there are a few suggestions. One is that the shortbread disc was said to resemble the stitches sections of cloth that formed the petticoats of ladies when them were laid out on the floor. Other ideas are less romantic, noting that the name could derive from petits cotés, a type of pointed biscuit, or the old French term for little biscuits, petites gastelles. Whatever the real source of the name, they are a perennial favourite and Mary, Queen of Scots was reputed to have been particularly fond of these sweet, buttery biscuits.

Petticoat Tails are very easy to make. You just need three ingredients (sugar, salted butter and flour), then roll out the dough, trim it and shape it, so it is perfect if you want to make in small batches. I think it is vital to use salted butter – that salt adds a little extra something, and takes biscuits from being a bit sweet but bland and into being rich and buttery with a tiny hint of caramel. The only other  tricks are to make sure that once you’re cut and shaped the dough, it should be chilled for about half an hour, then put into a fairly low oven and left to turn a golden colour.

When you make Petticoat Tails, you will have some offcuts when you cut out the giant disc. However, don’t throw them away! Collect them up, roll into a sausage and leave to chill in the fridge. You can then cut into thin slices and bake them until golden to enjoy with a cup of tea. Two bakes for the price of one!

petticoattails2

To make Petticoat Tails:

• 100g caster sugar
• 225g salted butter
• 300g plain flour
• 50g cornflour (not cornmeal)

1. Cream the butter until soft, then add the sugar and beat until light and fluffy.

2. Add the plain flour and cornflour, and mix to a soft dough. It might be easiest to use your hands, particularly if you’re working in a cold room.

3. Lay a sheet of greaseproof paper on a baking tray, put the dough on top and roll it out. Use a plate, a tin or some sort of circle as a template and cut out a disc (mine was 24cm diameter). Trim away the excess.

4. Decorate the shortbread – use a knife to divide the disc into eight, cutting about half-way into the dough. Use your fingers, a fork or whatever utensil you like the crimp or decorate the edge. Use a cocktail stick to make random holes on each piece. Put the whole tray into the fridge for 30 minutes.

5. Preheat the oven to 160°C (320°F). Put the tray into the oven, and bake for around 40 minutes until golden. You might need to turn the tray round half-way, and adjust the time as needed – thinner shortbread will cook more quickly than thicker pieces.

6. When the shortbread is ready, remove from the oven and sprinkle lightly with caster sugar and leave to cool completely.

7 Comments

Filed under Recipe, Scottish Food, Sweet Things

Scottish Food: Selkirk Bannock

You’ll probably know by now that I’m Scottish, and that often comes through in a lot of the food I make. Well, it’s certainly been an interesting few months concerning the future of the nation (but of course, as a resident of London, I was an observer rather than a voter) and I get the feeling that this “interesting” period is only going to continue.

So how to deal with this disconnection? Make something Scottish of course! I decided that I really should turn my hand to making a traditional bake called the Selkirk Bannock, a rich bread made with dried fruit – and sometimes spices – which originates from the Royal Burgh of Selkirk in the Scottish Borders. Truth be told, I made about four of these over the last couple of weeks. Symptomatic of a touch of homesickness perhaps?

selkirkbannock1

Now, the name name “bannock” usually means something a bit more like a flatbread, often cooked on a griddle. Well, this really could not be more different. The Selkirk Bannock was originally a festive bake, but is now available all year. It is an enriched bread, made with milk and butter, but no eggs (at least in my version) and not a crazy amount of sugar. Most of the sweetness comes from the sultanas, so it can be eaten either as a savoury bread with cheese, or toasted and topped with butter, or jam if you want something very sweet. It’s certainly an easy and tasty bake to enjoy on these nippy autumnal days as the final days of summer pass quickly.

selkirkbannock2

I tried making a couple of versions before settling on my recipe below. From what I could see, most recipes did not use a lot of yeast and a limited amount of liquid, but this meant that my first attempt did not have much of a rise. While this seemed to chime with bannocks that I remember eating in the past, it was not quite what I was looking for. Flat flavour and a flat look! Fortunately, this was easy to fix – in my next attempt, I added more milk to make the dough softer, and I doubled the amount of yeast – I figured that it would be quite acceptable to have a light and tasty Selkirk Bannock that veers towards being a Celtic take on a panettone.

One thing to point out about the flavours in here – it’s traditional to stick just to dried fruit like sultanas, but more modern versions also include candied peel and/or spices (or even the ubiquitous cranberries!). I’ve stuck with a fairly traditional recipe, but I did add a dash of garam masala for a little extra flavour. Perhaps not quite what the purists would like to see, but I’m happy to face the wrath of some gnarly Scots master bakers – I’m rather happy with my bannock, with its light texture, a lovely golden soft crust, and lots and lots of fruit. I think it worked a treat – it was a big hit at brunch, sliced, toasted and spread with salted butter.

 To make a Selkirk Bannock:

• 60g butter, plus extra for greasing
• 150ml milk, scalded
• 250g strong white flour
• ¼ teaspoon salt
• 1 teaspoon instant yeast
• 2 teaspoons caster sugar
• 1/2 teaspoon mixed spice (optional)
• 200g sultanas
• 30g light brown sugar
• milk, to brush

1. Melt the butter and add to the milk. Leave until lukewarm.

2a. If using a bread machine: Put the flour, salt, yeast, caster sugar and mixed spice (if using) plus the milk mixture into the bowl and run a dough cycle. Simples!

2b. If making by hand: Put the flour, salt, yeast, caster sugar and mixed spice (if using) plus the milk mixture into the bowl. Stir with a spoon, then knead with your hands until you have a smooth, stretchy, silky dough (at least 5 minutes). Leave the dough a warm place for an hour until the dough has doubled in size. Knock back and knead again for 2-3 minutes.

3. Knead the sultanas and brown sugar into the dough, then shape into a round and put into a buttered and lined cake tin. Leave to prove until roughly doubled in size (ideally spritz lightly with water, put the whole thing in a plastic bag, then leave somewhere warm).

4. In the meantime, preheat the oven to 160°C (320°F). Brush the bannock with milk and bake for 40-50 minutes until the bannock looks risen and well-browned. You might need to turn it round at some point to get an even colour, but if it like it is getting too dark, cover loosely with tin foil. When done, the loaf should sound hollow when tapped lightly.

5. Let the bannock cool for 10 minutes in the tin, then transfer to a wire tray to cool completely.

Worth making? Delicious – easy to make, and a good all round bread for breakfast or a little snack.

16 Comments

Filed under Recipe, Scottish Food, Sweet Things

Gaun Yersel, Glasgow!

So, lads and lassies, did you see all that? We’ve had over a week of sporting action from the 2014 Commonwealth Games in Glasgow. The opening ceremony was of course a festival of almost every cliché you could imagine – tartan, glens, bagpipes, Scottie dogs, the Loch Ness Monster and a few dancing Tunnocks teacakes – and all of that was brilliant. I went up there for a few days, and the mood in the city was amazing. Friendly people and crowds cheering the athletes. Glasgow did itself and Scotland proud!

Just to finish off the celebration of all things Caledonian, here are a few Scottish recipes that I’ve tackled over the years from those of you that have been watching from further afield and who want to keep the celtic mood going, and perhaps experience some of the flavours of Scotland. Sadly, I don’t have recipe for Scotland’s second national drink, Irn-Bru, that I can share with you. I’ll leave that gastronomical experience for when you’re able to visit…

Macaroon bars. For me, these are one of the most Scottish things you could make. The centre is a simple fondant made from icing sugar and, rather bizarrely, mashed potato! They’re then dipped in chocolate and rolled in toasted coconut to provide a very calorific treat. Go for a long run after eating.

Macaroons_Bars_3

Shortbread. This is often seen as the “jewel in the crown” of Scotland’s rich baking tradition. It is amazing that this simple combination of butter, flour and sugar can turn into something so delicious and it has been responsible for millions of boxes festooned in tartan, Scottie dogs and thistles.

thistleshortbread_2

Oatcakes. As a healthy counter to those sugar-heavy macaroon bars, oatcakes are another of Scottish baking’s gems. They’re ridiculously simple, just oats, flour, water and salt, but they’re delicious on their own or with good, sharp Scottish cheese.

Oatcakes3

Ecclefechan Butter Tart. This one is worth making for the name alone! It originates in the town of Ecclefechan near the border with England, and consists of nuts and dried fruit in a rich filling made with butter and brown sugar. It’s a little bit like Canadian Butter Tarts…I wonder if there is some link there?

EcclefechanTart2

Clapshot. Another simple dish but one which is utterly delicious, believe me. Not much more than potato and neeps (aka turnips, or what the rest of the world calls swede…), mashed up with butter, salt, pepper and sprinkled with chives. This one originates from Orkney.

clapshot1

Atholl Brose. This is the grand name that is given to an oat milk that is mixed with cream, heather honey and whisky to provide a celebratory tipple that was said to have been a favourite of Queen Victoria.

atholl_brose

Cranachan. Scotland is a big soft fruit producer, and cranachan is a great way to make the most of Scottish raspberries. This is a lovely mixture of toasted oats, softly whipped cream with a dash of whisky and honey, and fresh berries that is the essence of summer. A more sophisticated alternative to Eton Mess!

cranachan_2

Rock Buns. A tea shop staple that I remember from the 1980s – simply fruit buns with a dash of spice. Named after their slightly rustic (rock-like) appearance.

RockBuns2

Empire Biscuits. More tooth-attacking sweetness! These are two buttery biscuits, filled with jam and topped with glacé icing. Originally known as German biscuits, the name was changed to something more patriotic.

EmpireBiscuits2

Smiddy Dumpling. Alright, this is perhaps one that is not so widely known, but it nicely showcases the various dark teabreads you might see in Scotland. I got this one from a friend’s mum who lives on the Black Isle, to the north of Inverness. An easy loaf cake to knock up if you don’t fancy getting to grips with boiling the more famous Clootie Dumpling (in an old dish cloth, or cloot, of all things!).

Smiddy_Dumpling

Tattie Scones. A great breakfast favourite – mashed potatoes and flour, cooked dry in a frying pan and then yours to scoff either covered in butter and jam, or as part of a cooked breakfast. Incidentally, these were being served in a bun at the Commonwealth Games…perhaps a bit of a starch overload there?

TattieScones3

10 Comments

Filed under Scottish Food

Scottish Food: Empire Biscuits

I’ve not done a post on something Scottish for a while, so time to change that. These are Empire Biscuits, which are made from two layers of shortbread, filled with jam and topped with sweet icing and a cherry on top. Well, that’s the story that I know, but they do also go by different names, including Belgian biscuits, but that’s a name I never heard of where I grew up!

They are, in one way, just another variation on Linzer biscuits, but their name is where things get a little interesting. They were known as German biscuits until World War I, at which point they took on a more patriotic name, perhaps taking their lead from the rebranding of the Germanic-sounding House of Saxe-Coburg-Gotha over to the much more British-sounding Windsor around the same time?

EmpireBiscuits2

These are the sort of biscuits that I can remember from when I was growing up, either behind glass counters in a bakery or as part of a selection of cakes in a tea shop. For me, they have a certain retro charm, the sort of thing that is actually very simple to make, but also utterly delicious when made well, with buttery biscuit and good, fruity jam. Perhaps if I was faced today with the sort of biscuits that I ate as I child I might be a little more picky about them, but in my mind, they are a firm favourite. Certainly my inner child was quite excited with how this little batch of biscuits turned out. They looked just right!

To make the biscuits, you can use whatever recipe you want, but I think a simple shortbread works best (I re-used this Christmas recipe to good effect). It’s also best to go with a recipe that does not contain too much sugar – you’re going to be adding jam and icing to the finished biscuits, so you don’t need to worry about them not being sufficiently sweet. I also cut them out using a scalloped cutter as I think the effect is rather pretty, but you can go for circles, or get creative with stars, squares or stars.

When it comes to the filling, it has to be jam and it has to be something with a good, fruity flavour. It’s got to stand up the biscuit and the icing, so something with only a very delicate flavour will be overshadowed. Robust raspberry or strawberry is traditional, but blackcurrant works well too (in fact, that’s what I used here). I recommend being fairly generous with the jam – probably veer on the side of being a little too generous, because Empire biscuits actually benefit from being left overnight for the icing the set and for the jam to merge into the biscuit.

Empire biscuits are finished off with a simple water icing, and then a cherry on top. You might think that you could add all manner of interesting and exciting flavours to Empire Biscuits, but my own preference is to keep things traditional. Play around with the jam, but beyond that, enjoy the retro feeling you get with these tasty little morsels. If you’re feeling particularly adventurous, you could replace the cherries with some sort of jelly sweet. Me? Always a glacé cherry!

EmpireBiscuits1

To make Empire Biscuits (makes 10):

For the biscuits:

• 85g butter, softened
• 40g icing sugar
• pinch of salt
• 1/8 teaspoon vanilla extract
• 1 dessert spoon water
• 125g plain flour

To finish:

• jam (one teaspoon per biscuit)
• 100g icing sugar, to dust
• cold water
• 2 glacé cherries, each cut into 8 pieces

1. Beat the butter until soft. Add the icing sugar, salt, vanilla and water and beat until pale, fluffy and completely combined. Sieve the flour and add to the rest of the ingredients. Mix until you have a smooth dough. Wrap in cling film and chill in the fridge for 30 minutes.

2. Preheat the oven to 200°C (400°C). Line a baking tray with greaseproof paper. Roll out the dough to 1/3 cm (1/4 inch) and cut 20 shapes with a round or fluted cutter. Pop into the fridge for 5 minutes, then bake the cookies until just golden at the edges (5-10 minutes depending on size – mine baked in 6).

3. Once the cookies are cooled, it’s time to assemble them. Put the jam in a saucepan. Heat until runny, then pass through a sieve. Allow to cool slightly, then spoon a little jam onto the bases. Smooth with a spoon, then add another biscuit on top.

4. Make the icing – mix the icing sugar with enough cold water to make a thick but spreadable icing (I used 4 teaspoons of water). Spread on top of the biscuits. Don’t add too much or you will get drips down the sides. Add a piece of cherry to the middle of each biscuits and leave for the icing to set.

Worth making? I love these! They are easy, look good and taste great. They work well as part of an afternoon tea, and (keep it a secret) they’re really not much effort to make.

13 Comments

Filed under Recipe, Scottish Food, Sweet Things

{12} Festive Ecclefechan Butter Tarts

Merry Christmas to everyone! Here is the final instalment of my 2013 festive baking marathon. I had intended to get them all done by Christmas Eve, but the social whirl, preparing for Christmas day and need to spend a fair amount of time in the garden tidying up after storm damage meant that I didn’t quite hit that target. However, we are still in the limbo period between Christmas and New Year, so at least this offers an easy little recipe to have a go at when you’ve had your fill of Disney films and chocolates.

Last year I made some mince pies to round of the baking madness, so this year I’ve done a bit of a variation on a theme. However, I understand that mincemeat can be a bit of an acquired taste, so instead I’ve made some miniature versions of a Scottish classic, the Ecclefechan Butter Tart, which also have lots of fruit and nuts in them, but rather than the spices, they are enriched with a thick mixture of butter, brown sugar and egg. This is all mixed together and baked, so it puffs up a little on the surface, while inside it is soft, moist and sticky. Ideal as an easy alternative if you have guests coming who just can’t get into mincemeat tarts.

eccelfechantarts1

While it is tradition to use dried fruits like currants and sultanas, plus glacé cherries, walnuts and citrus peel, you can play around quite a bit with the filling. For example, brown sugar is traditional in the filling (giving a slight toffee note), you can easily use white sugar if you want a lighter filling so that other ingredients are not overpowered. Rather than lots of currants and sultanas, you could opt instead for mostly candied orange peel for a more citrussy affair (perhaps a little like that other Scottish delight, the Edinburgh Tart). By that stage, you’re probably getting rather far from a true Ecclefechan tart (and it would be a shame to have to forgo the highly amusing name when presenting to guests), but go with what you like.

I think it is important to get the pastry as thin as you can. I rolled it out, then pressed it in a buttered muffin tray to get it very thin. When you make them with these proportions, you might think there is not that much filling and feel they look a bit mean. All well and good, but the filling is very rich, so if you make them too big, you’ll probably struggle to eat even one of them. Just keep this in mind if you are tempted to double the quantities!

eccelfechantarts3

When serving these tarts, they are great at room temperature, but I’m sure you could warm them slightly. I’ve left mine plan, but you can finish with a little water icing, or a sprinkling of icing sugar for a more festive look.

You might also recognise this tart from a previous post. Yes, I’ve made this before as a large tart to be served by the slice, so if you want something grander for a party, then that’s also an option.

eccelfechantarts2

So…there we have it! The Twelve Festive Bakes of Christmas for 2013! I hope you’re enjoyed these recipes and they’ve given you a little bit of inspiration.

To make miniature Ecclefechan Butter Tarts (makes 12):

For the pastry:

• 150g plain flour
• 50g butter, cold, cut into cubes
• 25g icing sugar
• 1 egg yolk
• cold water

1. In a bowl, rub the butter into the flour. Once the mixture resembles breadcrumbs, add the sugar and mix well.

2. Add the egg yolk and just enough cold water so the mixture comes together (1-2 tablespoons of water is probably enough). Cover the pastry in cling film and leave to rest in the fridge for at least 30 minutes.

3. Grease a non-stick muffin tray with butter. Roll out the pastry very thinly and use a circular cutter to make discs to put in the tray holes. Use your fingers to press down the pastry, pushing it up the sides to make it as thin as possible. Spike the bottoms with a fork, and pop the tray into the fridge to chill while you make the filling.

For the filling:

• 65g butter, melted and cooled
• 100g soft brown sugar
• 1 egg, beaten
• 1/2 tablespoon white wine vinegar
• 25g walnuts, chopped
• 100g dried mixed fruit (currants and sultanas)
• 25g chopped candied peel
• 25g glacé cherries, chopped

1. Preheat the oven to 190°C (375°F).

2. In a bowl, combine the sugar, butter and eggs. Stir in the vinegar, walnuts, dried fruit and cherries. Divide among the 12 pastry cases.

3. Bake the tarts for 12-15 minutes until the pastry is golden and the filling is slightly puffy and lightly browned in the centre (turn the tarts during baking).

Worth making? Absolutely. This is a very simple, yet rich, alternative to mincemeat pies at this time of year, so idea for those that don’t like (or want a change from) all that spice.

10 Comments

Filed under Christmas, Recipe, Sweet Things

Highland Jam

I’ve just spent a few days up in Scotland. Lots of fresh air, scenic landscapes and – gasp – sunshine. Well, to be fair, the days were peppered with a few fleeting light showers, just to keep everyone on their toes, but it was mostly a case of blue skies with fluffy white clouds.

The first stop was Inverness, the capital of the Highlands. It’s a compact city on the banks of the River Ness, and was a good place for a few pints of local beer before venturing off inland.

highlands5

The main draw was a weekend in the small town of Muir of Ord on the Black Isle (actually a peninsula, not an island). The origin of this dramatic name is unknown, but there are suggestions that it can be traced back to the thick, dense forests that once covered this land, or the dark, fertile soil which grows the barley used in whisky making.

No trip to the Highlands is complete without a long walk, ideally up a large hill. The local focal point is Ord Hill, which took me past fields of cows, through pine forests and up onto the hill itself. Up on top, you could see the imposing Grampian Mountains to the south and, to the east, three firths (a Scots term which roughly means where a river meets the sea) – the Cromarty, Beauly and Moray Firths. I know this because, as our little group was sitting at the top, a man ran past, stopped, gave us the tourist low-down, then carries on running. Good timing indeed!

highlands2

highlands3

highlands4

When you look at much of the Scottish landscape, it is often called “bleak” or “rugged”, and people think it’s heather and not much else. Well, that’s not really true. Large parts of the country are covered in forests of pine, beech or birch, and in the middle of all these woodlands, you can find all manner of fruits ripe for the picking. Well, ripe when they are in season – Scotland is not, generally, that warm, so you do need to be patient!

One of my favourites is the blaeberry, the European cousin of the blueberry. While the American berries are large and grow in little bunches that make then fairly easy to pick, blaeberries are tiny – less than the size of a small pea! This means that if you’re lucky enough to find them, you’ll easily find yourself down on the ground rummaging around in bushes looking for your precious treasure. The plant grows very close to the ground, so you really need to be willing to crouch down, or, in my case, to reach up into awkward places along a footpath. As a result of my efforts while walking up Ord Hill, I managed to come away with a small bag of berries, as well as an elbow that had been sliced open as I tried to reach a good patch of berries, only for my foot to give way on the soft earth (luckily – superficial damage only!).

Now, I was faced with a bit of a quandary. I had easily picked more blaeberries than I had ever managed to collect in my life, but not quite enough to make something. Was it going to be a case of just eating them on muesli and yoghurt for breakfast? Well, of course not. Luckily, a bit further down the hill there were lots of wild raspberries, so I was presented with a perfect opportunity to gather some of these jaunty little red fellows.

highlands1

Now, wild raspberries are also smaller than their cultivated relatives, but they are also about six times the size of blaeberries, as well as growing on bushes. Much easier to pick! If you’ve never tried them, wild raspberries are sharper and more tart than normal raspberries, and absolutely delicious. Adding the raspberries to my blaeberry haul meant that I ended up with a large bag of free, fresh and organic berries.

I’m telling you all this because I have, for many years, harboured a fantasy that I would one day gather enough blaeberries to make jam. That way, I would be able to enjoy their flavour and bright purple colour all year round, and not just for those few months in autumn. While my little hike up Ord Hill did not quite allow this to come true, I was able to combine the blaeberries with the wild raspberries. And as it turns out, this combination is a popular flavour in Scandinavia, known in Sweden as Drottningsylt (“Queen’s Jam”). If this combination is fit for a queen, then who am I are to argue?

The recipe itself is very simple – equal parts of raspberries and blueberries, and then almost the same again of sugar (I aim for about 80% of sugar to berries by weight).

queensjam1

queensjam2

At this point, you may wonder where I made the jam. In some kitchen up north while on holiday? Nope. I did it the hard way – transporting the berries back from Scotland to London. I was, of course, completely paranoid that they would leak juice all over my luggage, so these things were packed in multiple plastic bags, just in case. Luckily, there was no juice incident, and the fruit arrived intact, ready for a jam session.

If you’re making this with foraged blaeberries and raspberries, then chances are this is a jam you would only every be able to make in small batches. However, if you’re keen to make bigger batches, or just don’t fancy all that crouching over small shrubs, you can buy blueberries and raspberries for a similar effect. You’ll still end up with a fruity, deep red jam that is delicious on toast, croissants or stirred through yoghurt. Of course, made with berries you picked yourself…then you know it’s going to taste just that much better!

queensjam3

To make blaeberry and wild raspberry jam (makes 2 small pots):

• 200g mixed blaeberries and raspberries
• 180g white sugar
• 3 tablespoons water

• 1/2 teaspoon pectin

1. First, the boring bit. sterilise some jam jars(*), and put a plate into the freezer – you’ll need this to test when the jam is set.

2. Rinse the fruit, removing any bad berries. Mix the sugar and pectin, and throw into a saucepan with the berries and water.

3. Place the pan on a medium heat. Bring to the boil, and use the back of a spoon to burst the blaeberries are they cook (the raspberries will break up on their own). Keep the jam on a slow rolling boil for around 10 minutes. Start to check for a set every minute or so – put some jam on the cold plate, leave for a moment to cool, and if it wrinkles when you push with your finger, it’s done.

4. Once the jam is ready, ladle into the prepared jars, seal, label and hide it somewhere to enjoy later.

(*) To sterilise jam jars: wash with hot, soapy water, then rinse well. Place upside-down in a cold oven, and heat to 90°C for 15 minutes. Leave in the oven to cool down while you are making the jam . To sterilise the lids, wash with hot, soapy water, then rinse well, place in a saucepan with boiling water for 5 minutes.

Worth making? Yes – it’s perfect!

11 Comments

Filed under Recipe, Sweet Things

Scottish Food: Aberdeen Butteries

This is part of a series on Scottish food. See more recipes here!

With Burns Night just behind us, this seems like an opportune moment to try another traditional Scottish recipe, and today I’ve turned my hand to rolls called Aberdeen Butteries (or Rowies) which originate from the North-East of Scotland. If you don’t know Aberdeen, it’s a coastal city where the buildings as made from glistening local stone giving it the nickname The Granite City, and it enjoys some of the most “bracing” winds and some of the chilliest beaches in the country!

butteries1

When I was young, there were two sorts of rolls in bakeries. Either the big, round, soft morning rolls, or these – flatter, heaving and a lot richer. Their texture was rather flaky, as the butter was folded in rather than being kneaded into the dough. And when I say “butter” what I actually mean is “lots and lots of butter”.

It is this slightly flaky character which has led people to refer to them as “rustic” or Scottish croissants. Now, I can see why you might make think to make that connection (it’s a yeasted dough to which layers of butter are added) but I don’t think the good burghers of Aberdeen would regard these as having too much in common with those fancy French thingies. Aberdeen Butteries are certainly a bit more robust, and I find them also much more savoury (certainly far saltier), without the sweetness of croissants. That, and they don’t have the delicate shape of croissants! In fact, the method for making them means that they tend not to be very photogenic. Unlike croissants or puff pastry, you don’t need to chill the dough between folding – just roll it out as large as you can, then spread with butter and fold – by the end of the process, there will be butter everywhere! I managed to make six large rolls, and perhaps two of them were presentable. All were delicious though!

Of course, by including all that butter and a good amount of salt, these are not an everyday treat, especially if you’re not spending your days tilling the land or manning a fish trawler. However, calls from a certain TV doctor to ban them sort of misses the point – they’re probably not amazing eaten every day, but as the occasional treat, why not? If you’re off for a day walking in the hills, then all that energy is going to serve you well.

butteries2

butteries3

If you want to make these, they are great enjoyed while still warm, with some jam (no more butter needed!). Being Scottish, I think you want to eat them with something traditional – raspberry jam or thick-cut marmalade would do the trick.

To make Aberdeen Butteries:

Makes 12 small or 6 large

• 340g strong white flour
• 1 teaspoon instant yeast
• 1 tablespoon sugar
• 1 teaspoon salt
• 240ml water
• 240g salted butter, softened

1. Make the dough. If using a machine, put the flour, yeast, sugar, salt and water into the bread machine, and run the dough cycle. If making by hand, combine the same ingredients in a bowl and knead until elastic. Leave somewhere warm, covered, until doubled in size.

2. In the meantime, cream the butter until smooth, and divide into four.

3. Roll the dough out to a large rectangle (go as large as you can). Take one-quarter of the butter, and spread over two-thirds of the dough. Fold the un-buttered part of the dough back on itself, then flip again. Repeat the process another three times until all the butter has been incorporated.

4. Preheat the oven to 200°C (400°F). Cut the dough into twelve pieces, shape into rolls and lay on a baking sheet lined with greaseproof paper. Cover the rolls lightly in cling film, and leave somewhere warm until doubled in size.

5. Bake for around 15 minutes until golden.

Worth making? These have been on my to-do list for a while, and I’m happy to say they are super-easy and delicious. Just a note of caution – watch out for all that melted butter when they’re in the oven!

20 Comments

Filed under Recipe, Savoury, Scottish Food