Tag Archives: coconut

{2} Alfajores

I’ve had alfajores on my list of things to make for a while, and I’ve finally had a go at the famous little Argentinean shortbread cookies filled with dulce de leche caramel. And as is the way of the world, I waited a very long time to try them, then ended up making them a couple of times this year. Turns out they’re pretty popular and go fast.


The first time was back in May in the middle of Lockdown 1 (remember that? And now we’re on Lockdown 3 here in London…possibly until February 2021…). There was a palpable frisson of excitement among European royalty watchers when Queen Maxima of the Netherlands whipped up a batch for her 49th birthday made to her Argentinean mother’s recipe. She explained they are her favourite cookies, and posted pictures of herself in the kitchen standing around in a gold ball gown.

I had a go at Queen Maxima’s recipe, sadly not dressed in formal wear, was going to post them as part of my lockdown baking series. I just never quite got round to it, but they were delicious, and they disappeared pretty quickly. But it did convince me that it was high time for alfajores to appear on my festive baking list.


In preparing for the festive version, I did a little reflecting on what I would like from an alfajor.

I am sure that South Americans have very clear views about what they should be like, but there does seem to be a bit of variety among the various recipes I looked at. Lots of recipes use a lot of cornflour to make them crumbly. This makes sense, and I agree to a point, but if the dough has too much cornflour, I find that it becomes too crumbly when you eat them. Instead I prefer to have a cookie that is slightly crisp and only breaks when I bite into it, as opposed to one that collapses. So my recipe has just a bit of cornflour, which I think gives a nicer texture and makes the dough easier to work with too. I’ve also omitted any eggs or egg yolks. I wanted the cookies to both crumbly but also a bit crisp to contrast with the smooth caramel filling.

I’ve also skipped the addition of lemon zest – I’ve tried alfajores both with and without the lemon, and while I can see that it lifts the flavour a little and cuts through the sweetness as well as being traditional, I just prefer it without. It must be my Scottish sweet tooth. If I’m going to have caramel, I want it to be pure, unadulterated sweetness. To provide the balance to the caramel, I’ve added a generous pinch of salt to the dough instead. I’ve also baked them so they have a slight colour to them. Lots of recipes keep them almost pure white, but I just prefer them to be slightly more baked.

The filling is the famous dulce de leche. You can be efficient and just buy a tin of the stuff. But if you are feeling adventurous, you can make it yourself. When I was a kid, we did this by piercing the top of the tin to release pressure, and we would then let the tin sit in a pan of simmering water for an hour until it had turned into caramel, ready to be added to a banoffee pie. What actually happened was that some water got into the tin, and that wasn’t great if you wanted it to have a nice thick texture. Maybe tin cans have gotten stronger since the 80s, but I recently came across another way – you put a whole tin in water, unopened, and simmer the thing for a few hours. Then leave it to cool, and when you open it the next day, the whole lot has magically turned into thick, luscious dulce de leche. It’s simple, effective, and you get the thrill of living dangerously in case the can does actually explode and coat your kitchen in caramel. But hey, we’re still in various states of lockdown, and cleaning anything sugary from your whole kitchen would give you something to do for at least several hours!

I tried a couple of different techniques in making the cookies, and my clear preference is for the biscuits to be on the thinner side. You’re going to be sandwiching two of them together with a lot of filling, so they need to be thin for two reasons. First, if they’re too thick, the cookies will be too tall. And second, you want to get a good cookie-to-caramel ratio. No-one wants your cookie with too little filling. Mine were 4mm thick, which I achieved by finding two magazines of the requisite thickness, then laying them either side of the dough, and voila – they act as rolling guides when you’re too cheap to buy the real thing. The other thing to embrace is rolling this dough out between two sheets of greaseproof paper. The dough is sufficiently buttery that it will not stick, and since you are not using flour, it means the first cookie will be the same as the last, as you’re not adding more flour as you shape the dough and re-roll the scraps.


If you’re locked down and don’t think you can eat them all over the course of two days, then I would fill them in batches. The cookies will keep well in an airtight tin, and then you can just fill and serve them when you need them. If you leave them to sit, then cookies start to go soft after a couple of days, and while they still taste amazing, you start to lose the textural contrast.


Putting the risky business of the caramel to one side, this is a nice recipe to try with children. The dough is quite forgiving, and you don’t need to worry about cutting out any elaborate shapes. They also love the sandwiching together of the cookies, and trying this out at the weekend I found that there was a material “angel’s share” which was being sneakily scooped from the bowl and not being added to the cookies when a certain little someone thought I was not looking.

To make Alfajores (makes around 30)

For the dulce de leche filling

• 1 tin condensed milk

For the dough

• 175g butter, softened
• 80g icing sugar
• pinch of salt
• 1/4 teaspoon vanilla extract
• 4 teaspoons rum
• 200g plain flour
• 50g cornflour
• 1/2 teaspoon baking powder

To finish

• unsweetened desiccated coconut

1. Make the caramel – fill a saucepan with cold water. Put in the tin of condensed milk on its side – there should be a good 3-4cm of water above the tin. Bring the pan to the boil, then turn down the heat, cover the pan, and leave on a simmer for 3 hours. Check it regularly to make sure that the can stays completely immersed – add more water as needed. Turn off the heat, and leave to cool. Do not open the tin while warm – it can explode and cover you in burning caramel!

2. Make the dough. Beat the butter until soft. Add the icing sugar, salt, vanilla and run, and beat until pale, fluffy and completely combined. Add the flour, cornflour and baking powder, and mix everything until you have a smooth dough. Wrap in cling film and chill in the fridge for 30 minutes.

3. Preheat the oven to 175°C (350°C). Line a baking tray with greaseproof paper.

4. Roll out the dough to 4-5mm thick. Cut out circles of 4-5cm, and place on the baking sheet. Before baking, place the whole sheet of cut cookies in the freezer for 2 minutes. Then bake the cookies until they are starting to turn golden at the edges (around 8-10 minutes). Turn the tray half-way to get an even colour. Repeat until all the dough has been used. Leave the cookies to cool completely.

4. Time to assemble. Open the cooled tin of condensed milk, and it will magically have transformed into deep golden dulce de leche. Give it a good mix, then take a cookie and add a generous amount of filling. Place another cookie on top, press gently until the filling is just sticking out of the sides. Roll the edge in desiccated coconut.

1 Comment

Filed under Christmas, Recipe, Sweet Things

{8} Broas Castelares

I’ve looked for quite a long time for a Christmas recipe for Portugal. I’ve found ideas galore from Spain and Italy, but for some reason I wasn’t seeing anything from the Lusophere. That is, until now.

I’ve made little sweet potato cakes called broas castelares. The name means “Castile corn breads” and they are named after their creators, the Castelar brothers who ran a bakery called the Confeitaria Francesa, or French Patisserie, in Lisbon. It was founded in 1860 and stood in the Rua do Ouro, or “Street of Gold”, which I think is rather fitting given the colour of these cakes.


Now I say “cakes” but this recipe is a very different way of baking to the festive recipes I have tried before. This is based on sweet potato puree, which I made by roasting some sweet potatoes and scooping out the tender flesh. I thought this would give a better flavour than boiling as it would keep (and perhaps even concentrate) their flavour. Then you mix this with sugar, and the whole lot turns from sort-of-fluffy mash into a gloopy, soupy mass – I’ve seen this before making a Scottish potato-based sweet, and it seems odd that you can add dry sugar to something and it seems to get wetter!

I saw a few different versions of this recipe with different amounts of sugar. These seemed to split into Portuguese recipes and then those from everyone else. The home of Fado makes extremely liberal use of sugar, so I figured that it was safe to assume these little guys were going to be on the sweet side. This expectation was further supported by lots of non-Portuguese bakers trying to cut down the amount of sugar. Choices, choices. In the end, I decided to plump for a more authentic Portuguese version. This is a Christmas sweet after all! The version I went with came from the website of Lisbon City Council. Surely these guys would get it right?


The actual recipe is fascinating – the base is sweet potato (the orange ones, not the white ones) that you turn into a basic jammy paste. Then you mix in eggs, and add a veritable cornucopia of other nice things – ground almonds, cornmeal, coconut and orange zest. Some of the recipes suggested adding cinnamon to taste – I skipped this, but I think this could be a nice addition. You then end up with one of the stickiest doughs I’ve worked with. You leave it to chill overnight, and I thought the dry ingredients would have soaked up some of the liquid and made a thicker dough. I was wrong. The next day, it was slightly thicker but still seemed to be as sticky! But the way to deal with this is to have a plate with some neutral oil on it, and keep your hands well-coated. Any by coated, I mean pressing your palm into it, pretty often as it turned out. Then nothing sticks!

Shaping the broas was easy, provided you are making liberal use of that oil. Take a tablespoon of the mixture, roll to a ball, then form into an oval shape – I noticed that longer, slimmer ovals kept their shape better than shorter, fatter ones. The skinny ones set and keep their shape, the more squat ones seemed to spread more. Then make (or try to make) a little dent in the middle so they look like golden giant coffee beans. They are then finished with an egg yolk glaze, and baked in a hot oven.


And how do they taste? Amazing! I expected something more cake-life and reminiscent of cornbread, albeit sweet, but in fact they are more like marzipan, so I would call them a type of candy rather than a bread or a cake. As I expected, they are extremely sweet – sweet, sweet, sweet! Delicious, but for me this is something you want to eat with strong coffee or tea, rather than with mulled wine unless you’re the sort of person that wants to embrace hyperglycemia. The good thing is you can serve a tray of these and be confident that people will self-police and no-one will scoff the lot.

I hope you like this. I wasn’t sure I would and I am completely convinced. Obrigado e feliz natal!

To make Broas Castelares (makes around 40-45)

For the dough

• 1 large or 2 medium sweet potatoes (at least 500g), to yield 400g cooked flesh
• 700g soft brown sugar
• 125g ground almonds
• 50g desiccated coconut
• 125g cornmeal (fine polenta, not corn starch)
• 75g plain flour
• 3 medium eggs
• Zest of 1 orange

To finish

• vegetable oil, for your hands to work the dough
• 2 beaten egg yolks, to glaze
• tablespoon of water

1. Heat the oven to 200°C (400°F). Prick the sweet potato, then put in the oven and bake until it is soft. You should be easily insert a knife. This will take 45-60 minutes. When done, remove from the oven, cut the potato in half and scoop out the flesh – you want 400g of cooked sweet potato.

2. Put the cooked sweet potato flesh in a saucepan, and mash it. Do this manually – if you use a blender it may affect the texture. Add half the sugar and mix – it will look a bit transparent and become wetter. Cook over a medium heat for around 5 minutes, stirring constantly. It is done when you pull a wooden spoon across the base and leaves a clean trail that holds for a few seconds. Remove from the head and leave to cool to lukewarm.

3. Put the potato mixture in a large bowl. Add the eggs, and mix well. Stir in the remaining sugar, ground almonds, coconut, orange zest, flour and cornmeal. Mix to a smooth batter – it will be thick but sticky. Cover and chill overnight.

4. The next day, preheat the oven to 200°C (400°F). Prepare a few sheets of greaseproof paper and rub each with some vegetable oil.

5. Get your hands covered with vegetable oil, and keep some extra within easy reach to re-coat your hands as needed. Take a tablespoon of the mixture and roll it into a ball. Now shape into a long oval between your palms. Place on the greaseproof paper, then flatten and make a dent in the centre so they look a bit like coffee beans. Repeat until the sheet is covered – they will spread slightly so leave at least 5cm between them.

6. Make the glaze – mix the two egg yolks with a tablespoon of cold water, and mix well.

7. Slide the tray under the paper, then glaze the broas. I found it best to do this just before baking, and really get in around the sides and base as this seems to help them keep their shape. Bake for 15 minutes – the top might look mottled and very dark in some places, but this is normal. Leave for a moment to cool and set, then transfer to a wire tray.

Note: the broas are a little crisper on the outside when they are fresh, but will soften if you store them overnight in an airtight container.

3 Comments

Filed under Christmas, Recipe, Sweet Things

Lamingtons

In years gone by I had traditionally written about something from Scotland in honour of Burns Night which falls on 25 January. This year I thought I’d do things a little differently. As Australia Day falls on 26 January, how about something Antipodean instead?

If we’re doing Australian, it just has to be lamingtons. This is not a cake that I see very often, even in a city like London with a decent Aussie population, but I do remember seeing them on Neighbours when I was young and being introduced to the concept of the “lamington drive”. This involved making and then selling lots of these little cakes, and it was pretty much the way of raising money for a good cause. From what I knew, they were pieces of sponge, dipped in chocolate icing and coated in coconut.

They were apparently named either for Lord Lamington, who served as Governor of Queensland from 1896 to 1901, or after his wife, the surprisingly named Lady Lamington. You can understand why they used his title when looking for a cake name, as his full name (Charles Wallace Alexander Napier Cochrane-Baillie) didn’t really trip of the tongue.


So I set about making a batch of lamingtons. First question: is there some single authentic recipe for making them? It would seem not. There are various different recipes for the sponge (such as genoise, Victoria or pound cake) and chocolate glaze ideas range from a smooth proper ganache to something sweeter and more obviously icing-like. I ignored suggestions to use pink icing on the basis I never saw the Robinson household or anyone else in Ramsay Street making them that way.

I settled on genoise, but then had to decide if I would try to make a deep cake and cut it into pieces, or would I try to include some jam element? Again, I don’t remember seeing jam on Neighbours but I think the right tangy, fruity jam is a good complement to sweet chocolate icing. I decided to make one large thin sheet of cake, which I would cut in two and sandwich the pieces together with apricot jam. That decision was based on what I had in the cupboard, but I think anything that has some sharpness to it would work well, such as raspberry or blackcurrant jam. Something more muted like strawberry would just add more sweetness but no contrast, but if that’s what you like, then go for it.


Many of the recipes that I did see suggested not using cake which was very fresh – you want the cake to be ever so slightly stale (whatever that means) and apparently this was best done but wrapping the cake in cling film and letting it sit in the fridge overnight. I’m not sure whether this really made a difference, or just ensured that the cake really was properly cooled, but it did cut neatly and cleanly into pieces. Given you will be glazing these guys and rolling them in coconut, neat slicing is not really that important as icing can cover a multitude of sins, but I was happy that the pieces didn’t just start falling apart. I took this as a good sign for when I was going to ice them.


For the glaze, I quickly discounted the idea of a ganache. While I have not been to Australia (yet), it is fair to assume it is a warm place for most of the time, and so it would be rather daft to make a cake with an icing that would melt easily in warm weather. So the icing I came up with is made from a warm mixture of milk, butter, dark chocolate and cocoa powder to which you add the icing sugar, then keep the lot warm over a pan of hot water. This keeps the icing smooth and makes it easier to coat the cakes, but then it will set fairly quickly after you’ve rolled the cakes in coconut. While most recipes use just cocoa powder, I also added some dark chocolate to the icing which seemed to help get a good colour and flavour.

The actual glazing process was quite fun – not something I would want to attempt in a hurry, and the first couple of lamingtons took a bit of time to get right. I found it easiest to gently drop one into the icing, then used a spoon to pour glaze over the cake. Once it is coated, you just slip a fork underneath, then allow the extra icing to drizzle off the cake. Then comes the fun part – you need to quickly transfer the cake onto the desiccated coconut, which you have on a large plate right next to you. Then you have to use your hands to form a coconut mountain around the cake, and press it a bit so the coconut sticks to the glaze. Then you need to flip the lamington over, so that all sizes are covered, and then move it to a wire rack. And all the while, the glaze is a bit soft, so you will probably have to fix the shape a bit with your fingers so it looks presentable. After you have done a few of them, you’ll defiantely develop a “lamington technique”.


And speaking of coconut…I was not sure if I should use plain or sweetened coconut for this recipe, so I bought both types. As this is a traditional recipe, I thought it might be made with the sweeter stuff, but to be sure, I tested them both before using them, and this taste test told me that the sweetened coconut was not right. Yes, it was softer and seemed more tender, but it had a rather peculiar aftertaste that I did not like at all – and then I checked the ingredients, it turned out it was just 65% coconut. All that apparent “tenderness” was coming from propylene glycol. I’m not a Luddite, and looked into what this was – it’s safe for food (which I would hope, since it was in that coconut!) but the impact on the flavour meant it was going nowhere near my lamingtons, but straight in the bin. Back to good old-fashioned unsweetened desiccated coconut we went! If you want to try something a bit different, you could toast the coconut, but that’s as far as I would go. You could use chopped nuts if you’re not a coconut fan, but then I think you’re veering away from what a true lamington is.

Finally, I should say that my recipe basically recommends you have a whole packet of coconut on a plate for dipping, but you won’t use all of it. I just think that you’ll struggle to get a good finish if you try to use less, so don’t be puzzled if you have lots left over after your icing escapades.

And how were they? I was all prepared for them to be a bit naff, but I must confess I really liked them. The cake, the set-but-soft icing, the coconut and the jam come together into a really lovely cake. They also looked great piled up high on a plate, so I will definitely be making these again. And not just for 26 January!

To make Lamingtons (makes 16)

For the sponge:

• 2 large eggs
• 100g white caster sugar
• 1 teaspoon vanilla extract
• 100g plain flour
• 1 teaspoon baking powder
• 60g butter, melted and cooled
• 130g tangy jam (apricot, raspberry, blackcurrant…)

For the icing

• 120ml whole milk
• 30g unsalted butter
• 50g dark chocolate

• 50g cocoa powder
• 1/2 teaspoon vanilla extract
• generous pinch of salt
• 450g icing sugar
• extra milk, to thin the icing

To finish

• 250g desiccated coconut

1. Start wit the sponge. Preheat the oven to 180˚C (350˚F). Line a 20 x 30cm tray with greaseproof paper.

2. Melt the butter in a small saucepan over a low heat. Put to one side to cool. In a bowl, combine the flour and baking powder and mix well. Set aside.

3. Put the eggs, sugar and vanilla into a large bowl. Beat with an electric whisk until pale, thick and fluffy (around 3-4 minutes). Gently fold in the flour mixture using a spatula. Finally add the melted butter and gently fold it into the mixture. Pour the batter into the prepared tin and gently level off the mixture as best you can.

4. Bake the cake for 15-20 minutes until an inserted skewer comes out clean. Remove from the oven and cover with a tea towel. Allow to cool completely, then cover with film and refrigerate overnight.

5. The next day, time to prepare the sponge. Cut the cooled cake sheet in half. Spread one piece with jam, then place the other piece on tip. Leave to rest for an hour so that the jam holds the two layers together.

6. Cut the cake into pieces – trim the edges with a sharp knife to get good, clean edges. Now cut into 4 equal strips, and cut each strip into 4 pieces. They should end up roughly cube shaped.

7. Make the icing. Put the milk, butter, chocolate, cocoa powder, vanilla and salt into a medium saucepan, and heat gently until the butter and chocolate have melted. It will become very thick. Add the icing sugar, and beat vigorously until smooth.

8. Transfer the icing to a bowl, and balance it above a pan of warm water (this will keep the icing warm, and it should set more quickly when coating the lamingtons). Now check the icing consistency – you will need to add more milk to get it to a smooth but thick icing which pours easily – you don’t need much though, I only added a further 3 teaspoons of milk.

9. Tip the coconut onto a large plate.

10. Time to decorate. Drop a piece of the sponge into the icing, then use a spoon to coat it with the glaze. When done, put a fork underneath, lift it up and allow excess icing to drop off. Wipe the base of the cake on the edge of the bowl, then transfer it into the coconut. Coat it in the coconut, then transfer to a wire rack and leave to set (allow 30 minutes).

4 Comments

Filed under Recipe, Sweet Things

{1} Fedtebrød

Hello, hello, hello! And welcome to the 2017 edition of my 12 Bakes of Christmas!!! I know it’s been a while since I last posted (we’ve now got a toddler in the house, so free time’s a bit scarce these days) but the lure of festive baking brought me back. As is the custom, I’ve been on the hunt for some interesting festive baking, and hopefully you will enjoy what is to come over the next few weeks.

We’re starting off with something from Denmark. Fedtebrød is a nice cookie that is flavoured with coconut and finished with icing flavoured with lemon or rum. From what I gather, Danes have firm views about which one is correct, and you’re either Team Rum or Team Lemon. Whichever you end up going with, these little cookies pack a flavour punch which is pretty far removed from the spices and dried fruit that usually features in Christmas fare. If you’re not keen on mince pies or Christmas cake, this might be something for you.

First of all, thought, we need to deal with that name. Fedtebrød literally means “greasy bread”. Yum! Not scoring may points there in the branding department. Let’s hope it tastes better than the name seems to suggest…

Actually, I’ll admit to two attempts at making these things. First time round, I used desiccated coconut, and followed a recipe that has equal amounts of butter and flour, and then half that amount of sugar and coconut (a ratio of 2:2:1:1, which seems to be fairly standard for this cookie). The recipe sort of worked…I made the dough into logs, then it flattened out during baking, but there was a noticeable and not very pleasant greasiness. Seems that they delivered on that name! That first batch tasted fine, but I had the feeling that the result could be better.

My second attempt (and the recipe below) had less butter, and I used coconut flour rather than desiccated coconut. This stuff has a texture rather like ground almonds, and I thought this would help counter any greasiness from the butter and any coconut oil that was released during baking. This time it worked like a dream – the dough kept its shape and had a little bit of height, and the colour was very even. The cookies were buttery and crumbly, but didn’t have the odd texture from before. Result! Well…maybe it’s not how the Danes like them to be, but it was more to my taste.

In the spirit of fairness, I finished two of the bars with two glazes – some lemon, some rum. The choice of icing might make families argue, but I think they both taste great – the lemon is fresh and zesty, while the rum and coconut have a bit of a tropical thing going on. I did notice that the lemon flavour lasted better, so if you’re making these to eat over the course of a few days, I would go for the lemon. I also used neat lemon juice and rum for the glaze, and the flavour was fairly sharp. If that’s what you like, great, but you may want to use some water for a milder flavour if you prefer.

To make Fedtebrød (makes around 25-30 pieces):

For the dough

• 125g plain flour
• 100g unsalted butter
• 75g white caster sugar
• 75g coconut flour
• 1/4 teaspoon baking ammonia

For the glaze

• 100g icing sugar
• rum or lemon juice (don’t mix them!)
• water

1. Preheat the oven to 200°C (400°F). Line a baking sheet with greaseproof paper.

2. Put all the ingredients for the dough into a bowl and rub together into you have a soft dough. It might seem too dry, but you’ll find the warmth from your hands will soften the butter and it will come together. Note: due to the baker’s ammonia, don’t eat the raw dough!

3. Divide the dough into three pieces. Form into a sausage, around 25cm long, and transfer to the baking tray. Flatten each to a width of around 5cm.

4. Bake the fedtebrød for 10 minutes (turning the tray half-way) until golden. Remove from the oven and allow to cool for 4 minutes.

5. While the fedtebrød is baking, make the glaze. Mix the icing sugar with around 4 tablespoons of liquid (lemon juice or rum, plus water) to get a smooth but thick consistency.

6. Drizzle the glaze along the middle of each piece of cookie – you should find the heat from the cookies helps the icing spread a little and go smooth. Leave to set for 2 minutes, then cut diagonally with a sharp knife while still warm.

14 Comments

Filed under Christmas, Recipe, Sweet Things

Beijinhos de Coco (Brazilian Coconut Kisses)

A few days ago I tried making Brazilian brigadeiros and have been really surprised at just how popular they are – I think they’ve had more comments than just about any other of my posts! As the weather has been rotten here, I found myself looking again at the cuisine of Brazil for some inspiration, and came across another sweet treat, very similar to brigadeiros, but made with coconut rather than cocoa. Again it is a simple matter of cooking up some condensed milk with a little butter plus your desired flavour, then cooking the lot until thick.

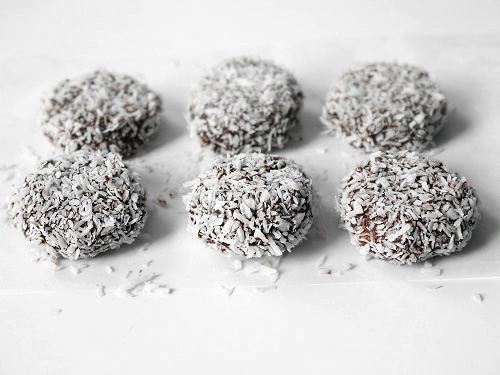
I’m rather impressed with how these turned out – they have a really excellent coconut flavour and a nice chewiness, rather like a firmer and chocolate-free Bounty bar. They are traditionally rolled in more coconut and finished with a whole clove. This might seem a little odd, but the hint of spice that this adds is surprisingly good (just remember to remove the cloves when you eat them!). If cloves aren’t your thing, you could try dipping them in dark chocolate for a more sophisticated treat.

BeijinhodeCoco

As with making chocolate brigaderos, I recommend that you don’t make these too far ahead of time. They can dry out, and you want them to be smooth and chewy. It is also worth saying that the longer you cook the mixture, the firmer the final sweets, so if you want them to be softer and more creamy, cook for less time, for very firm and more toffee-like, cook a little longer.

To make Beijinhos de Coco (make 25):

• 1 tin sweetened condensed milk (400g)
• 30g desiccated coconut (unsweetened)
• 30g (2 tablespoons) butter
• extra desiccated coconut, to roll
• whole cloves

1. Very lightly butter the bottom of a dish and place to one side.

2. In a small saucepan, melt the butter. Mix in the coconut and condensed milk. Keep stirring over a gentle heat until the mixture looks thick and comes away from the sides of the pan (around 10 minutes). Pour the mixture into the buttered dish, cover with cling film, and leave to cool completely.

3. Take walnut-sized pieces of the mixture and roll into balls between your hands. Roll in more coconut, press a clove into the top of each beijinho, and put into miniature cake cases.

Worth making? If you like coconut, these are a delicious and easy sweet to make at home. Recommended!

22 Comments

Filed under Recipe, Sweet Things

Queen Elizabeth Cake

Today is sixty years since the coronation of Queen Elizabeth II. Last year we had the festivities of the Diamond Jubilee, marking sixty years since her accession, but today marks the anniversary of the great celebration in Westminster Abbey which provided such memorable images to the world. And in comparison to the rather wet day we had last year, today London is basking in sunshine.

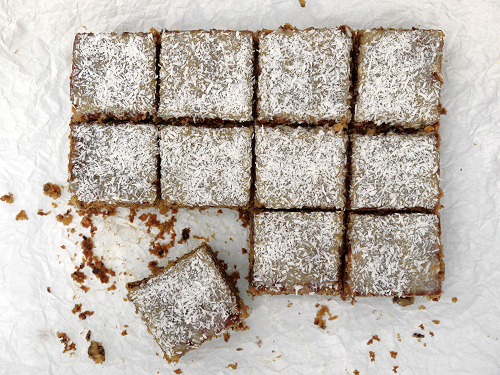
I was looking for a recipe in honour of this day, and I was rather surprised that there were not more cakes and bakes that were associated with great event. Perhaps everything else has been overshadowed by the famous Coronation Chicken? Undeterred, I kept searching and finally came across the curiously-named Queen Elizabeth Cake. This is a tray cake made with dates and nuts, finished off with a caramel glaze and topped with coconut. So far, so good.

Queen_Elizabeth_Cake_1

This is a cake with quite an interesting story. The tale goes that Her Majesty used to enjoy dabbling in home baking from time to time, and would make this recipe herself, in the Buckingham Palace kitchens, to be sold for charitable purposes. In fact, this was the only cake she would make. With this sort of regal endorsement, I just had to try this recipe. Incidentally, I’m sure the Queen would appreciate the Great British Bake-Off – but what would she make of this cake featuring as part of the technical challenge?

The technique was new to me – the cake has a lot of dates in it, but rather than just throwing them in and hoping for the best, they are soaked briefly in hot water with bicarbonate of soda. This soda, in addition to helping the cake to rise, gives the batter greater saltiness which combines with the sweet dates to enhance their flavour. The overall result is light, airy and delicious. With the caramel glaze, it probably makes you think of sticky toffee pudding.

When it came to assembling the cake, and with the utmost respect to Her Majesty, I departed from the original recipe. My cake did rise in the oven, but it was about 2 1/2 cm in depth. I wanted it higher, so I cut the cake into two slabs, and used half of the glaze as a filling, and so ended up with two layers. If you’ve got lots of people coming to tea, just go with one layer, but I think the double-layer approach looks quite nice. When it comes to the coconut, I would go for the white stuff rather than the golden toasted coconut. Nothing to do with flavour, but the white coconut looks great against the caramel.

Queen_Elizabeth_Cake_2

Now, time for a reality check. Is this cake really a secret from Buckingham Palace? Well, we do know that the Queen is very practical and hands-on when she is at her summer home, Balmoral Castle in Scotland, and from her days in the Auxiliary Territorial Service. I have no doubt she would be more than capable when it comes of baking. This also seems like a very traditional cake to me – the dates and walnuts give it an old-fashioned flavour, and I felt the air of post-war austerity over the ingredients, jazzed up with exotic coconut, all of which lends an air of plausibility to the story of this recipe coming from a newly-crowned Queen in the 1950s.

However, a few things make me cautious. This recipe does seem very close to the very British dessert of sticky toffee pudding, so perhaps it’s just that with a better story? Also, lots of the versions of this recipe featured online from yellowing scraps of paper found in attics from American sources, with references to terms like “frosting” and “pecans”. We don’t frost cakes in Britain, we ice them (and if you’ve had the pleasure of a British wedding cake, you might think we plaster them). Pecan nuts are traditionally less common than good old-fashioned walnuts over here. So on balance, if I were asked to come down in favour of a “yay” or “nay”, I would need to plump for “nay”, but even so, there is a nice story behind this cake, and if Her Majesty were to be coming round for afternoon tea, I don’t think she would refuse a slice. Congratulations Ma’am!

To make Queen Elizabeth Cake (makes 12 pieces):

For the cake:

• 175g soft dates, finely chopped
• 240ml boiling water
• 1 teaspoon bicarbonate of soda
• 200g soft brown sugar
• 120g butter
• 1 teaspoon vanilla extract
• 1 egg
• 140g plain flour
• 1 teaspoon baking powder
• 1/2 teaspoon salt
• 60g walnuts, chopped

For the glaze:

• 75g soft brown sugar
• 75g double cream
• 25g butter
• pinch of salt
• 30g desiccated coconut

1. Preheat the oven to 175°C (300°F). Line a 23 x 31cm (9 x 12 inch) rectangular baking tray with greaseproof paper.

2. In a heatproof bowl, mix the dates, bicarbonate of soda and boiling water and set aside.

3. In another bowl, beat the butter, sugar and vanilla until light and fluffy. Add the egg and mix well, then fold in the flour and baking powder until just combined.

4. Add the nuts and the date mixture (the dates should have absorbed a lot of the water, but the mixture will still be very wet – it should be lukewarm, not hot). Stir with a light hand until smooth.

5. Pour the batter into the tray and bake for around 25-30 minutes until the top is a rich brown colour and an inserted skewer comes out clean. Leave to cool.

6. While the cake is baking, make the glaze – put the sugar, cream, butter and salt into a saucepan, and keep stirring until the mixture comes to the boil. Remove from the heat and put aside until cold.

7. To finish the cake, cut in two equal slabs. Spread half the glaze onto one piece, then place the other on top of it. Spread the remaining glaze on the cake and sprinkle with the coconut. Trim the edges for a neat finish and cut into pieces.

Worth making? An easy recipe, but gives a rich, moist cake which cuts easily. Perfect for coffee mornings or afternoon tea. Recommended, and with royal approval!

9 Comments

Filed under Recipe, Sweet Things

Chocolate and Coconut Macaroons

I’m a great believer in having a few recipes up my sleeve to produce at short notice. And this is one of them. Pillowy coconut macaroons, finished with dark chocolate.

ChocolateCoconutMacaroons2

If you have tried making French macarons, chances are that you’ll know that they can be time-consuming and very fickle – there is a lot that can go wrong, so making them is a technique the requires precision, patience and practice.

British macaroons, made with coconut, are an altogether different beast. They are much easier to make, and part of their charm is their more “rustic” appearance. Not for them the smooth shells of their French cousins. They share a slightly crisp surface, that’s true, but underneath they have a soft, fluffy centre that is a little like a home-made Bounty bar. With that in mind, I decided to make these little guys, and finish them off by dipping the bottom in dark chocolate, and drizzling more chocolate on the top. The result was absolutely delicious and they have a great visual impact too. I took them along to a birthday party, and they seemed to vanish in a shot. Children and adults were seen sneaking off with two or three at a time, which I take as a compliment.

I mentioned these are easy to make – the mixture can be made, chilled and baked in an hour, and the dipping in chocolate only takes around fifteen minutes, so they can be easily made in the morning and on a plate to serve to guests in the afternoon. The only question is – how many is too many?

ChocolateCoconutMacaroons1

To make 20-25 macaroons:

• 130g desiccated coconut (unsweetened)
• 20g icing sugar
• 30g flour
• 2 egg whites
• pinch of salt
• 2 pinches of cream of tartar
• 100g white sugar
• 1/2 teaspoon vanilla essence
• 150g dark chocolate

1. Place the coconut, icing sugar and flour in a dish. Mix well and set aside.

2. In a metal bowl, whip the egg whites, salt and cream of tartar until frothy. Add the sugar, and place the bowl above a pan of barely-simmering water. Whisk constantly until the egg whites form a white, glossy mass that leaves stiff peaks when you remove the beater (around 5 minutes). This can be done by hand but is easier with an electric whisk.

3. Remove from the pan of water, and stir the vanilla into the meringue mixture. Add the coconut mixture, and fold in gently.

4, Cover and leave in the fridge to chill for 20 minutes. At this stage, preheat the oven to 170°C (335°F) and line a baking tray with greaseproof paper.

5. Bake for 15 minutes until slightly puffed and lightly golden. Remove from the oven and allow to cool.

6. Melt the chocolate over a pan of barely-simmering water. Dip the bottom of each macaroon into the chocolate, and place on greaseproof paper to set. Once you have dipped all the cookies, use the remaining chocolate to drizzle in a zig-zag pattern.

Worth making? These are sensational – if you like Bounty bars, you’ll love them. As they don’t contain too much sugar, they’re not overly-sweet, and the texture if very light. You can skip the chocolate, but the dark, bitter flavour balances the sweet coconut beautifully.

16 Comments

Filed under Recipe, Sweet Things

Scottish Food: Macaroon Bars

The elegant arcades of Paris are dotted with pâtisseries selling dainty macarons in vibrant colours and all manner of exotic flavours. All very sophisticated and famous the world over.

Well, today I present one of Scotland’s national sweets: the macaroon bar. It’s about a million miles from the French macaron. They both contain sugar and the names are a little bit similar, but that’s about as far as it goes.

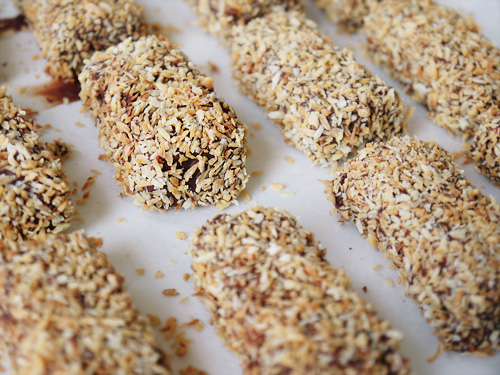
The Scottish macaroon bar is something of tooth-aching sweetness. It has a snowy-white intensely sugary interior that has been dipped in chocolate and then rolled in toasted coconut. This is probably as bad as sweets can get (and a dentist’s worst nightmare) but it has a firm place on the heart of a nation that, well, loves just about anything that is very, very, very sweet.

You might also wonder where the name comes from – is this in any way linked to the French macaron? The answer is…I don’t know. But here in Britain, coconut macaroons are quite common, so I think it is the addition of the coconut that gives rise to the name. Just a hunch.

Now, you might be looking at these things and thinking “wow, that looks an awful lot like a peppermint cream/pattie then you are sort of right. The filling is like fondant, but it hides a surprise. Whereas true fondant centres involve boiling sugary syrups to the right temperature, then working the syrup on cool marble surfaces with spatulas and kneading them to encourage the formation of the right type of sugar crystals, macaroon bars take a shortcut. And that shortcut (and I promise I am not making this up) is to use cooled mashed potato.

That’s right. Potato!

It seems surprising, but you mix one part potato to four to five parts icing (confectioner’s) sugar, and hey presto – a smooth filling that is easy to work and just as sweet as the more complex version. What this does mean, of course, is that if you are making this with kids on a rainy afternoon, it’s very easy to do and much safer than leaving a toddler to work a tray of scalding sugar syrup. Of course, it won’t do their teeth any good, but this is of course not something that you would be making on a daily basis.

The profess of making them takes a little time, but it’s actually quite easy. You start with the potato, which looks like it won’t ever take the best part of a kilogram of sugar. But with the first addition, it turns from dry-looking mashed potato to a very sticky syrup. Looks odd, but keep going and it becomes firm and turns snowy-white. Then you chill it in the freezer, so that once you come to dip the pieces in chocolate, it sets quite quickly. But something I learned by macaroon bar number two was that you either need to work with a friend (one dipping, one rolling) or use one hand for dipping, and keep the other free for the rolling. Otherwise you end up with fingers covered in chocolate, coated in coconut, and one very, very big mess in the kitchen.

The bar shape is classic, but once I’d cut the fontant into strips, I ended up with a few scraps. Clearly worried that I didn’t have enough highly sugary sweets already, and as I still had ample chocolate left, I rolled the fondant into balls, flattened them slightly, and dipped them in chocolate and rolled them in untoasted coconut. I think that they look rather pretty. Who knows, they could even take off as the must-have petits fours for smart dinner parties!

To make macaroon bars (makes 18-20):

• 1 large potato (100g after boiling)
 • 400-500g icing sugar
• 2-3 drops vanilla extract
 • 300g dark chocolate
 • 100g dessicated coconut

Boil the potato until soft. Drain, measure out 100g, then mash until there are no lumps, and leave until cold.

Put the cold mashed potato, vanilla extract and 100g of icing sugar in a bowl. Mix well – the potato might seem very dry, but it will change into a very thick, sticky paste. Keep adding the icing sugar, 100g at a time, mixing well after each addition, until you have a stiff white fondant.

Line a tray with greaseproof paper, put the fondant in the tray, and press flat. Cover with cling film and leave in the freezer for an hour.

In the meantime, toast the coconut in the oven – spread thinly on a large baking sheet and cook in the oven at 150°C (300°F) for around 5 minutes until the coconut is just golden. Watch it carefully – it can burn very easily. Remove from the oven and allow to cool.

Remove the fondant from the freezer. Cut into bars (mine were finger length and just wider than finger width).

Melt the chocolate in a bowl above a pan of barely simmering water. Once the chocolate is melted and smooth, dip each piece of the sugar paste into the chocolate, then roll in the coconut. Transfer to a sheet of greasproof paper and allow to set.

Worth making? This is quite a fun and easy recipe to try. It’s super-sweet, so not something you would make often, but worth having a go at!

23 Comments

Filed under Recipe, Scottish Food, Sweet Things

Coconut Macaroons, Part II

Last week I turned my hand to making that British favourite, coconut macaroons. I liked the result, but thought that it would be good to experiment with it a little further. I was happy with the dense, sweet type I made, and they did look great, but I also wanted to have a light and fluffy version in my baking repertoire. All very much in the spirit of the Great British Bake-Off, with each participant preparing the same recipe. Except it’s just me, competing against myself…

With a view to making softer cookies, I decreased the amount of dessicated coconut, and switched from the fine to coarse variety. The stuff I used last time was very fine, and I think it just mopped up all the moisture from the meringue mixture, so I thought reducing the overall amount and using less coconut would address that. I also did a little research, and saw that the recipe on Joy of Baking uses a quick cooked Swiss meringue rather than simple meringue. Armed with this knowledge, I tweaked my previous recipe and hoped for the best.

The mixture itself looked good – white, fluffy, shiny and softer than my previous attempt. I skillfully formed the macaroons using two teaspoons, as the mixture was too moist to roll by hand. After baking and allowing them to cool slightly, a little tasting session was in order. First, the lightness struck me – they felt airier than the last batch, and were much softer. More like a meringue with coconut than a dense, sweet coconut ball.

In short – this is an amazing version of my recipe. I love it – snaps for kitchen experimentation!


To make around 25 coconut macaroons:

• 130g dessicated coconut (unsweetened)
• 20g icing sugar
• 30g flour
• 2 egg whites
• pinch of salt
• 2 pinches of cream of tartar
• 100g white sugar
• 1/2 teaspoon vanilla essence

Place the coconut, icing sugar and flour in a dish and mix well. Set aside.

In a metal bowl, whip the egg whites, salt and cream of tartar until frothy. Add the sugar, and place the bowl above a pan of barely simmering water. Whisk constantly until the egg whites form a white, glossy mass that leaves stiff peaks when you remove the beater (around 5 minutes).

Remove from the pan of water, and stir the vanilla into the meringue mixture. Add the coconut mixture, and fold in gently.

Cover and leave in the fridge to chill for 20 minutes. At this stage, preheat the oven to 170°C (335°F) and line a baking tray with greaseproof paper.

Bake for 15 minutes until slightly puffed and lightly golden. Remove from the oven and allow to cool.

Worth making? This recipe is amazing. They don’t look quite as pretty as the other version of coconut macaroons, but if you are a fan of the softer variety, this is hard to beat. These can also be jazzed up either by dipping in chocolate, or drizzling it over the top, to recall the Bounty bar we all love.

1 Comment

Filed under Recipe, Sweet Things

Coconut Macaroons

Are you watching the Great British Bake Off? A group of people compete to bake classic British fare, with one kicked off each week. We were discussing it at work last week and there were many sighs along the lines of “Oh, I love the show, but I wish I could bake, just don’t have the time”. So to make a little contribution to turning that around, here is an easy recipe for a British classic from my childhood: coconut macaroons.

French macarons have taken the world be storm over the last few years. Well kids, this is a world away from them. Whereas their Gallic cousins are complex, tricky, sometimes gaudy, and come wrapped in expensive boxes with fancy fillings, our dear coconut macaroons hark back to simpler times. They remind me of visits to my grandmother or being dragged along to coffee mornings in the local town hall when I was growing up. We would sulk until we were given a pound to buy a cup of tea and select a cake from the home baking stall. There is something familiar and comforting about them. They are sweet and straightforwardly honest. Bite into them, and the golden outside reveals the snowy-white coconut inside.

Now, it’s confession time. I tried a couple of different versions of these macaroons. There are two schools of thought. One is the “easy” way, just mix coconut with sweetened condensed milk and a little flour, and bake. I tried this, but didn’t really like the result. The coconut seems to absorb the milk, and the resulting macaroons were a little too solid for my liking. Next, I tried the “complex” method. This time, I used egg white and sugar to make a simple meringue, then add lots of coconut. Now these were the sort of macaroons I remember. The outside is delicately golden, the inside snowy in colour and texture, and after a day or two, they soften and become just that little bit more luxurious.

These are just perfect as a petit four with coffee. They don’t take more than 5 minutes to make (assuming you have an electric whisk!), and they don’t involve any of the faffing around you have with macarons. No counting the number of strokes to mix in the dry ingredients, no piping, no worrying if the tops of the macarons are too dry, or not dry enough, no fretting that they will erupt, volcano-like, in the oven. Just whip, stir, roll and bake.

To make coconut macaroons (makes around 40):

• 2 egg whites
• 1/4 teaspoon cream of tartar
• 100g caster sugar
• 1/8 teaspoon salt, finely ground
• 1 teaspoon vanilla extract (or coconut essence, should such be available)
• 50g plain flour
• 225g desiccated or shredded coconut (unsweetened)

Preheat the oven to 170°C (340°F). Line two baking sheets with baking parchment and grease lightly.

Place the flour, salt and coconut in a bowl. Mix well and put to one side.

In another bowl, whip the egg whites with the cream of tartar until you have stiff peaks. Add the sugar, and whip until you have a smooth, glossy, stiff meringue-like mass. Stir in the vanilla extract.

Add the dry ingredients to the meringue and combine. Be gentle, but mix it all well. Take teaspoons of the mixture, form it into rough balls, and place on the baking sheets (2-3 cm apart).

Bake for 20 minutes until the macaroons are just starting to turn golden. Remove from the oven and allow to cool. If you can, leave to sit for 24 hours before eating so they soften a little.

Worth making? If you like little bites that are not too sweet, these are great. They also soften a little if you leave them overnight, so they are perfect is made the night before. However, I’m going to continue on my quest and try a few more recipes until I get “then one”. This is good, but I just want to experiment a little more.

2 Comments

Filed under Recipe, Sweet Things